Nigeria. Primary Maths. Gr 1 Teacher s guide
|
|
|
- Felicity McKinney
- 5 years ago
- Views:
Transcription
1 Nigeria Primary Maths Gr 1 Teacher s guide
2 Pearson Education Limited Edinburgh Gate Harlow Essex CM20 2JE England and Associated Companies throughout the world Pearson Education Limited 2014 All rights reserved. No part of this publication may be reproduced, stored in a retrieval system or transmitted in any form or by any means, electronic, mechanical, photocopying, recording, or otherwise, without the prior permission of the publishers. First published in 2014 ISBN It is illegal to photocopy any page of this book without the written permission of the copyright holder. Cover design by Dion Rushovich Typesetting by The Icon Agency Acknowledgements: The Publishers would like to thank the following for the use of copyrighted images in this publication: Cover photo/artwork from hanhanpeggy/istockphotos Every effort has been made to trace the copyright holders. In the event of unintentional omissions or errors, any information that would enable the publisher to make the proper arrangements will be appreciated.
3 Contents How to use this course Curriculum Matching Chart Unit 1 Sorting and classifying 1 to 5 objects 1 Unit 2 Identifying and reading a number of objects 1 to 5 5 Unit 3 Writing and ordering of numbers 1 to 5 10 Unit 4 Introducing zero 15 Unit 5 Sorting and classifying 6 to 9 objects 20 Unit 6 Identifying and reading of numbers 6 to 9 24 Unit 7 Writing and ordering figures 6 to 9 28 Unit 8 The number Unit 9 Place value 38 Unit 10 Identifying and reading numbers 1 to Unit 11 Writing of numbers 1 to Unit 12 Fractions 51 Term 1 Project 1 57 Term 1 59 Unit 13 Adding numbers with a sum less than five 61 Unit 14 Adding numbers with sum less than ten 65 Unit 15 Adding numbers with sum less than Unit 16 Adding 2-digit whole numbers without regrouping 74 Unit 17 Subtracting from whole numbers not greater than 9 78 Unit 18 Subtracting whole numbers not greater than Unit 19 Open sentences with addition 84 Unit 20 Open sentences with subtraction 88 Unit 21 Recognising money 92 Unit 22 Adding and subtracting money 95 Term 2 Project: Tracing coins 98 Term 2 99 Unit 23 Introducing length 100 Unit 24 Measuring length using natural units 105 Unit 25 Comparing and ordering lengths 111 Unit 26 Time 116 Unit 27 Weight 122 Unit 28 Three-dimensional shapes 127 Unit 29 Two-dimensional shapes 132 Unit 30 Collecting data 138 Term 3 Project Collecting data 142 Term Resources 145 Index 182 iv vi
4 How to use this course The New General Mathematics Primary 1 Pupil s Book (PB) consists of 30 units. Each unit starts with a list of objectives, or commonly known as performance objectives (as listed in NERDC, 2013), that will be covered in each unit. In addition, the exercises in the PB have been carefully developed to ensure integration of the performance objectives from the curriculum, and a steady progression of skills throughout the year. It is important that you follow the order of the units, especially for related sub-topics, as units build on the knowledge and skills acquired in preceding units. The units follow a teach and practise approach: New concepts are explained and given context in their meaning. Worked-through examples show pupils how to approach problem solving. Exercises allow pupils to practise on their own. Revision exercises round off each unit as a mixed exercise covering all the problems addressed in the unit. Summative assessment activities are provided at the end of every term in the form of term assessments, along with a term project. These assessments test pupils on all the knowledge and skills they have gained in each term, and the projects enable the pupils to apply the work they have learnt in practice. Additional features include: Key words: Key terminology is highlighted for the pupils. Definitions are given in the PB and in the TG. Puzzles: Additional problems, usual in a reallife context are included to help grow an appreciation of mathematics in everyday life. Challenges: Extension problems for stronger pupils to attempt. These exercises generally extend the scope of content covered in each unit. Teaching notes: Advice and ideas for teachers in dealing with the content on each page. Features of the Teacher s Guide This New General Mathematics Primary 1 TG is lesson-based. The units of the PB are organised into a series of lessons. Units include most of the following features: The performance objectives from the curriculum that are covered in the unit A list of suggested resources you will need Definitions for the key words in the PB, as well as some additional key words and their descriptions Frequently asked questions relating to teaching the unit s content (not always applicable) Common errors pupils make (not always applicable) An evaluation guide showing the key learning milestones. Each lesson includes the following: for the lesson (all the suggested resources) remember, these can be tailor-made to suit the requirements of your classroom situation A starter activity, which helps you focus on the topic, or revise previous required knowledge, which suggests how you should teach the lesson, and the main strategies you can incorporate Answers to all exercises, puzzles and challenges in the PB and WB guidance on how to effectively assess pupils in each lesson Extension and support activities (not always applicable) Suggestions for homework activities, where necessary. Note: The lesson-based guidelines are suggestions only. You, as the teacher, will need to assess how much your pupils are able to cover in each lesson. Features of the Workbook The New General Mathematics Primary 1 WB provides a worksheet for every unit in the PB. iv How to use this course
5 Pupils use these worksheets to practise the specific mathematical skills and concepts covered in each unit. It forms as a consolidation of the pupils understanding and is a useful resource for homework assignments. Pupils can record their answers and calculations in the spaces provided on each of the worksheets. The answers to these worksheets are all provided in the TG. Methodology Mathematics teaching and learning goes beyond reaching the correct answer. Many mathematical problems have a range of possible answers. Pupils need to understand that Mathematics is a tool for solving problems in the real world; not just about giving the correct answers. The Mathematics classroom must therefore provide an environment in which problem-solving is seen as integral to the teaching programme, and where learning activities are designed to provide pupils with opportunities to think. Working mathematically involves: questioning applying strategies communicating reasoning reflecting. Alongside developing these problem-solving strategies, it is important for pupils to gain specific mathematical knowledge as tools for problemsolving. At Primary level 1, these tools include: sorting, identifying, counting, arranging, and reading and writing whole numbers from 1 to 9 recognising, reading and writing the number 0 recognising the number 10 as a group working with tens and units in place value identifying, reading and writing numbers from 11 to 99 working with fractions adding whole numbers up to a sum less than 18 adding 2-digit whole numbers without regrouping subtracting from whole numbers not greater than 18 working with open sentences in addition and subtraction recognising, adding and subtracting money comparing, ordering and measuring of length in natural units (hand spans, arm spans, footsteps, strides) working with time (morning, afternoon, evening, night) estimating and comparing the weight of objects working with simple 2-D and 3-D shapes collecting data. Pupils will require some, or all of the above processes, to make sense of any mathematical concept. Problem-solving strategies include: trial and improvement acting it out making a model drawing a diagram or picture looking for patterns working backwards (inverse operations) using tables and data making a list. Primary level 1 focuses primarily on building the first five strategies listed above, and then in the later primary levels, builds on the other strategies. How to use this course v
6 Curriculum Matching Chart NERDC PB WB Performance Objective Pupil Book Unit Topic Pages Pages Theme 1: Number and numeration Sub-theme: Whole numbers 1. Whole 1. Sort and classify number of objects in a Unit 1 Sorting and classifying numbers 1-5 group or collection objects 2. Identify number of objects in a group or Unit 2 Identification and reading 10 6 collection of number of objects Count correctly up to 5 4. Write correctly number 1-5 Unit 3 Ordering and writing of Arrange numbers 1-5 in order of magnitude (quantities) numbers Whole 1. Recognize that the symbol 0 stands for Unit 4 Introducing zero 14 9 number 0 (zero) nothingness 2. Read the number 0 3. Write 0 3. Whole 1. Sort and classify numbers of objects in a Unit 5 Sorting and classifying numbers 6-9 group or collection objects 2. Identify number of objects in a group or Unit 6 Identification and reading collection of numbers Count and read correctly from Write correctly number 6-9 Unit 7 Writing and ordering of Arrange the numbers 6-9 in order of their magnitudes figures Whole 1. Recognize 10 as a group Unit 8 The number number Use the idea of place value, limited to Unit 9 Place value tens and units 5. Whole 1. Identify and read correctly the numbers Unit 10 Identification and reading numbers Write correctly the numbers 1-99 of numbers 1-99 Unit 11 Writing of numbers from Fractions 1. Identify and using concrete objects and shapes Unit 12 Fractions Project 34 vi Curriculum Matching Chart
7 NERDC Performance Objective Topic Theme 2: Basic operations Sub-theme: Basic operations 1. Addition 1. Add two whole numbers from 1 to 3 with sum less than 5 2. Add two or three whole numbers from 1-8 with sum less than Add two or three numbers from 0 to 9 with sum not greater than Add 2-digit whole numbers with sum not greater than 40, without exchanging or renaming 5. Cross-check numeracy in addition is readable 2. Subtraction 1. Subtract from whole numbers not greater than 9 2. Subtract from whole numbers not greater than 18 Pupil Book Unit Unit 13 Adding numbers with sum less than 5 Unit 14 Adding numbers with sum less than 10 Unit 15 Adding numbers with sum less than 18 Unit 16 Adding 2-digit whole numbers (without regrouping) Unit 15 Adding numbers with sum less than 18 Unit 16 Adding 2-digit whole numbers (without regrouping) Unit 17 Subtracting from whole numbers not greater than 9 Unit 18 Subtracting from whole numbers not greater than Cross-check accuracy in subtraction Unit 17 Subtracting from whole numbers not greater than 9 Unit 18 Subtracting from whole numbers not greater than 18 PB Pages WB Pages Addition 1. Find missing numbers in a statement Unit 19 Open sentences : addition Cross-check the correctness of addition in everyday life 4. Subtraction 1. Find missing numbers in a statement 2. Cross-check the correctness of Unit 20 Open sentences: subtraction subtraction in everyday life Theme 3: Algebraic processes Sub-theme: Algebraic operations 1. Open 1. Find missing numbers in an open sentences sentence 2. Solve simple related open sentences Theme 4: Mensuration and geometry Sub-theme: Primary measures 1. Money 1. Recognize different denominations of Nigerian coins 2. Add coins to obtain sums not exceeding 25k 3. Calculate change obtainable from 10k or less 4. Trace coins using brown and white papers Unit 19 Open sentences : addition Unit 20 Open sentences: subtraction Unit 21 Recognising money Unit 22 Adding and subtracting money Project: Tracing coins and notes Curriculum Matching Chart vii
8 NERDC Topic Performance Objective Pupil Book Unit PB Pages 2. Length 1. Develop the idea of length Unit 23 Introducing length Measure length and distance in their Unit 24 Measuring length using natural units natural units 3. Compare length of two or three objects Unit 25 Comparing and ordering Order similar objects according to lengths 5. Apply the length and ordering of lengths lengths Unit 25 Comparing and ordering in our environment lengths 3. Time 1. Demonstrate knowledge of the idea of Unit 26 Time time 2. Mention when certain things are done: At home At school 4. Weight 1. Compare the weights of some common objects in the school using the terms light and heavy 2. Estimating and comparing weights Unit 27 Weight Theme 4: Mensuration and geometry Sub-theme: Shapes 1. Threedimensional 1. Sort out cubes, cuboids, cylinders and Unit 28 Three-dimensional shapes shapes spheres 2. Identify and name cubes, cuboids, cylinders and spheres 3. Distinguish between cuboids and cubes 4. Mention solid shapes in homes and the 2. Twodimensional shapes WB Pages environment 1. Identify a square, a rectangle and a circle Unit 29 Two-dimensional shapes Match and name a square, a rectangle and a circle 3. Distinguish between squares and rectangles 4. Mention square, rectangular and circular shapes in homes Theme 5: Everyday statistics Sub-theme: Data collection and presentation 1. Data collection 1. Collect data on their ages at home and school Unit 3 Data collection Project: Data collection viii
9 Unit 1 Sorting and classifying 1 to 5 objects Objectives By the end of this unit, pupils should be able to: Sort and classify objects up to 5 Match numerals from 1 to 5 with the number of objects. Suggested resources A counting stick a stick between 50cm to 100cm long Small items to use as counters such as beads, buttons, bottle tops, stones etc Bananas, balls, oranges, coconuts and pineapples Wall chart matching numerals 1 to 5 with corresponding number of objects. Numeral labels 1 to 5 Key word definitions sort: categorize or group classify: divide into classes, to categorize object: an item or a thing Frequently asked questions Q What prior knowledge do the pupils need? A Pupils need to understand that a counting word is applied to each object being counted. Common errors pupils make Some pupils are not patient enough to count in ones and match one number to more than one object or group of objects. Pupils may gather the objects without counting them carefully or just play with the objects. Evaluation Guide Pupils to: 1. Classify and sort given number of objects from a collection. 2. Arrange given number of objects from a collection together. Lesson 1 Pupil s Book page 8; Workbook page 5 Wall chart matching numerals 1 to 5 with corresponding number of objects Small items to use as counters such as beads, stones, bottle tops and counting sticks Bananas, balls, oranges, coconuts and pineapples Number rhymes and number stories Workbook Begin by reading stories and number rhymes involving numbers 1 to 5. Raise up a finger and tell pupils that it is different from when you increase it to 2, then 3, 4 and 5. Ask pupils to also raise the fingers up as you do. Ask pupils to look at the groups of objects on page 8 of the PB and raise your fingers to represent the number of objects in each group. Mix different collections of objects and ask pupils to sort them according to group or type. Guide pupils to form groups as follows: one orange, two pineapples, three bananas, four balls and five coconuts. Repeat with different pupils. The lesson should be concluded with a review of the concept of sorting of objects up to 5. Complete Exercise 1 on page 8 in the PB. Unit 1: Sorting and classifying 1 to 5 objects 1
10 Answers Exercise 1 5 pencils, 4 loaves of bread, 3 sweets, 1 book, 2 cars Worksheet book, 4 balls, 3 bananas, 2 cars, 5 pencils Observe and listen to the pupils during the lesson. Look at their answers to the exercises in the PB and WB. Pupils should be able to sort a given number of objects from a collection of 1 to 5 items. Support activity Pupils should play in pairs by raising up the number of fingers raised by his/her partner. Homework activity Pupils should answer Question 1 of Worksheet 1 on page 5 in the WB. Lesson 2 Pupil s Book page 9 Wall chart matching numerals 1 to 5 with corresponding number of objects Small objects to use as counters such as beads, stones, bottle tops and counting sticks Bananas, balls, oranges, coconuts and pineapples Remind pupils of the number of fingers they raised up at the last lesson. Repeat some of the rhymes you read during the last lesson and encourage pupils to sing or recite the rhymes with you. Look at the wall chart and point to the different groups of objects, reminding pupils how many objects are in each group. Mix different objects and ask pupils to classify them according to group. Guide the pupils to form groups. Organize some materials on the floor of the class like oranges, shoes, books, and pencils each numbering between 1 and 5 and ask pupils to say how many of each object they can see. Repeat with different pupils. Complete Exercise 2 on page 9 of the PB. Answers Exercise 2 5 balls, 3 rings, 2 ropes, 1 chair Observe and listen to the pupils during the lesson. Look at their answers to the exercises in the PB. Pupils should be able to classify objects from a collection of 1 to 5 items. 2 Unit 1: Sorting and classifying 1 to 5 objects
11 Support activity Pupils are divided into five groups with a leader in each group. Refer to the wall chart showing numerals one to five with corresponding numbers of objects and call any member from a group to say which collection of objects has a certain number. The group is clapped for if correct otherwise another group is called. Lesson 3 Pupil s Book page 9; Workbook page 5 Wall chart matching numerals 1 to 5 with corresponding number of objects Numeral labels 1 to 5 Small items to use as counters such as beads, stones, bottle tops and counting sticks Bananas, balls, oranges, coconuts and pineapples Workbook Ask pupils to find a partner. The one should pass a number of beads to the other who should then show a numeral label corresponding to the number of beads passed. Mix various objects into a big collection on the floor, using no more than 5 of the same object. Divide the class into groups and ask the groups to sort the objects according to their properties, such as: size, colour, shape, texture, and so on. Ask pupils to say the number of objects in the group they make. Repeat with different pupils. The lesson should be concluded with a review of the concept of classification of objects up to 5. Complete Exercise 3 on page 9 of the PB. Answers Exercise 3 Ball, oranges, bottle tops, books, sweets Worksheet 1 2. a) 1 ball b) 4 books c) 3 bananas d) 2 cars e) 5 pencils Unit 1: Sorting and classifying 1 to 5 objects 3
12 Observe and listen to the pupils during the lesson. Look at their answers to the exercises in the PB and WB. End the lesson by reviewing the concept of objects up to 5 to assess pupils progress. Pupils could be able to classify objects from a collection of 1 to 5 items. Homework activity Divide pupils to 5 groups and ask each group to bring a number of objects like bottle tops, stones etc from home. Pupils should also complete Question 2 of Worksheet 1 on page 5 of the WB. 4 Unit 1: Sorting and classifying 1 to 5 objects
13 Unit 2 Identifying and reading a number of objects 1 to 5 Objectives By the end of this unit, pupils should be able to: Identify a number of objects in a group or collection up to 5 Read correctly numerals up to 5 Count correctly numerals 1 to 5. Suggested resources Objects for counting such as pencils, crayons, bottle tops, sweets, balls, shoes, fruit Boxes Numeral labels 1 to 5 Wall Chart showing numerals 1 to 5 matched with corresponding number of objects Evaluation Guide Pupils to: 1. Identify a given number of objects from a collection up to 5. 2 Read given numbers on the board. Key word definitions identifying: to establish or associate with a group reading: to say aloud Frequently asked questions Q What prior knowledge do the pupils need? A Pupils will need to be able to rote count from 1 to 5 and to use this knowledge to count a set of objects. They need to have one-to-one matching skills and understand that a counting word is applied to each object. Common errors pupils make Pupils can say number names in order, but do not associate them with the number of objects being counted even when touching the objects. They need to develop one-to-one conservation, matching the number count to each thing they touch and understand the count remains the same when the objects are moved into different positions. Counting backwards can present more problems than counting forwards. Unit 2: Identifying and reading a number of objects 1 to 5 5
14 Lesson 1 Pupil s Book page 10 Oranges, apples, bananas, balls Small objects to use as counters such as pencils, crayons, sweets, bottle tops Boxes Numeral labels 1 to 5 Wall chart showing numerals 1 to 5 matched with corresponding number of objects To start this lesson, the teacher should raise up a number of fingers and ask pupils to raise the same number of fingers. Keep on changing the number of fingers and ask pupils to do the same thing. Ask pupils to find partners and play the game of identifying the number of fingers from 1 to 5 with each other. Make 3 groups of similar objects, such as balls, shoes and books. Give each group between 1 and 5 items. Say the number of items in a group and ask pupils to identify the correct group. During the lesson ask one pupil to come to the front and choose the group having a particular number of objects. Let pupils work in small groups to find a certain number of objects for example, four bananas, five pencils, three crayons, two apples, one orange. Guide pupils to identify correctly. Assist pupils to carefully answer the questions in exercise 1 on page 10 in the PB. Observe and listen to the pupils during the lesson. Look at their answers to the exercises in the PB. Pupils should be able to identify numbers 1 to 5 from a collection of objects. Extension activity Lay out on a table five boxes. On each box write a number from one to five in both words and numerals and draw corresponding number of dots on each one. Place some objects in each box- not necessarily the correct number. Ask pupils to check whether each box contain the right number of objects. Change the objects around each day. Homework Activity Pupils should complete Question 1 of Worksheet 2 on page 6 of the WB. Answers Exercise 1 Pupils to touch the specified number of apples on the tree. 6 Unit 2: Identifying and reading a number of objects 1 to 5
15 Lesson 2 Pupil s Book page 10; Workbook page 6 Oranges, bananas, pineapple, balls Small objects to use as counters such as pencils, crayons, leaves, sweets, bottle tops Boxes Numeral labels 1 to 5 Wall chart showing numerals 1 to 5 matched with corresponding number of objects Work through Exercise 2 on page 10 of the PB and discuss the answers. Let pupils work in small groups to find a certain number of objects, for example, four leaves, five pencils, three crayons, two apples, one orange. Guide pupils to identify correctly. Ask pupils to match the correct number word label with the corresponding group of objects. Listen to pupils conversations and questions and conclude the lesson with a review of the concepts covered. Observe and listen to the pupils during the lesson and note their responses to questions. Look at their answers to the exercises in the PB and WB. Pupils should be able to identify and count groups up to 5 objects and should be familiar with the numerals 1 to 5. Extension activity Ask pupils to identify the number of objects the teacher is holding by picking the same number of objects from a collection. Ask them to show the corresponding numeral label. Homework Activity Pupils should complete Question 2 of Worksheet 2 on page 6 of the WB. Answers Exercise 2 Green, Red, Purple, Yellow, Blue Worksheet , giraffe, one 4, ostriches, four 3, fish, three 5, ants, five 2, elephants, two 2. Pupils colour the 4 pineapples, the 5 bananas, and the 4 mangoes Unit 2: Identifying and reading a number of objects 1 to 5 7
16 Lesson 3 Pupil s Book page 11 Oranges, bananas, pineapple, flowers, apples, balls Small objects to use as counters such as beads, pencils, crayons, sweets, bottle tops Boxes Numeral labels 1 to 5 Number word labels 1 to 5 Wall chart showing numerals 1 to 5 matched with corresponding number of objects To start this lesson the teacher should gather 1,2,3,4,5 objects mixed together. Revise the previous lessons by separating the objects into their groups and associating each group of objects with a numeral 1 to 5. Hold up the numeral label for each group of objects and ask the pupils to read the number that appears on the label. Answers Exercise 3 4 bananas, 3 flowers, 5 oranges, 2 trees, 1 pineapple Observe and listen to the pupils during the lesson. Look at their answers to the exercises in the PB. Pupils should be able to identify and read numerals 1 to 5. Pupils should be able to match the correct numeral with the group of objects. Extension activity Lay out on a table five boxes. On each box write a number from one to five in both words and numerals and draw corresponding number of dots on each one. Place some objects in each box- not necessarily the correct number. Ask pupils to check whether each box contain the right number of objects. Change the objects around each day. Make 3 groups of similar objects, such as balls, shoes and books. Give each group between 1 and 5 items. Say the number of items in a group and ask pupils to identify the correct group. During the lesson ask one pupil to come to the front and choose the group having a number of objects. Let pupils work in small groups to find a certain number of objects e.g. four leaves, five pencils, three crayons, two apples, one orange. Guide pupils to read correctly. Read the numerals and number words together. Make a collection of different objects ranging from one to five. Ask pupils to match the correct numeral with the corresponding group of objects. Hold up the number word labels. Read the number words together. Ask pupils to match the correct number word label with the corresponding group of objects. Assist pupils to carefully answer the questions in Exercise 3 on page 11 in the PB. 8 Unit 2: Identifying and reading a number of objects 1 to 5
17 Lesson 4 Pupil s Book page 11; Workbook page 6 Oranges, bananas, pineapple, flowers Small objects for counting such as pencils, crayons, sweets, bottle tops Boxes Workbook Numeral labels 1 to 5 Wall chart showing numerals 1 to 5 matched with corresponding number of objects Hold up a hand with 1-5 fingers raised. Pupils must raise the same number of fingers on their own hand and then say the number. Make five groups, comprising 1 to 5 items. Lay the groups out on the floor with enough space around each group. Say a number and then ask pupils to move to stand next to the group of items with the corresponding number called. Call out numbers in any order and repeat until the activity runs smoothly. Assist pupils that are having difficulty by counting the items in the correct group using raised fingers on their hand. Observe and listen to the pupils during the lesson. Look at their answers to the exercises in the PB and WB. Pupils should be able to identify and read numbers 1 to 5 as numerals and number words. Pupils should be able to match the correct numeral and number word with the group of objects. Extension activity Lay out on a table five boxes. On each box write a number from one to five in both words and numerals and draw corresponding number of dots on each one. Place some objects in each box- not necessarily the correct number. Ask pupils to check whether each box contain the right number of objects. Change the objects around each day. Homework Activity Ask pupils to complete Questions 3 and 4 of Worksheet 2 on page 6 in the WB. Guide the pupils to work through Exercise 4 on page 11 in the PB. Answers Exercise 4 3 pencils, 4 sweets, 5 bottle tops, 2 crayons, 1 flower Worksheet and 4 4. a) 7 b) 10 c) 3 d) 6 Unit 2: Identifying and reading a number of objects 1 to 5 9
18 Unit 3 Writing and ordering of numbers 1 to 5 Objectives By the end of this unit, pupils should be able to: Write numbers 1 to 5 correctly Arrange the numbers 1 to 5 in magnitude form. Suggested resources Workbook Pencils Crayons Wall chart showing numerals 1 to 5 matched with corresponding number of objects Key word definition Write: to inscribe or record Frequently asked questions Q What prior knowledge do the pupils need? A Pupils need to be able to identify and read numbers 1 to 5. Common errors pupils make When writing numbers, pupils may turn the figures upside down or write them back to front. Some pupils may struggle to arrange the numbers in the correct sequence. Encourage pupils to use the Wall chart as a guide when writing numbers. Evaluation Guide Pupils to: 1. Write the numbers 1 to 5 correctly. 2. Arrange numbers 1 to 5 in magnitude form. Lesson 1 Pupil s Book page 12; Workbook page 7 Workbook Labels or cards showing the numbers 1 to 5 in numerals and words Pencils Crayons A variety of objects for counting and sorting Wall chart showing numbers 1 to 5 in numerals and words matched with corresponding number of objects Make three groups of 1 to 5 objects. Ask pupils which group has the most objects, then ask which group has the least. Change the number of objects in the groups and repeat until all pupils have had a turn. Remind pupils to read the numerals and number words carefully. Pupils should also be able to write the numbers. They should count the number of objects presented and write the number appropriately. Pupils should be shown the number cards with a number written in figure and its corresponding word. Pupils can now practice by tracing the numbers on page 12 of the PB. 10 Unit 3: Writing and ordering of numbers 1 to 5
19 Observe and listen to the pupils during the lesson. Look at their answers to the exercises in the PB and WB. Pupils should be able to trace numbers correctly. They should be able to write numbers 1 to 5 in words and figures. Support activity Ask pupils to 5 cardboard squares measuring 10cm by 10cm and write numbers 1 to 5 boldly on them. Homework activity Ask pupils to look out for numbers around their home. They can report back to the class on where they found the numbers. They should also practice writing the numerals and words for numbers 1 to 5. Pupils should complete Question 1 of Worksheet 3 on page 7 of the WB. Lesson 2 Pupil s Book page 12 Pencils Crayons Wall chart showing numbers 1 to 5 in numerals and words matched with corresponding number of objects Work through the answers of the exercises in the previous lesson (PB page 12) to make sure all pupils are able to write the numbers 1 to 5 correctly. Ask pupils to count the number of objects in exercises 1 and 2 on page 12 in the PB and write the correct numbers under each group of objects. Remind pupils to read the numerals and number words carefully. Write each numeral 1 to 5 on the board and below it write the number in words. Explain to the pupils that each number has a number word that goes with it. Show how to write each number word and have pupils practice by writing down the numbers 1 to 5 in words and figures in their note books 10 times. Pupils can complete this exercise during the lesson. Answers Exercise 1 2 apples, 5 bananas, 3 oranges, 4 loaves of bread, 1 flower Exercise 2 4 ostriches, 5buffaloes, 1 giraffe, 3 elephants, 2 penguins Observe and listen to the pupils during the lesson. Look at their answers to the exercises in the PB. Pupils should be able to identify up to 5 objects and write the numbers in numeral and word form. Unit 3: Writing and ordering of numbers 1 to 5 11
20 Extension activity Ask pupils to make their own number books from 1 to 5. On each page they write the numeral and draw the corresponding number of objects. Make sure the pages are in order from 1 to 5. Display the number books on the walls of the classroom. Homework activity Ask pupils to look out for numbers around their home and report back to the class on where they found the numbers. Pupils should also practice writing the numerals 1 to 5 and the words one to five. Ask pupils to bring to school objects numbering 1,2,3,4 and 5 from home. The objects have to be different from each other for example, pebbles, stones, beads etc. Lesson 3 Pupil s Book page 13; Workbook page 7 Workbook Pencils Labels or cards showing the numbers 1 to 5 in numerals and words Wall chart showing numbers 1 to 5 in numerals and words matched with corresponding number of objects Work through the answers of the exercises in the previous lesson (PB page 12) to make sure all pupils are able to write the numbers correctly. Let pupils know that the sequence of the numbers is important. Arrange the numbers 1 to 5 in order by writing them on tags hanging on the wall of the class. Ask pupils to read the numbers forwards and backwards several times. Ask pupils to read numbers 1 to 5 forwards and backwards correctly. Remind pupils to read the numerals and number words carefully. Pupils should also be able to write the numbers in order in their books and arrange numbers 1 to 5 in order of their magnitude using counters and other objects. Pupils can now complete Exercises 3 and on page 13 in the PB. Answers Exercise 3 1, 2, 3, 4, 5 Exercise Worksheet 3 2. a) 3, 5 b) 1, 4 c) 4, 3, 1 d) 4, 1 12 Unit 3: Writing and ordering of numbers 1 to 5
21 Observe and listen to the pupils during the lesson. Look at their answers to the exercises in the PB and WB. Pupils should be able to write numbers 1 to 5 correctly and in the correct order. This will help them to be able to complete sequences of 1 to 5 with missing numbers. Extension activity Use number cards with numbers 1 to 5 written on them. Ask a pupil to pick one and another to pick the number before or after it. Repeat the practice with many pupils. Homework activity Complete Question 2 of Worksheet 3 on page 7 of the WB. Lesson 4 Pupil s Book page 13; Workbook page 8 Workbook Pencils Crayons Ask five pupils to stand next to one another. Label their shirts 1 (one), 2 (two), 3 (three), 4 (four) and 5 (five) respectively. Ask the first to shout his number aloud, and the next etc. Remove one or two of them and ask which number has been removed. Guide them where necessary. Make pupils know the number before or after their number. Repeat the exercise with many other pupils. Work through the answers of the exercises in the previous lesson (PB page 12) to make sure all pupils are able to write the numbers 1 to 5 in correct order. Focus on the order of numbers 1 to 5. Ask pupils to say the number before or after a number tag. Pupils should also practice writing the numbers 1 to 5 in their order of magnitude in their note books, both in numeral and word form. Pupils can now complete Exercise 5 on page 13 of the PB. Answers Exercise 5 After 2 3 After 4 5 Before 3 2 Before 5 4 Between 1 and 3 2 Between 3 and 5 4 Worksheet 3 3. a) 2 b) 5 c) 1 d) 4 Unit 3: Writing and ordering of numbers 1 to 5 13
22 4. a) Four flowers is more b) Five flowers is more c) Four mangoes is more 5. 1, 2, 3, 4, 5 Observe and listen to the pupils during the lesson. Look at their answers to the exercises in the PB and WB. Pupils should be able to identify and write the correct number missing before or after a given number. Extension activity Challenge pupils to write the number words correctly from 1 to 5. Homework activity Pupils should complete Questions 3, 4 and 5 of Worksheet 3 on page 8 of the WB. 14 Unit 3: Writing and ordering of numbers 1 to 5
23 Unit 4 Introducing zero Objectives By the end of this unit, pupils should be able to: Recognize that the symbol 0 stands for nothingness Read the number zero Write 0 in figure and in words. Suggested Resources Workbook Cups Objects for counting such as fruit, beads, bottle tops Small boxes, baskets Cardboard with numeral 0 Word label zero Wall chart showing numerals and word numbers 0 to 5 with corresponding number of objects Evaluation Guide Pupils to: 1. Remove objects from a box until zero objects are left in the box. 2. Write numbers 0,1,2,3,4,5 forwards and backwards in numeral and word form. Keyword definition zero: nothing, nought or an empty set Frequently asked questions Q What prior knowledge do children need? A Pupils need to be able to identify, count and read numbers 1 to 5 correctly. They need to recognize numbers 1 to 5 accurately and write the numbers in order of magnitude. They should also be able to say and write which number is before or after a given number from 1 to 5. Common errors pupils make Pupils may sometimes think that there is no number before 1. Encourage them to identify zero as a number before one and help them to write it in figure and in words. Unit 4: Introducing zero 15
24 Lesson 1 Pupil s Book page 15 Objects for counting such as, bananas, beads and bottle tops Small boxes Cardboard with numeral 0 Word label zero Wall chart showing numerals and word numbers 0 to 5 with corresponding number of objects Place two bottle tops in the left palm and nothing on the right palm. Ask the pupils how many bottle tops are in the palm. Ask them to count the objects in the right palm. Let them know there is nothing there. Gather three boxes, bowls or baskets. Put four objects in one box, 5 in another and leave the third box empty. Ask a pupil to choose a box and count how many objects are inside. When a pupil chooses the empty box explain that the numeral we use to represent an empty set is 0. Hold up the numeral 0. Explain that zero means there is nothing to count. There are no objects in the box. Let the pupils know that zero comes before 1. Observe and listen to the pupils during the lesson. Look at their answers to the exercises in the PB. Pupils should be able to say that the number zero means there is nothing to count. They should also know that zero comes before 1. Support activity Let pupils practice how to recognize zero objects by emptying their bag to show that zero means nothingness. Guide pupils to recognize the symbol 0 correctly. Put 5 bananas in a basket and start removing the bananas until nothing remains. Let them realize when nothing remains the symbol for nothing is written 0. Pupils can now complete Exercise 1 on page 15 in the PB. Answers Exercise , 1, 4, 0 16 Unit 4: Introducing zero
25 Lesson 2 Pupil s Book page 15; Workbook page 9 Workbook Objects for counting such as bananas, beads and bottle tops Small boxes Cardboard with numeral 0 Word label zero Wall chart showing numerals and word numbers 0 to 5 with corresponding number of objects Gather four plastic containers with 4 bean cakes, 2 bean cakes, 0 bean cakes and 1 bean cake in them respectively. Ask pupils to count how many bean cakes are in each plastic container and say them aloud. Observe and listen to the pupils during the lesson. Look at their answers to the exercises in the PB and WB. Pupils should be able to identify and read the symbol 0 both in numeral and word form. Support activity Let pupils practice how to count and read aloud the symbol 0. Homework activity Complete answers to Questions 1, 2 and 3 of Worksheet 4 on page 9 in the WB. Guide pupils to identify and read the symbol 0 correctly. Put 5 bananas in a basket and start removing the bananas until nothing remains. Let them realize when nothing remains the symbol for nothing is written 0. Ask pupils to write 0 in their note books ten times both in numeral and word form. Encourage them to look at the Wall chart for guidance. Pupils can now complete Exercise 2 on page 15 in the PB. Answers Exercise , 5, 3, 0, , 1, 2, 3, 4, 5 Worksheet 4 1. Pupils colour in the middle basket 2. Pupils underline four zeros 3. Pupils practise speaking in pairs Unit 4: Introducing zero 17
26 Lesson 3 Pupil's Book page 14; Workbook page 9 Workbook Objects for counting such as bananas, beads and bottle tops Cardboard with numeral 0 Word label zero Wall chart showing numerals and word numbers 0 to 5 with corresponding number of objects Look at the numbers 0 to 5 on the Wall chart together. Read the numerals and number words together. Make a collection of different objects ranging from 0 to 5. Use the cardboard numerals 0 to 5 and ask pupils to match the numerals 0 to 5 with the corresponding group of objects. Hold up the number word labels. Read the number words together. Ask pupils to match the correct number word label with the corresponding group of objects. Observe and listen to the pupils during the lesson. Look at their answers to the exercises in the WB. Pupils should be able to write the numerals and number word for 0 correctly. Support activity Give pupils sticks to practice forming the numeral 0 on sand or mud or use chalk to write on the chalkboard. Homework activity Pupils should complete Questions 4 and 5 of Worksheet 4 on page 9. Hold up the cardboard numerals. Show pupils how to write the numeral 0 by pointing to the starting point and move your finger around to form the number 0. Ask pupils to copy the numeral 0 in the air. Ask some pupils to come to the front and practice writing the numeral 0 on the board. Guide pupils if they begin to make mistakes. Pupils should do draw 0 to 5 objects in their note books and to write the corresponding numeral and number word below each picture. Pupils should complete Questions 4 and 5 of Worksheet 4 on page 9 of the WB. Answers Worksheet 4 4. Pupils complete the writing outlines. 5. Pupils complete the writing outlines. 18 Unit 4: Introducing zero
27 Lesson 4 Pupil's Book page 15 Cardboard with numerals 0 to 5 Word labels zero to five Wall chart showing numerals and word numbers 0 to 5 with corresponding number of objects Look at the numbers 0 to 5 on the Wall chart together. Read the numerals and number words together. Arrange the numbers in order and ask the pupils to read and write in that order. Also ask them to write the numbers backwards. Hold up the cardboard numerals. Show pupils how to write the numerals 0 to 5 in order of their magnitude. Show the numbers written in order but with some missing and ask pupils to write the missing numerals. They should do the following questions: Observe and listen to the pupils during the lesson. Look at their answers to the exercises given in this lesson. Pupils should be able to write the numbers 0 to 5 in correct order and fill in missing numbers in the exercises given in both numeral and word form. Support Activity Ask pupils to write the numeral 0 and zero in words in their books five times. Homework activity Divide pupils book page into four. Write 0 in two as heading and zero in the other two spaces. Ask them to complete the spaces down by copying the 0 or the zero. Write the missing numbers one two four five Answers Lesson activity Zero one two three four five Unit 4: Introducing zero 19
28 Unit 5 Sorting and classifying 6 to 9 objects Objectives By the end of this unit, pupils should be able to: Sort and classify up to 9 objects in a group or collection. Suggested Resources Objects for counting such as balls, pebbles, buttons, bottle tops, leaves and oranges Flash cards of numbers 1 to 9 Key word definitions sort: categorize or group classify: divide into groups Frequently asked questions Q What prior knowledge do the pupils need? A Pupils will need to be able to sort, classify, count, order and write numerals 1 to 5. They will also need to read and write numbers 1 to 5 in words. Common errors pupils make Pupils can say number names in order but do not associate them with the number of objects being counted, even when touching the objects. Pupils need to develop one-to-one conservation, matching the number count to each thing they touch and understand the count remains the same when the objects are moved into different positions. They may be accurate with numbers up to 5 but have difficulty with the numbers 6 to 9. Their one-toone conservation is still developing. Counting back can present more problems than counting forwards. Evaluation guide Pupils to: 1. Arrange a given number of objects from a collection together. Lesson 1 Pupil s Book page 16; Workbook page 10 Workbook Objects for counting such as stones, bottle tops beads A variety of fruit, such as mangoes, bananas, oranges, pineapples Wall chart showing numerals and word numbers 1 to 9 matched with corresponding number of objects To start the lesson, recap by asking pupils to read numbers 1 to 5 and remind them that adding one finger to 5 fingers makes 6 and continue the addition of one more finger till you get to nine. Split the class into nine groups. Ask each group to look for a different number between 1 and 9. Get some collections of objects ranging from 6 to 9 objects. Ask pupils to sort the different objects into groups. Read from the wall chart from 1 to 9. Ask the pupils to read the numbers out loud as you point to them. Together, look at the pictures and numerals of 6 to 9 in the PB on page 16 and say what number of objects is in a particular shape and colour. Ask pupils to complete Exercise 1 on page 16 in the PB. Remind pupils to sort carefully. 20 Unit 5: Sorting and classifying 6 to 9 objects
29 Answers Exercise Worksheet 5 1. Pupils colour the third bowl from the left. 2. a) 6 ducks b) 7 chicks c) 8 sheep d) 9 goats Observe and listen to the pupils during the lesson. Look at their answers to the exercises in the PB and WB. Pupils should be able to sort 6 to 9 objects carefully into groups and say how many of each type are in the collection. They should be able to sort clearly from mixed collections of apples, balls, stones etc. Extension activity Focus on 6 to 9 objects. Ask pupils to make collections of 6 to 9 objects around the school or their homes and place the correct number label next to the collection. Homework activity Divide the class into nine groups. Ask each group to bring objects between 6 and 9 objects from home. Gather the objects and group them according to number of them. Let pupils say which objects are group of 6, 7, 8 and 9 objects. Pupils to complete Question 1 and 2 of Worksheet 5 on page 10 in the WB. Lesson 2 Pupil s Book pages 16 and 17; Workbook page 11 Workbook Objects for counting such as stones, bottle tops, beads Mangoes, bananas,oranges,pineapples Object pictures Labels or cards showing the numbers 6 to 9 in numerals and words Wall chart showing numerals and word numbers 1 to 9 matched with corresponding number of objects Guide pupils to look around the class and identify objects which can be made into groups of 6 to 9. As pupils to use objects or counters and to make into collections ranging from 6 to 9 objects. Together, look at the pictures and numerals of 6 to 9 in the PB on page 16. Classify the objects into groups and say what object has a particular number from 6 to 9. Provide a collection of different objects from 6 to 9 of each object. Ask pupils to separate them into their groups. Ask pupils to complete Exercise 2 on page 17 of the PB. Remind pupils to classify carefully. Answers Exercise 2 Lions, buffaloes, elephants, rhinoceros. Worksheet oranges, 9 bananas, 6 pineapples, 8 apples Unit 5: Sorting and classifying 6 to 9 objects 21
30 Observe and listen to pupils during the lesson. Look at their answers to exercises in the PB and WB. Pupils should be able to classify objects into groups of 6 to 9 correctly. They should be able to classify mixed collections of apples, balls, stones. Extension activity Ask pupils to make collections of objects around the school or their homes and place the correct number label next to the collection. Homework activity Divide the class into nine groups. Ask each group to bring objects between 6 and 9 objects from home. Gather the objects and group them according to number. Ask pupils to say which objects are in groups of 6, 7, 8 and 9. Complete Question 3 on page 11 of the WB. Lesson 3 Pupil s Book page 17; Workbook page 11 Workbook Objects for counting such as stones, bottle tops, beads, fruit Object pictures Wall chart showing numerals and word numbers 1 to 9 matched with corresponding number of objects Hold up a number of fingers between 6-9. Pupils must raise the same number of fingers and say the number aloud. Set out an assortment of small objects of different shapes, colours and materials on the floor in the classroom. Ask pupils to come gather around the collection and identify all the different objects. Choose a property and ask pupils to count all the objects with that property, for example which objects are red or smooth. Ask pupils to complete Exercise 3 on page 17 in the PB. Remind pupils to classify carefully. Answers Exercise 3 6 oranges, 7 pineapples, 9 mangoes, 8 bananas Worksheet 5 4. a) 6 and 1 makes 7 b) 7 and 1 makes 8 c) 8 and 1 makes 9 d) 5 and 1 makes 6 22 Unit 5: Sorting and classifying 6 to 9 objects
31 Observe and listen to the pupils during the lesson. Look at their answers to the exercises in the PB and WB. Pupils should be able to classify objects into group of 6 to 9 objects. They should be able to classify mixed collections of objects such as apples, balls and stones. etc. Homework activity Complete answers to Question 4 of Worksheet 5 on page 11 in the WB. Lesson 4 Pupil's Book page 16 Objects to use as counters such as buttons, bottle tops, fruit, balls Wall chart showing numerals and word numbers 1 to 9 matched with corresponding number of objects This lesson focuses on consolidating what the pupils have learnt so far. Show collections of 1 to 5 counters. Pupils must identify the number of items and then write the correct word and the figure. Next, show a mixed collection of various objects, with up to 9 of any one object. Ask pupils to form a group that equals 6, 7, 8 or 9 objects and then state what the common property of the items in their group is. Ensure that pupils read and write the figures 1 to 5 correctly and that they correctly match up the number of items, the number in words and the number in figures. Observe pupils while they form groups of 6 to 9 items. Give guidance when needed to help all pupils complete the activity correctly. Unit 5: Sorting and classifying 6 to 9 objects 23
32 Unit 6 Identifying and reading of numbers 6 to 9 Objectives By the end of this unit, pupils should be able to: Identify the number of objects in a group or collection Count correctly numbers 1 to 9 Read correctly numbers 1 to 9 in numerals and words. Suggested Resources Objects to use as counters such as balls, pebbles, buttons, bottle tops, leaves and oranges Flash cards of numbers 1 to 9 Workbook Wall chart showing numerals and word numbers 1 to 9 matched with corresponding number of objects Key word definition identifying: to say or know what something is Frequently asked questions Q What prior knowledge do the pupils need? A Pupils will need to be able to rote count from 1 to 9. They need to have one-to one matching skills and be able to identify and sort a number of objects in a group up to 9. Common errors pupils make Pupils sometimes confuse the numerals 6 and 9 as they mistake one for the other. Show pupils how to write 6 as different from writing 9 by asking them to write in the air or on the playground. Hold their hands to assist if some are still confused. Evaluation guide Pupils to: 1. Identify numbers 6 to Read numbers 6 to 9 on board and flash cards. Lesson 1 Pupil's Book page 18; Workbook page 12 Small objects to use as counters such as stones, bottle tops Mangoes, bananas,oranges,pineapples Cardboard numerals of 6 to 9 Number word labels of 6 to 9 Wall chart showing numerals and word numbers 1 to 9 matched with corresponding number of objects Place numbers 6, 7, 8, 9 written boldly on cut out cardboards on a table. Ask pupils to pick a number mentioned by the teacher ranging from 6 to 9. Guide the pupils where they may be confused. Practice this identification of numbers 6 to 9 with many of the pupils. Then show the numerals with their corresponding words and match them together. Together, look at the number cards of 6 to 9 on the table and identify a given number called by the teacher. Guide the pupils to identify numbers 6 to 9 from a collection of numbers written and clipped on the wall of the class. Ask pupils to identify the numerals 6 to 9 and match them with their number word labels. 24 Unit 6: Identifying and reading of numbers 6 to 9
33 Answers Worksheet 6 1. six, seven, eight, nine Observe and listen to the pupils during the lesson. Pupils should be able to identify numerals 6 to 9 and their words. Support activity Focus on 6 to 9 numerals. Ask pupils to play a game of picking a number among themselves. If a pupil picks correctly all other clap for him/her but if wrong he/she is corrected. Homework activity Ask pupils to complete Question 1 of Worksheet 6 on page 12 in the WB. Lesson 2 Pupil s Book page 18; Workbook page 12 Workbook Small objects to use as counters such as erasers, buttons, beads, sticks, pencils Cardboard numerals 1 to 9 Number word labels 1 to 9 Wall chart showing numerals and word numbers 1 to 9 with corresponding number of objects A number of objects between 1 and 9 should be placed in boxes and labelled with corresponding numeral labels. Ask pupils to bring a box containing a particular number of objects. Let another pupil count out the box chosen to confirm whether the box was the correct one. Let pupils play counting games involving numbers 1 to 9. Arrange pupils in certain numbers and ask them to count as the teacher touches the head of the stick. Pupils can be asked to touch and count by themselves while others repeat after the pupil leading the counting. Fill one box with one object, another with two objects and the others with three, four, five,six, seven, eight, nine objects. During the lesson, ask one pupil to come to the front and choose a box. Ask the pupil to count the objects one at a time and place the object on the table as they count them. Ask the rest of the class to check that the pupil counted correctly by counting back into the box. Ask other pupils to come to the front and count the objects in the other boxes. Provide numeral labels for the boxes and let pupil s place the correct numeral next to the number of objects. Let pupils work in small group to find a certain number of objects, for example, six buttons, seven sticks, eight bottle tops and nine pencils. Remind pupils to count carefully. Write the instructions on a piece of card so that pupils learn to connect the spoken word six with the written word six and the numeral 6 for all the numbers 6 to 9. Unit 6: Identifying and reading of numbers 6 to 9 25
34 Ask pupils to complete Exercise 1 on page 18 of the PB. Answers Exercise 1 6 tomatoes, 8 cashew nuts, 7 pineapples 7 carrots, 9 bananas, 8 spoons, 6 apples Worksheet 6 2. a) 6 / six b) 8 / eight c) 9 / nine d) 7 / seven 3. Pupils read the numbers with a partner Observe and listen to the pupils during the lesson. Look at their answers to the exercises in the PB and WB. Pupils should be able to count a set of objects up to 9. They should be familiar with the numerals and word numbers up to 9. Extension activity Lay out on a table four boxes of small objects. On each box write a number from six to nine in both words and numerals and draw the corresponding number of dots on each one. Place some objects in each box- not necessarily the correct number. Ask pupils to check whether each box contains the right number of objects. Change objects around each day. Homework activity Ask pupils to complete Question2 of Worksheet 6 on page 12 in the WB. Lesson 3 Pupil s Book pages 18 and 19; Workbook page 12 Workbook Cardboard numerals 1 to 9 Number word labels 1 to 9 Wall chart showing numerals and word numbers 1 to 9 with corresponding number of objects Look at the numbers 1 to 9 on wall chart together. Read the numerals and number words together. Make a collection of different objects ranging from 6 to 9. Use the cardboard numerals 6 to 9 and ask pupils to match the correct numerals with the corresponding group of objects. Hold up the number word labels. Read the number word labels together. Do same with the numerals 6 to 9. Guide pupils to look at the numerals of 6 to 9 in the PB on page 18. Read the numerals together in the class. Ask pupils to complete Exercise 2 on page 19 in the PB. Answers Exercise pencils 2. 9 books 3. 6 crayons 4. 8 tables 5. 7 chairs. Worksheet 6 3. Pupils read the numbers with a partner Pupils should be able to read 6 to 9 numerals and their words correctly. 26 Unit 6: Identifying and reading of numbers 6 to 9
35 Extension activity Merge numerals from Unit 3 i.e. 1 to 5 with 6 to 9 and read them together. Ask pupils to make collections of 1 to 9 objects around the school or their homes and place the correct number label next to the collection. Homework activity Ask pupils to complete Question 3 of the Worksheet 6 page 12. Unit 6: Identifying and reading of numbers 6 to 9 27
36 Unit 7 Writing and ordering figures 6 to 9 Objectives By the end of this unit, pupils should be able to: Write numbers 6 to 9 correctly Arrange the numbers 6 to 9 in magnitude form Suggested Resources Pupils note books Flash cards of numbers 1 to 9 Workbook Wall chart showing numerals and word numbers 1 to 9 with corresponding number of objects Key word definitions ordering: to arrange things in a certain way figures: a symbol which shows numbers set: a group of things of the same kind least: the smallest amount most: the biggest amount Frequently asked questions Q What prior knowledge do the pupils need? A Pupils will need to be able to rote count in sequence from 6 to 9. They need to be able to count and read numbers 1 to 9 correctly in numeral and word form. Evaluation guide Pupils to: 1. Write the numbers 1 to 9 in their note books in numeral and word form. 2. Write numbers 1 to 9 in order of magnitude. Count correctly numbers 1 to 9 Read correctly numbers 1 to 9 in numerals and words. Lesson 1 Pupil s Book page 20; Workbook page 13 Workbook Wall chart showing numerals and word numbers 1 to 9 matched with corresponding number of objects Cardboard numerals 1 to 9 Use wall chart to reinforce the writing of numbers. Draw numbers on the chalkboard and call some pupils to the front to copy on the chalkboard. Hold up the wooden or cardboard numerals. Show pupils how to write these numerals by pointing to the starting point and moving your finger around to form the number. Ask pupils to copy each numeral from 6 to 9 in the air. Ask some pupils to come to the front and practice writing the numerals on the chalkboard. Guide pupils if they begin to make mistakes. Pupils do a handwriting activity to practice forming the numerals 6 to 9 correctly in their books or on paper. Teacher to make collections of dots on the chalkboard from 6 to 9 and ask pupils to copy into their books or on paper, writing the correct numeral and word name under each group of dots. 28 Unit 7: Writing and ordering figures 6 to 9
37 Observe and listen to the pupils during the lesson. Look at their answers to the exercises in the PB. Teacher should check how the pupils trace with fingers to form the numbers and correct where necessary. Pupils should be able to write the numerals and number words 6 to 9 correctly. Extension activity Give pupils sticks to practice forming numerals in the sand or use chalk on the playground or a chalkboard. Ask pupils to make their own number books from 6 to 9. On each page they write the numeral and draw the corresponding number of objects. Make sure the pages are in order from 6 to 9 and attach them to their number books from 1 to 5 they made in Unit 3. Homework activity Ask pupils to complete Question 1 of Worksheet 7 on page 13 in the WB. Lesson 2 Pupil s Book page 20; Workbook page 13 Workbook Wall chart showing numerals and word numbers 1 to 9 matched with corresponding number of objects Number word labels 1 to 9 Use Wall chart to reinforce the writing of numbers 6 to 9 in words. Write 6 to 9 in words on the board and call some pupils to the front to spell the words six, seven, eight and nine. Hold up the number word labels of the numerals 6 to 9. Show pupils how to write these numerals in words. Ask pupils to spell each of the numbers. Ask some pupils to come to the front and practice writing the numerals on the chalkboard. Ask pupils to write each of the numerals in words in their books. Guide pupils if they begin to make mistakes. Ask pupils to complete Exercise 1 on page 20 in the PB. Answers Exercise 1 9 ants, 7 buffaloes, 6 lions, 8 mice Worksheet 7 2. six / 6 seven / 7 eight / 8 nine / 9 Observe and listen to the pupils during the lesson. Look at their answers to the exercises in the PB and WB. Pupils should be able to write the numerals 6 to 9 in words correctly. Unit 7: Writing and ordering figures 6 to 9 29
38 Extension activity Ask pupils to make their own number books from 6 to 9 written in words. On each page they write the numeral s 6 to 9 in words and draw the corresponding number of objects. Make sure the pages are in order from six to nine and attach them to their number books from one to five they made in Unit 3. Homework activity Ask pupils to complete Question 2 on page13 in the WB. Lesson 3 Pupil s Book page 20; Workbook page 14 Workbook Wall chart showing numerals and word numbers 1 to 9 matched with corresponding number of objects Cardboard numerals 1 to 9 Number word labels 1 to 9 Use wall chart to reinforce the ordering of numbers. Write the numbers on the chalkboard and remind pupils that 6 is the number before 7 as 7 is before 8, 8 is the number before 9. Then disarrange numbers 6 to 9 on the board and ask some pupils to come to the front to rearrange them. Do this activity with many children in the class. Hold up the cardboard numerals. Show pupils how to arrange these numerals in order of their magnitude by pointing to the starting number and counting on. Ask pupils to copy how the teacher writes the numbers in order. Ask some pupils to come to the front and practice writing the numerals 6 to 9 on the chalkboard according to their magnitude. Guide pupils if they begin to make mistakes. Pupils do a handwriting activity to practice writing the numerals and word numbers 6 to 9 in order in their books or on paper. Ask pupils to complete Exercise 2 on page 20 in the PB. Answers Exercise 2 6, 7, 8, 9 6, 7, 8, 9 6, 7, 8, 9 30 Unit 7: Writing and ordering figures 6 to 9
39 Worksheet 7 3. a) 9 b) 8 c) 8 d) Observe and listen to the pupils during the lesson. Look at their answers to the exercises in the PB and WB. Pupils should be able to write the numerals and number words 6 to 9 in their correct order. Extension activity Pupils should ask the ages of their friends and arrange them in order forwards and backwards (from highest to lowest number). Homework activity Ask pupils to complete Questions 3 to 6 of Worksheet 7 on page 14 in the WB. Lesson 4 Pupil's Book page 20; Workbook page 14 Workbook Wall chart showing numerals and word numbers 1 to 9 matched with corresponding number of objects Cardboard numerals 1 to 9 Number word labels 1 to 9 Use wall chart to reinforce the ordering of numbers in words. Write the word numbers on the chalkboard remind pupils that six is the number before seven as seven is before eight, eight is the number before nine. Then disarrange numbers six to nine on the board and ask some pupils to come to the front and rearrange them. Do this activity with many children in the class. Hold up the number word labels for six to nine. Show pupils how to arrange these numbers in order of their magnitude by pointing to the starting number and counting on. Ask pupils to copy how the teacher writes the numbers in order. Ask some pupils to come to the front and practice writing the numbers six to nine on the chalkboard according to their magnitude. Guide pupils if they begin to make mistakes. Pupils do a handwriting activity to practice writing the numbers six to nine in order in their books or on paper. Answers Worksheet 7 7. Six, seven, eight, nine Eight, seven, six, five 8. 6 / six 7 / seven 8 / eight 9 / nine Unit 7: Writing and ordering figures 6 to 9 31
40 Observe and listen to the pupils during the lesson. Look at their answers to the exercises in the WB Pupils should be able to write the numbers six to nine in their correct order. Extension activity Pupils should ask for their friend s age, write them in words and arrange them in order and also backward (from highest to least number). Homework activity Ask pupils to complete Questions 7 and 8 of Worksheet 7 on page 14 in the WB. Lesson 5 Pupil s Book page sweets or other small objects Wall chart showing numerals and word numbers 1 to 9 matched with corresponding number of objects Cardboard numerals 1 to 9 Number word labels 1 to 9 Ask four pupils to come to the front of the class. Give the first pupil (A) six sweets to hold, the second (B) nine sweets, the third (C) seven sweets and the fourth (D) eight sweets. (Beads, leaves or other small objects can be used instead of sweets). Ask pupils to count carefully the number of sweets they are holding. Ask each pupil in turn the number of sweets they each have. Have these four pupils all got the same number of sweets? Do any of these have same number? Does B have more sweets than A and D or less? Does C have more or less sweets than B? Does C have more or less sweets than A? Who has the most? Who has the least? Ask pupils to look at the example on page 21 of the PB. Point out to them that 6 is one more than 5, 7 is one more than 6 etc. up to 9 so that we can say that 7 is more than 6, 8 is more than 7, 9 is more than 8. In the same way 8 is less than 9, 7 is less than 8 and 6 is less than 7 hence 9 is more than all of them while 6 is the least. Ask pupils to complete Exercise 3 on page 21 in the PB. Answers Exercise 3 1. Circle 9 pencils 2. Circle 8 crayons 32 Unit 7: Writing and ordering figures 6 to 9
41 Observe and listen to the pupils during the lesson. Look at their answers to the exercises in the PB. Pupils should be able to say which number from 6 to 9 is more than the other and which is less than the other. Extension activity Ask pupils to compare their ages. Who is older and who is younger? Try to compare your age with about five of your mates. Are any of your mates the same age as you? Homework activity Ask pupils to find out which number is after 9. Unit 7: Writing and ordering figures 6 to 9 33
42 Unit 8 The number 10 Objectives By the end of this unit, pupils should be able to: Recognize 10 as a group Write the number 10 as a numeral and word number. Suggested Resources Pupils note books Objects to use as counters such as buttons, balls, fingers, bottle tops, toes, sticks Wall chart showing numerals and word numbers 1 to 10 Frequently asked questions Q What prior knowledge do the pupil s need? A Pupils need to be able to rote count and write the numbers in sequence from 1 to 9. They will use this knowledge to recognize 10 as one more than 9. Common errors pupils make Pupils may sometimes think that 10 is a number with two separate digits that could be pronounced one and zero. Show pupils that the two digits give a number called ten and written in figure 10. Evaluation guide Pupils to: 1. Write the numbers 1 to 10 in their note books. 2. Order numbers 1 to 10 according to their magnitude. Lesson 1 Pupil s Book page 22 Wall chart showing numerals and word numbers 1 to 10 Cardboard numerals Number word labels Start the lesson by telling pupils that 1 more than 9 is called ten written 10. Then gather different objects with some 8 in number, some 9 and some 10. Ask pupils to sort out the objects that are ten in number, that is, 1 more than nine. Say the number of objects in a mixed collection of balls, pencils, people, chair etc. Show pupils how to sort and classify objects up to 10 in number. Guide pupils if they begin to make mistakes. Lead pupils to classify objects that are 10 in a mixed collection. Show numbers 1 to 10 on the board and point out the number 10 among the numbers. Ask pupils to complete Exercise 1 on page 22 in the PB. Answers Exercise 1 Pencils, Books, Coconuts 34 Unit 8: The number 10
43 Pupils should be able to sort and classify up to 10 objects in a collection. Extension activity Observe and listen to the pupils during the lesson. Look at their answers to the exercises in the PB. Ask pupils to go around the school and collect ten objects such as leaves, stones, pebbles, buttons, bottle tops or other counters. Homework activity Pupils should mention four objects from home that can be up to 10 in number. Lesson 2 Pupil s Book page 23 Small objects to use as counters such as beads, pencils, stones Wall chart showing numerals and word numbers 1 to 10 Cardboard numerals Revise the reading and writing of numbers 1 to 9. Ask pupils to count 9 beads and add one more. Let them know that 9 and one more is called 10 and ten in words. Show a flashcard where 10 is written in both numeral and word to the pupils. Use the wall chart to reinforce the reading and writing of the number 10. Ask pupils to count out 10 objects like counters, beads, pencils, stones and say the number of objects. Show pupils how to read the numerals 10 as 1 and 0 put together. Lead them to see that 10 is a group and if you have 14, it means a group of ten and 4 units. Guide pupils if they begin to make mistakes. Ask pupils to read numbers 1 to 10 in forwards and backwards. They should also be able to identify and read numbers 1 to 10 in words. Ask pupils to complete Exercise 2 and the puzzle on page 23 in the PB. Answers Exercise 2 10 ten (repeated 4 times) Puzzle 10 groups of 10 objects Unit 8: The number 10 35
44 Observe and listen to the pupils during the lesson. Look at their answers to the exercises in the PB. Pupils should be able to read the numeral 10. They should be able to join 10 to the numbers 1 to 9 they have learnt in the previous units to form numbers 1 to 10 and write them in order of magnitude. Pupils should be able to read the numbers 1 to 10 backwards. To assist with this assessment, ask some pupils to come out and arrange numbers 1 to 10 in the order of magnitude using flashcards put on a table. Extension activity Ask pupils to make their own number books from 1 to 10. On each page, they write the numeral and the number word and draw the corresponding number of objects. Make sure that the pages are in order from 1 to 10 and attach them to their number books from 1 to 9 which they made in unit 7. Lesson 3 Pupil s Book page 23; Workbook page 15 Workbook Wall chart showing numerals and word numbers 1 to 10 Cardboard numerals 1 to 10 Number word labels 1 to 10 Revise the writing of numbers 1 to 9. Draw the number ten as dotted lines and have pupils practice writing in words and figures. Show a flashcard where 10 is written in both numeral and word to the pupils. Use Wall chart to reinforce the writing of number10. Show pupils how to write the numeral 10 as 1 and 0 put together. Ask pupils to copy numerals from 1 to 10 in their books. Guide pupils if they begin to make mistakes. Ask pupils to write the numbers 1 to 10 forwards and backwards. They should also be able to write the numbers 1 to 10 in words. Ask pupils to complete Exercise 3 on page 23 in the PB. Answers Exercise 3 1, 2, 3, 8, 10 Worksheet 8 1. Pupils complete the writing packets, 10 books, 10 pencils, 10 cars 36 Unit 8: The number 10
45 Observe and listen to the pupils during the lesson. Look at their answers to the exercises in the PB and WB. Pupils should be able to write the number 10 in numerals and as a word number. They should be able to join 10 to the numbers 1 to 9 they have learnt in the previous units to form numbers 1 to 10 and write them in order of magnitude. Pupils should be able to write the numbers 1 to10 backwards. To assist with this assessment, ask some pupils to come out and arrange numbers 1 to 10 in the order of their magnitude using flashcards put on a table. Homework activity Ask pupils to complete Questions 1 and 2 of Worksheet 8 on page 15 in the WB. Lesson 4 Pupil's Book page 22 This lesson focuses on consolidating what the pupils have learnt so far about writing numbers in numeral and word form. Draw a picture of different groups of objects from 1 object to 10 objects on the board. Ask pupils to work on their own to draw the objects and then write the number of objects in each group in words and in figures. Ensure that pupils write the numbers 1-10 correctly and that they correctly match up the number of items with the number in words and the number in figures. Observe pupils while they complete the activity and note which pupils struggle or make mistakes. Also note the first 5 pupils to complete the activity correctly. Ask these 5 pupils to partner with the pupils you previously identified needing help in order to complete the activity. Unit 8: The number 10 37
46 Unit 9 Place value Objectives By the end of this unit, pupils should be able to: Recognize 10 as a group Read and write numbers up to 20 Use the idea of place value limited to tens and units Understand the importance of 10 in the number system. Suggested Resources Pupils note books Small objects to use as counters such as buttons, balls, fingers, bottle tops, toes, sticks Workbook Wall chart showing numerals and word numbers 1 to 20 Items for collecting into groups of 10 Pots for putting groups of 10 into Number cards 0 to 20 Key word definitions place value: the value of the position or place of a digit in a number tens: the left-hand place value of a two-digit number units: the place value of a one-digit number Particular problem points are 20, 19 and 13,12 where the pattern in the number words changes. Pupils will often reverse the digits in two-digit numbers. They need to see the importance of writing them in correct order, as the position of the digits has meaning. The zero digit can cause all sorts of problems. To many pupils, zero represents nothing and can therefore be ignored. Pupils need to develop a solid understanding of the use of zero as an empty place holder. Evaluation guide Pupil s to: 1. Select ten objects from a collection. 2. Read and write from 10 to 20 in tens and units. 3. Read, write and order numbers up to 20. Frequently asked questions Q What prior knowledge do the pupils need? A Pupils will need to be able to rote count up to 10. They should also be able to read and write the numerals and number words up to 10 and understand the concept of 10 as a group. Common errors pupils make Pupils often confuse the number words thirteen and fifteen as they do not keep the pattern of other teen numbers. Counting backwards is more difficult than counting forwards and requires practice. Likewise, giving a number after a given number. 38 Unit 9: Place value
47 Lesson 1 Pupil s Book pages 24 and 25 Objects to use as counters such as beads, balls Wall chart showing numerals and word numbers 1 to 20 To start the lesson, pupils follow the teacher as he counts beyond 10. You could either let pupils find objects such as leaves or stones or other items in the classroom to make a set of 20. Give pupils number cards and ask them to match the right number of objects to each card. Ask pupils to check each other s counting. As numbers become larger, the greater the chance of making a mistake. Refer to PB page 24. Show pupils that 10 is a group to which other numbers are added to make 11, 12, 13 and so on by demonstrating using objects in groups of ten to which other objects are added to make the larger numbers. Write the numbers on the board in numeral and word form and ask pupils to copy them into their note books so that they learn to count, read and write from 10 to 20. Ask pupils to say which number is before or after a given number up to 20. Observe and listen to the pupils during the lesson. Look at their answers to the exercises in the PB. By asking specific questions to individual pupils, teachers can help clarify any issue they are not sure of. For example you can ask pupils to count from 1 to 20 or from 11 to 17 or in any range on which you require particular confirmation. To assist with assessment, provide pupils with two sets of cards, one showing the number words and one the numerals. Allow pupils to play the game of matching the numerals with their corresponding words. Pupils should be able to count, read and write up to 20 forwards and backwards. Pupils should understand tens and units. Extension activity Join two sets of cards together and play Snap. Shuffle the cards and deal them out between up to four players. Pupils take turns to place a card in front of them. If their card matches another player s card (this time it could be 11 and 11, 11 and eleven or eleven and eleven), They say snap and receive the other player s cards. The winner is the player who ends up with all the cards. Pupils should then complete Exercise 1 on page 25 of the PB. Answers Exercise Unit 9: Place value 39
48 Lesson 2 Pupil s Book page 24; Workbook page 16 Sticks or straws Wall chart showing numerals and word numbers 1 to 20 Talk to the class about place value and what it means. Explain the terms units, tens and place value. The place value of any number is the value of any digit in the number, and can be a number between 0 and 9. The place value is quantified in units and tens. This means that a 4 in the units place is the same as 4 single sticks. A 4 in the tens place is the same as 4 bundles of ten sticks. Illustrate this with sticks. Observe pupils and correct them when they make mistakes in their representations. Pupils should be able to understand and demonstrate place value using objects. Homework activity Pupils should complete Questions 1, 3 and 4 of Worksheet 9 on pages 16 and 17 in the WB. Work through the example on page 24 of the PB. Tell pupils to close their books while you work through the example. Write numbers from on the board and show how each number is broken down into place value. Ask different pupils to come and show the number, representing them with individual and bundles of 10 sticks. Answers 1. Worksheet 9 a) 11, 12, 13, 14, 15, 16 b) 13, 14, 15, 16, 17, 18 c) 12, 13, 14, 15, 16, 17 d) 15, 16, 17, 18, 19, 20 e) 16, 17, 18, 19, 20, 21 or 22, 21, 20, 19, 18, eleven, oranges, 11 twelve, nuts, 12 thirteen, balls, 13 fourteen, pineapples, 14 fifteen, avocados, 15 sixteen, mangoes, 16 twenty, apples, , 12, 13, 14, 15, 16, 17, 18, 19, Unit 9: Place value
49 Lesson 3 Pupil s Book page 26; Workbook page 16 Workbook Large 0 to 9 digit cards Place 0-9 digit cards in a circle on the floor, not in sequence. Mark the cards for 1 and 2 with a coloured pen. Those marked cards will be the tens digit, which is 1 and 2 in this case, and the others the single digits. Divide the class into two teams. First person from each team walks around the edge of the circle, on opposite sides. When the teacher calls stop the child places their toe on the card they are next to, and looking at both their card and the other person s card, calls out the digits between 10 and 20. The first person to call the correct number stays in while the other returns to the back of their team and the next in line joins the circle. Introduce the words place value and explain to the pupils that whichever place or position a digit has in a number tells you the value of that digit. Discuss with the pupils digits you can have in any column. Explain that a group of 11 objects is made up of 1 group of ten and 1 unit and so on. Guide the pupils to carry out similar exercises for 12, 13, 14,15, 16, 17, 18, 19, 20. Pupils should then complete Exercise 2 on page 26 of the PB. i) 19 cars j) 20 sweets Worksheet 9 2. a) 12 b) 15 c) 11 d) 18 Observe and listen to the pupils during the lesson. Look at their answers to the exercises in the PB and WB. Continuous observation during teaching will highlight whether pupils have grasped the concepts or not. Pupils should be able to separate a collection of 11 to 20 objects into tens and units. Extension activity Ask pupils to write numbers 11 to 20 on a piece of cardboard and to show how many tens and units are in each number. Homework activity Pupils should complete Question 2 of Worksheet 9 on page 16 of the WB. Answers Exercise 2 a) 11 pens b) 12 books c) 13 crayons d) 14 apples e) 15 cups f) 16 spoons g) 17 buttons h) 18 flowers Unit 9: Place value 41
50 Unit 10 Identifying and reading numbers 1 to 99 Objectives By the end of this unit, pupils should be able to: Identify and read numbers 1 99 correctly. Suggested Resources Pupils note books Flashcards of numbers Workbook Wall chart showing numbers 1-99 Frequently asked questions Q What prior knowledge do the pupils need? A Pupils should be able to count forwards and backwards up to 20. They should also be able to read and write numbers up to 20 in numerals and word numbers. Pupils should understand tens and units and place value. Common errors pupils make Pupils (and particularly the left-handed pupils) may still reverse digits when writing numbers. If pupils reverse digits, ask them to explain the number they have written in terms of groups of 10 and ones left over. Pupils themselves need to be able to identify when they have made a mistake and self-correct their work. Some pupils have difficulty with crossing the decades, for example, 69,70 or 89, 90. This problem becomes even more evident when pupils are counting backwards, for example 70, 69. Pupils need plenty of practice at decade crossovers. Most pupils find it helpful to see the numbers written down on a number line or a 100 square. Actually writing these numbers helps others, as does plenty of oral practice. Lesson 1 Pupil's Book page 28 Flashcards, Number labels 1 to 99 Wall chart showing numbers 1 to 99 Look at the numbers 1 to 99 on the wall chart together. Provide pupils with plenty of opportunities to identify numbers 1 to 99. Show them that when 1 is added to 9 we have 10, when 1 is added to 19 we have 20 and so on. Point out 10, 20, 30, 40, 50, up to 90 and explain how many tens and units are in each of the numbers in the 100-square chart. Use the 100 square to identify particular numbers. Ask the pupils to find the numbers 23 or 68 on the 100-square chart and so on. Pupils should be able to identify numbers 1 to 99 correctly. Pupils should be shown flashcards with numbers between 1 to 99 and say what number is raised up. If he is correct say buzz otherwise correct the pupil. Pay particular attention to the decade numbers and assist pupils to understand the number between one decade and the other. Evaluation guide Pupils to: 1. Identify and read correctly given numbers between 1 and Unit 10: Identifying and reading numbers 1 to 99
51 Observe and listen to pupils during the lesson. Pupils should be able to identify numbers 1 to 99 correctly. Pupils should be able to say which number is on the flashcard held by the teacher and to raise the same number card. Extension activity Use two sets of the digit cards from 0 to 9. Turn over two cards to make a two-digit number. Say the number and the number one more or one less than the number. Repeat the activity but say the number which is 10 more or 10 less than the given number in the range 1 to 99. Repeat until all the digit cards have been used. Lesson 2 Pupil s Book page 29; Workbook pages Workbook Flashcards, Number labels 1 to 99 Wall chart showing number 1 to 99 Explain how many tens and units in each of the numbers in the 100-square chart. Ask the pupils to specific numbers on the 100-square chart. Guide the pupils to read the numbers 1 to 99 by rote from the 100-square chart. When reading the numbers and they reach 10, 20, 30, 40, 50 60, 70 80, 90 let the teacher say buzz or any other fun word you choose instead of the decade numbers. Let the pupils also try to read backward from 99. Repeat this task many times and with many pupils. Also try to say buzz at every fifth number, that is, 5,10,15,20,25, etc. Pupils do this counting up to 95 and try counting back from 95. Skip reading sequences provide pupils with useful strategies for reading larger quantities and build a foundation for multiplication tables. Pupils should be able to read in tens from 1 to 99 correctly and accurately. Pupils should read in tens forwards and backwards from any number for example, 4, 14, 24, 34, 44, etc. They should complete Exercise 1 and the puzzle on page 29 in the PB. Answers Exercise 1 a) 28 b) 41 Puzzle 100 Unit 10: Identifying and reading numbers 1 to 99 43
52 Worksheet , 20, 30, 40, 50, 60, 70, 80, a) 51 b) 77 c) 65 d) 98 Observe and listen to the pupils during the lesson. Look at their answers to the exercises in the PB and WB. Pupils should be able to read numbers 1 to 99 correctly. They should be able to read forwards and backwards in 10s and 5s in the range 1 to 99. They should also be able to read forwards and backwards from any number. Before proceeding from this unit, pupils need to be able to read 1 more than 99 which is 100. Extension activity Challenge pupils to complete the puzzle on page 29 in the Pupil's Book. Homework activity Pupils should be able to spell the words of the decade numbers and practice. They should also complete Questions 1 and 2 of Worksheet 10 on pages 18 and 19 in the WB. Lesson 3 Pupil s Book page 29; Workbook page 19 Workbook Flashcards, Number labels 1 to 99 Use two sets of the digit cards from 0 to 9. Turn over two cards to make a two-digit number. Say the number and the number one more or one less than the number. Repeat the activity but say the number which is 10 more or 10 less than the given number in the range 1 to 99. Repeat until all the digit cards have been used. Skip reading sequences provide pupils with useful strategies for reading larger quantities and builds foundation for multiplication tables. Pupils should be able to read in tens from 1 to 99 correctly and read them accurately. Pupils should read forward and backward from any number say 4, 14, 24, 34, 44, etc. They should complete Exercise 2 on page 29 in the PB. Answers Exercise 2 1. a) 40 b) 64 c) 80 d) a) 63 b) 98 c) 49 d) 79 Worksheet Pupils count aloud 5. Pupils count aloud 6 Pupils work with a partner and read the numbers aloud 44 Unit 10: Identifying and reading numbers 1 to 99
53 Observe and listen to the pupils during the lesson. Look at their answers to the exercises in the PB and WB. Pupils should be able to read numbers 1 to 99 correctly. They should be able to read forward and backwards in 10s, and 5s in the range 1 to 99. They should also be able to read forward and backwards from any number. Before proceeding from this unit, pupils need to be able to read 1 more than 99 which is 100. Homework activity Pupils should practice spelling the decade numbers. They should also complete Questions 3, 5 and 6 of Worksheet 10 on page 19 in the WB. Lesson 4 Pupil's Book page 28 Ask each pupil to draw a blank table in their book with 10 rows and 10 columns. The focus of this lesson is to consolidate the numbers 1 to 99. Pupils must fill in the numbers 1 to 99 on the blank table they drew. Observe and listen to the pupils during the lesson. Pupils should be able to write the numbers 1 to 99 in figures. Check the table drawn by each pupil. Make sure the numbers all appear and in the correct order. Extension activity Pupils fill in the bottom-right square of their table, after the number 99. Homework activity Pupils who did not correctly write the numbers 1 to 99 can take the teacher s corrections and prepare a correct table. Unit 10: Identifying and reading numbers 1 to 99 45
54 Unit 11 Writing of numbers 1 to 99 Objectives By the end of this unit, pupils should be able to: Write correctly the numbers 1to 99. Suggested Resources Pupils note books Flashcards of numbers Wall chart (100-square chart) Frequently asked questions Q What prior knowledge do the pupils need? A Pupils should be able to count forwards and backwards in the range 1 to 99 in 1s, 5s, and 10s. Pupils should be able to identify and read numbers in the range 1 to 99. Pupils should have understanding of how numbers are written in terms of groups of 10 and one left over (early place value knowledge). The unit extends pupil s knowledge of numbers within the range of 1 to 99, counting a set and understanding the quantity value. It also further explores the way numbers are written using pupils early knowledge about place value and groups of 10. Evaluation guide Pupils to: 1. Write and order correctly numbers between 1 and 99 as numerals and word numbers. Lesson 1 Pupil s Book page 30; Workbook page 20 Workbook Scissors Wall chart showing 100-square numbers Ask pupils to locate numbers on the 100 square by following instructions such as: Find the number that is 2 tens and 4 units. What is the number? What number is 10 more than 46? What number is 10 less than 97? What number is 20 more than/ less than? Challenge pupils to ask each other questions. Make some blank 100 squares and ask pupils to fill in all the numbers. Cut the 100 squares along the lines into different shapes to make a jigsaw puzzle. Pupils then reassemble their 100 squares. They can swap jigsaw puzzles with a friend and assemble the new one. (Before they swap, let pupils write their name or initials on each piece of their jigsaw puzzle.) Pupils then answer question 1 of Worksheet 11on page 20 in the WB. Answers Worksheet All numbers omitted. Teacher to guide. 46 Unit 11: Writing of numbers 1 to 99
55 Observe and listen to the pupils during the lesson. Look at their answers to the exercises in the PB and WB. Observe how pupils assemble the 100 squares jigsaw puzzle to assess their understanding of how a 100 square works. Pupils should be able to give a number one more and one less than any number in the range 1 to 99. Pupils should also be able to give the number 10 more and 10 less than any number in the range 1 to 99. Extension activity Play a game involving counting in 1s, 5s and 10s. Homework activity Pupils should complete Question 1 on of Worksheet 11 on page 20 in the WB. Lesson 2 Pupil s Book page 31; Workbook pages 20 and 21 Workbook Flashcards with numerals 0-99 written on them Cards with number words one to nine and the decade numbers ten twenty, thirty, forty, fifty, sixty, seventy, eighty, ninety written on them Wall chart showing 100-square numbers Draw a grid on the board and invite the pupils to give a 2-digit number to be written in each square. Place the decade word cards face down spread out on one table and the 1 to 9 cards face down spread out on another table. Ask a pupil to select a decade number and another pupil to select a 1 to 9 number. Hold the two cards up together to make a 2-digit number. Pupils read the number and if the number is in one grid they can cross it off. Once a card has been used it cannot be used again. The pupils will need to think carefully about the numbers they put on the grid. Pupils can draw a grid in their books and choose nine two digit numbers for themselves and play the game like a bingo game. The starter activity also provides much of the as it provides the opportunity for reading number words. Children also need to be able to write the number words as well as the digits. The game could be played with the pupils writing the number words on their game board and two digit numeral cards being drawn from a bag or box. When the pupil has a matching number word to a numeral they can cross it off. Pupils should complete Exercises 1 and 2 on page 31 in the PB. Unit 11: Writing of numbers 1 to 99 47
56 Answers Exercise 1 Twenty-nine, thirty-three, fifty-seven, eighty-two, seventy-five, twenty-four, ninety-five. Exercise 2 25, 61, 43, 79, 84, 93, 37, 99 Worksheet a) 34 (Thirty-four) b) 35 (Thirty-five) c) 66 (Sixty-six) d) 72 (Seventy-two) e) 91 (Ninety-one) 3. a) Twenty-one b) Thirty-five c) Seventy-three d) Eighty-nine e) Ninety-six f) Sixty-seven Observe the pupils and their number grids during the and during the lesson. Look at their answers to the exercises in the PB and WB. Pupils should be able to read and write numerals 1-99 correctly. They should also be able to write numbers 1-99 in words. Extension activity Use two sets of the digit cards from 0 to 9. Turn over two cards to make a two-digit number. Write the number and the number one more or one less than the number. Repeat the activity but write the number which is 10 more or 10 less than the given number in the range 1 to 99. Repeat until all the digit cards have been used. Homework activity Pupils should already be able to spell and write zero to ten. Ask them to practise spelling the decade numbers correctly. Pupils to answer questions 2 and 3 of Worksheet 11 on page 20 and 21 in the WB. Lesson 3 Pupil's Book page 30 Flashcards with numerals 0 to 99 written on them Number strips Cards with number words one to nine and the decade numbers ten twenty, thirty, forty, fifty, sixty, seventy, eighty, ninety written on them. Wall chart showing 100-square numbers Play the game Squeeze. The object of this game is for the pupils to identify the mystery number, selected by the teacher by asking questions. The teacher has two markers which initially are placed at either end of numbers 1 to 100 (in a 100 square chart.) The pupils might ask Is the number more than 30? If it is, the teacher moves the marker from 1 to thirty so the mystery number is now between 30 and 100. The game continues until the mystery number is identified by being squeezed between the pegs. Challenge the pupils to find the mystery number in less than ten questions (quite easy) or less than 5 questions (not too easy). Draw a series of 10 boxes on the board and write a number in the first and last box. Point to any of the empty boxes and ask the pupils which number would go in the box. For example, write 63 in the first box and 72 in the last box. Point to the box next to 63 and ask What number goes here? When a child responds with the correct number it is important to follow up with the question How do you know that? The response you are looking for is Because 64 is one more than 63. Use empty boxes that will require the pupil to respond using knowledge of number before as well as number after and number between. Hand out a number strip to each group or pair. Each strip should have a different start and end number so they can be swapped to provide another exercise. One person in the group or pair acts as teacher and asks what number will go here. The 48 Unit 11: Writing of numbers 1 to 99
57 partner of the group must identify the number and give the reasons why the number is correct using the language before, after, more or less than. Ask pupils to write the numbers below in order of their magnitude or from lowest to highest: What is 1 more than a) 18 b) 59 c) 32 d) 18 in numerals? 5. What is one less than a) 34 b) 47 c) 90 d) 40 in words? 6. Write a number between a) 95 and 97 b) 39 and 41 c) 84 and 86 Observe and listen to the pupils during the lesson. Look at their answers to the exercises given in this lesson. Spot check- ask individuals at any time Give me the number before or after... or Give me number one more and less than a given number in the range 1 to 99. Pupils should be able to give number before and after a given number in the range 1 to 100. Extension activity Use numbers larger than 100 on the paper strips. Homework activity Pupils should write numbers 1 to 100 as a 100 square chart from home. Answers Lesson activity a) 19 b) 60 c) 33 d) a) thirty-three b) forty-six c) eighty-nine d) thirty-nine 6. a) 96 b) 40 c) 85 Unit 11: Writing of numbers 1 to 99 49
58 Lesson 4 Pupil's Book page 30 Buttons or similar small objects to create pairs Wall chart showing 100-square numbers with even numbers circled Ask the children to find a partner. Does everyone have a partner or is there an odd one left over? How many boys are in the class? Record the number on the board. Ask the girls to find a partner. Does everyone have a partner or is there an odd one left over? How many girls are in the class? Record the number on the board. You may have had all odd numbers or all even numbers or a mixture of both. Introduce the terms: even number- a number that can be arranged in pairs; odd number- a number that when arranged in pairs has one odd one left over. Look at the wall chart 100-square and point out the pattern of the even numbers is 2, 4, 6, 8, 10. The children are already familiar with this counting sequence. Ask if they can predict the next even number or odd numbers. Write them on the board: 12, 14, 16, 18, 20, 22, 24, 26, 28, 30, - continue at least up to 30.Direct pupils to look carefully at the last digit in each number and say what they notice. Pupils need to generalize that an even number always ends in 0,2,4,6 or 8, while odd numbers always end in 1,3,5,7, or 9. Pupils need to try pairing up items as they move towards generalizing the rule. Answers Question above 1. Circle 42, 44, 46, 48, 50, 52, 54, 56, 58, Circle 51, 23, 3, 55, 77 Observe and listen to the pupils during the lesson. Look at their answers to the exercises given in this lesson. Spot check - ask at any time when using numbers Is this an odd or even number? How do you know? Children who do not focus on the right hand digit need to count out, write the number and physically pair the items. It is a good idea if you ask the pupils to underline the right hand digit to make sure they are focusing on the right one. Pupils should be able to identify even numbers and differentiate them from odd numbers. Extension activity Ask pupils to write numbers 50 to 99 and circle all the even numbers in the range. Ask pupils Do you know that other numbers not circled are odd numbers? Ask them to look at the right hand digits of numbers not circled. What are they? Homework activity Pupils should go on an even and odd numbers hunt and make a record of wherever they see the even numbers and the odd numbers around the school. Pupils should answer the following questions: 1. Write numbers 41 to 60 and circle all the even numbers. 2. Circle all the odd numbers in Unit 11: Writing of numbers 1 to 99
59 Unit 12 Fractions Objectives By the end of this unit, pupils should be able to: Identify a half and a quarter using concrete objects Identify a half and a quarter using shapes Recognize and use the symbols 1 2 and 1 4 Understand fractions as numbers between whole numbers Understand fractions as part of a whole Construct the whole from a given part. Suggested Resources Scissors Scrap paper Small items like buttons oranges apples Labels half and one quarter. Key word definitions fraction: an exact part of something half: one of two equal parts of something symbol: a sign that has a particular meaning whole: complete, not broken into pieces quarter: one of four equal parts of something Common errors pupils make Prior to learning about fractions, and sometimes while being taught fractions pupils construct many misconceptions. Their knowledge of numbers so far has been limited to whole numbers and therefore they do not conceptualise numbers between numbers. They know an object could be broken into parts but then each part becomes a whole. Pupils re-unitise and create whole numbers again. A biscuit is broken into half but children now see the biscuit as two whole parts of biscuits. The one biscuit has disappeared to be replaced by two different sized biscuits. The concept of half the biscuit is lost. Much early fractional teaching does not challenge pupils understanding of parts of a whole. Exercises in this unit will endeavour to challenge pupils fractional thinking. The symbol 1 is often misunderstood, and often 2 the misconception about the symbol is taught. It is important for the teacher to fully understand the meaning of the numerator and denominator and take pupils beyond unit fractions as the opportunities arise. If pupils are only exposed to unit fractions they come to believe that the denominator 2 means two equal parts, which is correct, but they also believe that the numerator 1 refers to 1 whole which is incorrect. Teachers who explain the symbol to pupils as 1 whole divided into 2 parts are creating the misconception, likewise 1 whole divided into 4 parts for 1. The numerator refers to the number 4 of parts selected. So you have 1, 2 etc. 2 2 and 1, 2, 3, Exercises in this unit will avoid this misconception. Pupils will even struggle with the idea of which is larger, 1 or 1. Pupils who have not yet grasped 2 4 the idea of a whole being broken into parts of the whole and re-unitise into 2 bits and 4 bits will see 4 as larger than 2. They are still thinking in whole numbers where 4 is larger than 2. Some pupils may also see 1 as a variable that is sometimes 2 larger and sometimes smaller than 1. Pupils 4 who have learnt 1 of 4 is 2 and 1 of 10 is 5 see changing, sometimes it is 2 and it is sometimes 5. So sometimes 1 is 1 and sometimes 1 is So therefore is sometimes a quarter a quarter is larger than 1 and sometimes 1 is larger 2 2 than1. It is 4 therefore important to understand a fraction as a number to give a result. Unit 12: Fractions 51
60 Evaluation guide Pupils to: 1. Recognize a half and a quarter as fractions. They should be able to understand their symbols and use them appropriately. 2. Cut a given object and shape into given parts and label them appropriately. 3. Fold shapes into halves and quarters, colour a half or a quarter and give examples of how things can be shared into 1 2 and 1 4. Lesson 1 Pupil's Book page 32; Workbook page 22 Workbook A strip of paper (about 50cm by 10cm) Scissors Scrap paper Oranges (brought by pupils) Hold up an orange and tell the pupils that you are going to cut it into two equal parts to share between two of the pupils. Slowly run the knife through the orange along its half and cut. Ask the pupils whether it was a fair cut. Discuss with pupils how they could check to see whether it is fair. Tell them that each part is a half ( 1 2 ). Develop the idea of halving, bringing pupils to the cutting or folding of a paper in a shape to create equal parts. Ask if they could think of another way you could have made sure the cut would be fair, so that each part was the same size or length. Record on both half the symbol 1 and the word 2 half. Introduce the word denominator and discuss why it is 2. The denominator gives the number of equal parts that one whole is divided into. Show on the board = 2 = 1. Introduce the word numerator and explain that the numerator tells you how many of the parts you have. Ask pupils to cut their own oranges which the teacher had asked them to bring to school a day before. Watch as pupils cut into halves and guide them where there is need. Answers Worksheet Draw a line to cut the shape into two equal parts and colour one part with green crayon. (a half) Unit 12: Fractions
61 Observe and listen to the pupils during the lesson. Look at their answers to the exercises in the Pupil s. Pupils should be able to find half of a regular shape like a rectangle, square or circle by folding. They should be able to use the symbols 1 2. Extension activity Provide children with cut outs of a hexagon, an equilateral triangle, an isosceles triangle and ask them to find how many different ways they can fold them into halves. Homework activity Pupils to answer questions 1 and 2 of Worksheet 12 on page 22 in the WB. Lesson 2 Pupil s Book page 33 A strip of paper (about 50cm by 10cm) Scissors Scrap paper Orange Hold up an orange and tell the pupils that you are going to cut it into two equal parts. Slowly run the knife through the orange along its half and cut. Ask the pupils whether it was a fair cut. Discuss with pupils how they could check to see whether it is fair. Tell them that each part is a half ( 1 2 ). Now further cut each half into two to have four parts. Ask how many parts you now have from a whole orange. Let them know that each part is called a quarter ( 1 4 ). Develop the idea of finding a quarter, asking pupils to cut or fold paper into 2 equal parts. Now cut or fold each half into two equal parts. How many parts do you now have? You now have four equal parts. Record on each of the four parts one quarter with symbol 1. Just like the explanation on half, tell 4 the pupils why the denominator of a quarter is 4. The denominator gives the number of equal parts that one whole is divided into. Show on the board = = 1. Introduce the word numerator and explain that the numerator tells you how many of the parts you have. Show that the numerator is 1 and the denominator is 4. Pupils should do exercises 1 and 2 and the puzzle on page 33 in the Pupil's Book (PB). Unit 12: Fractions 53
62 Answers Exercise 1 1. Colour one part of the apple cut into two. Colour one part of the paper folded in two 2. Colour 2 of the 8 flowers. Colour 2 parts of the ruler divided into 4 parts Exercise 2 1. Colour 1 of the 2 rectangles Colour 1 of the 2 triangles 2. Colour 1 of the quadrants Puzzle 4 parts Observe and listen to the pupils during the lesson. Look at their answers to the exercises in the PB. Pupils should be able to find half and quarter of a regular shape like rectangle, square and circle by folding. They should be able to use the symbols 1 2 and 1 4. Extension activity Provide children with cut outs of a hexagon, an equilateral triangle, an isosceles triangle and ask them to find how many different ways they can fold them into halves. Homework activity Ask pupils to further divide each of the four parts into two equal parts. How many parts do you now have and what symbol will you write for each part? Lesson 3 Pupil's Book page 32; Workbook page 23 Workbook Small items for sharing into half - buttons, shells, seeds Select a group of up to 20 pupils, making sure you have an even number. Explain to the pupils you want to make the group into two groups of the same number of pupils. Ask them how you could do this. The most likely reply is to move them one at a time into each group: one for group A and one for group B until all the pupils have been allocated to a group. Develop the idea of dividing into two equal sets as halving a group of objects. Ask pupils to take a group of 10 children and ask If I divide them into two equal groups how many will there be in each group? Some children may need to count and divide physically while some will say the answer straight away. Repeat the process several times with different numbers to reinforce the idea of halving. Answers Worksheet oranges Observe and listen to the pupils during the lesson. Look at their answers to the exercises in the WB. Pupils should be able to find half of a set of objects by sharing. They should be able to understand that finding half of a set is the same as making two equal sets. 54 Unit 12: Fractions
63 Extension activity Extend the pupil s thinking by asking If I had 7 oranges to share between two friends, how many oranges would they have each? Obviously you cannot give each child the same number of whole oranges. Ask the pupils How can we solve this problem so that the friends have exactly the same amount of orange each? You are trying to lead the pupils into the idea that the remaining odd orange can be cut into two equal parts so that each now have oranges. Homework activity Ask pupils to share 25 oranges among two friends. How many will each of them take? Pupils should answer question 3 of Worksheet 12 on page 23 in the WB. Lesson 4 Pupil's Book page 32; Workbook page 23 Workbook Small items for sharing into quarters - buttons, shells, seeds Select a group of up to 20 pupils, making sure you have an even number. Explain to the pupils you want to make the group into four equal groups of the same number of pupils. Ask them how you could do this. The most likely reply is to move them one at a time into each group: one for group A and one for group B, one for group C and one for group D until all the pupils have been allocated to a group. Give the pupils practice in sharing into 4 equal sets by giving them items to share. Initially give them sets that are multiples of 4 so that the sharing will always result in a whole number. Now introduce sharing of say 13 oranges. Ask: How can you share this spare orange? Pupils need to come to the idea that the extra orange could be cut into four equal parts or quarters and shared so that each person have 3 1 oranges. Extend the idea 4 to sharing of 14 oranges and explain how the set of 2 left over could be shared i.e. two pupils share one orange to have 3 1 each. 2 Answers Worksheet Pupils circle 4 pencils, 1 books, 2 cups. 5. One quarter, or 1 4. Unit 12: Fractions 55
64 Observe and listen to the pupils during the lesson. Look at their answers to the exercises in the WB. Observe and listen to discussion during teaching. Pupils should be able to find a quarter of a set of objects by sharing. They should be able to understand that finding a quarter of a set is the same as making four equal sets. Extension activity Extend the pupil s thinking by asking If I had 15 oranges to share between four friends, how many oranges would they have each? Obviously you cannot give each child the same number of whole oranges. Ask the pupils How can we solve this problem so that the friends have exactly the same amount of orange each? Homework activity Ask pupils to share 25 oranges among two friends. How many will each of them take? Pupils should answer questions 4 and 5 of Worksheet 12 on page 23 in the WB. 56 Unit 12: Fractions
65 Term 1 Project 1 Lesson 1 Two slices of bread Knife Two plates Pupil s Book page 34; Learning half and quarter (1) To start this lesson, allow the pupils to wash their hands very well as they are about handling food. Tell them that this is good for their health. This lesson is a practical lesson so each child should hold a slice of bread which they are to follow instruction to learn more about half and a quarter as a follow up to what they already learnt in the previous unit. Pupils should carefully run the knife along the middle of the slice of bread with them. Guide them to recall that each part is called a half. The symbol is 1 2. Pupils should show their cut outs to the teacher to assess the correctness. The teacher corrects where necessary. Observe pupils as they work, asking questions where necessary. If pupils have followed instructions carefully and cut accurately they should have two equal parts first and then four parts next. Pupils should be able to understand that each part of two equal parts is a half written 1. They should also be able to know 2 that each part of the four equal parts is 1. 4 Extension activity Get two strips of cardboard measuring 50cm by 10cm. Ask pupils to divide one into two equal part and write a half on each part in symbol and in word. Cut the other one into four and write a quarter on each part. Show your work to the teacher to correct where necessary. Discuss with the pupils how they could check that the cut was fair. That is, put one part on the other to be sure they measure same. Pupils should further cut each half into two equal parts. You now have four parts so that each part is called a quarter. The symbol is 1 4. Read together with the pupils the steps to follow in building the idea of a half and a quarter. Pupils are to follow the instruction of the teacher to compliment the idea of halving and quarter. They cut the slice of bread into two equal parts, call each part a half. Further cut each of the two parts into two equal parts to now have four equal parts. Each part of the four parts is called a quarter. Ask pupils whether there any other way they could have cut the slice of bread to have four parts. Term 1: Project 1 57
66 Lesson 2 Pupil s Book page 35; Learning half and quarter (2) Two cardboard of sizes 10cm by 8cm Strips of cardboard 50cm x 10cm, 2 for each pupil Scissors To start this lesson, hold up a piece of cardboard 10cm by 8cm and ask pupils to follow instructions read together earlier. This lesson is a practical lesson so each child should hold theirown cardboard. Tell the pupils to fold the first piece of cardboard into two equal parts. Show the pupils that the edges of the cardboard have to meet. Ask pupils to write half and its symbol 1 on each part. 2 Observe pupils as they work, asking questions where necessary. If pupils have followed instructions carefully and fold accurately they should have two equal parts first and then four parts next. Pupils should be able to understand that each part of two equal parts is a half written 1. They should also be able to know 2 that each part of the four equal parts is 1. 4 Support activity Give pupils two strips of cardboard measuring 50cm by 10cm. Ask pupils to fold one into two equal parts and write a half on each part in symbol and in word. Fold the other one into four and write a quarter on each part in symbol and in word. Teacher to correct where necessary. Discuss with the pupils that they can check that their fold was correct by putting one side against the other to measure if they are the same.. Pupils should then fold the second piece of cardboard into two equal parts as before. They should fold the two equal parts into another two equal parts. They will now havet four equal parts. Each of the four parts is called a quarter. The symbol is 1 4. Write a quarter and its symbol on each part. Develop the idea of half and quarter by folding to create two equal parts and four equal parts respectively. Instruct pupils to fold their cardboard into two equal parts and call each part a half. Take the second cardboard, fold it into two equal parts and further fold each of the two parts into two equal parts to now have four equal parts. Write a quarter on each part and its symbol. Ask pupils whether there is any other way they could have folded the cardboard to have four parts. Pupils should show their results to their teacher for checking. The teacher corrects where necessary. 58 Term 1: Project 1
67 Term 1 Lesson 1 Pupil s Book page 36 Objectives This assessment is an assessment of work covered in units one, two, three, four, five, up to twelve. This assessment is designed to assess the pupils mathematical understanding and not their reading ability. It is also important that it is completed by individuals and not with the support of others as this would uncover any difficulties a pupil may be having with particular concepts. It is therefore best carried out with small groups of pupils under the guidance of the teacher who should read each question carefully to the pupils and give them time to complete the question before moving on to the next question. A more able group within the class may be able to complete the assessment without the need for the teacher to read the questions. However observing pupils while they are completing the assessment provides further information about these pupils. Guidelines On completion of the assessment, teachers should look for both correct answers and mistakes made by individuals. They should also be checking to see if there is a pattern in terms of any particular question causing a significant number of pupils difficulties. By analysing the results of an assessment, teachers can identify weakness in individuals and so provide the necessary support and also identify strengths of individuals and provide them with more challenging activities. They will also be able to identify any weaknesses in their teaching programme and make adjustments as necessary. For this assessment, pupils should be able to identify, read and write numbers up to ninetynine. They should be able to look at any two-digit number and say how many groups of ten and units could be made from the number. If they are still reliant on making the groups and then counting the groups further work is required making specific links to the way numbers are written and expanding numbers into tens and units. Pupils should be able to count and write forwards and backwards in 1s, 2s, 5s and 10s. They should also be able to read and write numbers from zero to ninety-nine in words. Pupils should be able to read, write and order numbers between one and ninety-nine. They should answer questions 1 to 6 of Term 1. Answers to 1. Reading 1 to 9 aloud 2. One,two,three,four,five,six,seven,eight,nine. 3. 4, 5, , 2, , 17, 32, 50, tens and 7 units 17 1 ten and 7 units 32 3 tens and 2 units 50 5 tens and 0 units 6 0 tens and 6 units Term 1: 59
68 Lesson 2 Pupil s Book page 37 Objectives This assessment is an assessment of work covered in units one, two, three, four, five, up to twelve.this assessment is designed to assess the pupils mathematical understanding and not their reading ability. It is also important that it is completed by individuals and not with the support of others as this would uncover any difficulties a pupil may be having with particular concepts. It is therefore best carried out with small groups of pupils under the guidance of the teacher who should read each question carefully to the pupils and give them time to complete the question before moving on to the next question. A more able group within the class may be able to complete the assessment without the need for the teacher to read the questions. However observing pupils while they are completing the assessment provides further information about these pupils. Guidelines On completion of the assessment, teachers should look for both correct answers and mistakes made by individuals. They should also be checking to see if there is a pattern in terms of any particular question causing a significant number of pupils difficulties. An analysis of the results of an assessment enables teachers to identify any weaknesses so that they can provide more challenging activities. Teachers are also able to identify any weakness in their teaching programme make adjustments as necessary. Pupils should be able to complete all the Questions without assistance. Take note of where pupils struggle or ask for help, and revise those topics as needed. Pupils should be able to find missing numbers between one and ninety-nine. They should answer questions 7 and 8 of Term 1. Answers 7. 23, 24, 25, 27, 28 36, 37, 38, 39, 41, 42 60, 61, 63, 64, 65, 66 71, 72, 74, 75, , 97, 94, 93 44, 41, 40, 39 69, 68, 66, 65, 63 21, 19, 18, 17, 16, Term 1:
69 Unit 13 Adding numbers with a sum less than five Objectives By the end of this unit, pupils should be able to: Add two whole numbers from 1 to 3 with sum less than 5. Suggested resources Small items to use as counters, such as beads, buttons, coins Key word definitions add: combine two or more numbers to make a larger number addition: finding the total, or sum, by combining two or more numbers sum: the result, or answer, when adding two or more numbers less: smaller counters: small items we use to help us count and work with numbers number line: a line with numbers placed in their correct positions plus sign (+): the symbol used for addition equal sign (=): the symbol used to show when two things are the same value: an amount Q Does it matter which number I start with when adding numbers? A The principle is that it does not matter with which number you start, as the answer will be the same. It is a core mathematical notion that addition is commutative. Common errors pupils make When using a number line pupils count the jumps instead of saying the numbers on the number line: Pupils will often start the count from the first number in the equation instead of the number after it in the case of addition, so their answers are subsequently one too few. If you notice a pattern in pupils answers check their understanding of counting and the use of the number line. Evaluation guide Pupils to: 1. Add two whole numbers from 1 to 3 with sum less than 5. Frequently asked questions Q What prior knowledge do the pupils need? A Pupils need to be able to count forwards and backwards from 1 to 5. Q Should I use mathematical symbols straight away? A Mathematical symbols represent a concept and it is important that pupils understand the concept in a language they know well. When introducing the symbols it is important to use pupil-friendly language alongside the appropriate mathematical language, as the aim is to extend pupils language to include mathematical language. Unit 13: Adding numbers with a sum less than five 61
70 Lesson 1 Pupil s book page 38 Small items to use as counters, such as beads, buttons, coins Pupil Book. Let pupils make up a group of three pupils and a group of two pupils. Ask: How many pupils are there altogether? Repeat this activity, using different numbers for the groups. Do not let the totals exceed 5. Give pupils a handful of counters and ask them to start with 1 counter and to add or combine it to 2 counters what is the total number of counters? Repeat starting with 1 counter and adding 1, 3 and then 4 counters, then start with 2 counters and add 1, 2, 3 and 4 counters etc. Explain that we are adding counters and when we add, numbers get larger. The sum, or total, is always larger than each of the numbers we added. Give the pupils plenty of opportunity to join two sets together. Make cards or write on the chalk board examples like 3 and 1 and then ask pupils to model the sum with their counters. Practical activity is very important for pupils to understand the concept of joining two sets together before introducing mathematical symbols. Answers Exercise Observe and listen to the pupils during the lesson. Look at their answers to the exercises in the PB. Pupils should be able to add two whole numbers from 1 to 3 with a sum less than 5, and they should be able to count on to solve addition problems. Extension activity Pupils can complete the challenge on page 38 in the PB. Support activity Set out an assortment of small objects and then guide pupils to group the objects in numbers less than five. Now guide them to combine different piles and count the total number of objects in the bigger pile, not letting the sum exceed five each time. Work through the example on page 38 in the PB and then ask pupils to practice a few more of their own addition sums using the counters, with sums not exceeding 5. Complete Exercise 1 on page 38 in the PB, allowing pupils to use counters to help them solve the problems. Ask them to illustrate their answer and write down a number for the sum each time. 62 Unit 13: Adding numbers with a sum less than five
71 Lesson 2 Pupil s Book page 39 Small items to use as counters, such as beads, buttons, coins Draw a number line on the floor and allow pupils physically to move themselves forwards and back along the number line, for example, stand on number 2, make 2 jumps along the number line. The pupil physically jumps to number 3, and then to number 4. (If this is not possible then pupils can move their pencils along a number line drawn in their books or on the chalk board.) Introduce recording of = 5 using pupilfriendly language and examples, such as 3 eggs and 2 more eggs give me a total of 5 eggs; 3 jumps and 2 more jumps take me to number 5 on the number line. Explain to pupils that the plus sign (+) shows that we are adding or combining two numbers and the equals sign (=) shows when we are writing the answer, or the sum. Demonstrate using the number line - start with your pencil on number 3 and jump along the number line saying the numbers on the number line and not counting the jumps. To add on a number line, pupils need to be saying 4, 5, with the numbers 4 and 5 representing the +2. This is a significant step on from counting 3 objects as 1, 2, 3 and counting 2 objects as 1, 2 and then putting them together and counting 1, 2, 3, 4, 5. Answers Exercise = = = = 5 Observe and listen to the pupils during the lesson. Ask them simple addition questions and listen to their responses, particularly how they solved the problem and not merely whether they got a correct answer. Look at their answers to the exercises in the PB. Pupils should be able to add two whole numbers from 1 to 3 with a sum less than 5. Extension activity Ask pupils to make up their own sums with numbers between 1 and 5. They can illustrate them using pictures of items or using a number line. Support activity Use of a number line provides a visual image of addition. Give pupils extra help with how to use it to add two numbers. Once they are proficient at using it they should be encouraged to use the image of the number line (that is, they should see the line in their heads) to solve addition problems. Use the number line to interpret addition stories such as 3 pupils are in the playground and 2 more pupils come to play. Model the mathematical equation and tell the number story. Write another equation and ask the pupils to make up a number story for that equation. Complete Exercise 2 on page 39 in the PB. Unit 13: Adding numbers with a sum less than five 63
72 Lesson 3 Pupil's Book page 13; Workbook page 24 Workbook Revise the work covered in Unit 13: Adding two whole numbers from 1 to 3 with sum less than 5. Make sure that pupils are familiar with the key word definitions for this unit: Add combine two or more numbers to make a larger number. Addition finding the total, or sum, by combining two or more numbers. Sum the result, or answer, when adding two or more numbers. Less smaller. Counters small items we use to help us count and work with numbers. Number line a line with numbers placed in their correct positions. Plus sign (+) the symbol used for addition. Equal sign (=) the symbol used to show when two things are the same. Value an amount. Observe and listen to the pupils during the lesson. Look at their answers to the exercises in the WB. Pupils should be able to add two whole numbers from 1 to 3 with sum less than 5. Complete worksheet 13 on page 24 in the WB. Answers Worksheet a) 3 b) 4 c) 4 d) 4 2. a) 3 b) 4 c) 4 d) 4 3. a) 4 b) 4 c) 3 d) 4 64 Unit 13: Adding numbers with a sum less than five
73 Unit 14 Adding numbers with sum less than ten Objectives By the end of this unit, pupils should be able to: Add two or three whole numbers from 1 to 8 with sum up to 10. Suggested resources Small items to use as counters, such as beads, buttons, coins Key word definitions equal: exactly the same amount or value Frequently asked questions Q What prior knowledge do the pupils need? A Pupils need to be able to add whole numbers with sums up to 5 and count in whole numbers up to 10. Common errors pupils make Pupils do not yet fully understand what the mathematical symbols represent, so while they may be able to complete the sums they have little understanding of the underlying concept. For this reason, using pictures as a method of recording is important. Evaluation guide Pupils to: 1. Add two or three whole numbers from 1 to 8 with sum up to 10. Lesson 1 Pupil s Book page 40 Small items to use as counters, such as beads, buttons, bottle tops, coins Pupils all stand in the middle of an open space. Teacher says: The ship is sinking get into groups of 3. All pupils must rush and find two partners. Pupils without partners sit out until all the different groupings have been exhausted. Hand out piles of counters, such as bottle tops, and ask pupils to form groups of the numbers 1 to 9. Ask pupils to combine two groups, such as 2 counters and 7 counters, and ask them what the total number of counters is. Encourage them to use counting on to start with the number of the first pile and continue counting until they have added all of the second pile, and not to merely count the combined pile. Practice a few more examples, making sure the sums do not exceed 10. Let pupils make up their own examples too, as in unit one, as practical activity is very important for pupils to understand the concept of joining two sets together. Complete Exercise 1 on page 40 in the PB, allowing pupils to use counters to model the problems if necessary. Unit 14: Adding numbers with sum less than ten 65
74 Answers Exercise Observe and listen to the pupils during the lesson. Look at their answers to the exercises in the PB. Pupils should be able to add two whole numbers from 1 to 8 with sums not exceeding 10. Extension activity Play the Sinking ship game with groupings more than 5. You may want to cut big circles from newspapers or use skipping ropes to make circles for pupils to stand in once you have given the instruction. This will clearly show which pupils did not get their partners in time. Support activity Show pupils how they can use a number line to help them add numbers, as in unit 1. Give them a few more examples to practice, using pictures and a number line to illustrate each question having two ways of illustrating a problem gives pupils options when they are struggling with a particular question. Lesson 2 Pupil s Book page 41 Small items to use as counters, such as beads, buttons, coins Fingers are a useful piece of equipment that can be used for more than counting. It is relatively easy for pupils to see a group of objects up to 5 without needing to count them. Fingers can be used to help pupils build instant recall of numbers facts involving 5 + by using both hands. When pupils work with fingers, remind them to use all the fingers of one hand before starting with the fingers of the other. So 8 is shown as rather than double 4 (4 on one hand and 4 on the other). You can show the pupils that they can start with the double 4, but then need to replace the finger on one hand with a finger on the other hand, thus conserving the quantity, 8, but showing it as Ask pupils to use the fingers on both hands to show these addition sums: = = = = Return to the symbols introduced in unit one for addition (+) and equals (=). Write a few addition questions on the board and ask pupils to explain what the symbols mean for each question, such as = 5; = 7; = 7 etc. Hand out piles of counters again and ask pupils to form a pile of 4 counters and a pile of 5 counters, and then to combine them. How many counters are in the combined pile? 9 counters. Now write on the board: = 9, asking pupils to explain what the symbols used represent. 66 Unit 14: Adding numbers with sum less than ten
75 Ask pupils to illustrate each of these questions using their counters, and then to write down an addition sum: = = = 8 Complete Exercise 2 on page 41 in the PB. Answers Exercise = = = 8 Extension activity 1. 8 sheep 2. 7 cows 3. 8 pigs 4. 9 chickens 5. 2 cats Support activity When pupils add more to a set, this is a slightly different concept than when they join two sets together, but the result is the same and both are represented mathematically by the addition sign. Pupils need to have an understanding of both concepts when introducing the addition sign to represent them both. Make up simple addition stories, for example, 3 pupils were in the classroom and 5 more pupils came in. How many pupils are in the classroom? Encourage the pupils to make up addition stories, with sums not exceeding 10. Observe and listen to the pupils during the lesson. Look at their answers to the exercises in the PB. Ask pupils to explain how they are finding the answer to each question, focusing particularly on whether they are using mathematical language and symbols appropriately. Pupils should be able to add two whole numbers from 1 to 8 to give a sum not greater than 10. Extension activity Pupils can complete these questions, this time using words instead of pictures, at first using counters to physically model the problems, but then trying to work out the answers without counters: 1. 3 sheep + 5 sheep = 2. 6 cows + 1 cow = 3. 4 pigs + 4 pigs = 4. 5 chickens + 4 chickens = 5. 2 cats + 4 cats = Unit 14: Adding numbers with sum less than ten 67
76 Lesson 3 Pupil s Book pages 42 and 43 Small items to use as counters, such as beads, buttons, coins Let pupils make up a group of three pupils and a group of five pupils. Ask: How many pupils are there altogether? Repeat this activity, using different numbers for the groups. Keep the totals below 10. Include some examples where there are three groups of pupils, such as a group of two, a group of four and a group of one pupil, still keeping the totals below 10. When we add three numbers we start by adding two numbers and then add the third number to the first answer to get our final answer. Practice this using counters, for example give one pupil 3 counters, another pupil 4 counters and a third pupil one counter. Ask the first and second pupil to add their counters (to get 7 counters) and then ask the third pupil to add his or her counter to the total (to get 8 counters). Now ask the first and third pupils to first add their counters, and then ask the second pupil to add his or her counters to the total. Pupils should see that the order in which we add three numbers does not matter, the answer will always be the same. Now ask pupils to form an addition sum to represent the example: = 8 Practice a few more examples, this time just calling out three numbers and asking pupils to use counters to find the sum, taking two numbers at a time (make sure the sum does not exceed 10). Ask them to write down the addition sum each time. Give them one or two examples including zero they should realise that adding zero to a number does not change the number. Work through the example on page 42 in the PB. Complete Exercise 2 on page 43 in the PB, allowing pupils to use counters if necessary and reminding them that the order in which they add the counters does not affect the answer. Answers Exercise 2 1. a) 8 b) 9 c) 9 d) 9 e) 9 f) 9 g) 8 h) 7 i) 9 j) 6 k) 9 l) 9 m) 8 n) 9 Observe and listen to the pupils during the lesson. Look at their answers to the exercises in the PB. Pupils should be able to add three numbers together, taking two at a time. Extension activity Complete the challenge on page 43 in the PB. Support activity Work in a small group with pupils who need extra support. Give them ten counters, and ask a pupil to make three piles of counters (they do not need to use all ten counters). Have another pupil add the total number of counters in the three piles. Repeat a few times, making sure pupils can write an addition sum to represent each example, correctly using addition and equals symbols. 68 Unit 14: Adding numbers with sum less than ten
77 Lesson 4 Pupil's Book page 40; Workbook page 25 Workbook Revise the work covered in unit 14: Adding two or three whole numbers from 1 to 8 with totals less than 10. Make sure that pupils are familiar with the key word definitions for this unit: Equal: exactly the same amount or value. 2. a) correct b) incorrect c) incorrect d) incorrect e) correct f) correct Observe and listen to the pupils during the lesson. Look at their answers to the exercises in the WB. Pupils should be able to add two or three whole numbers from 1 to 8 with totals less than 10. Complete worksheet 14 on page 25 in the WB. Answers Worksheet a) 6 b) 9 c) 9 d) 8 e) 9 Unit 14: Adding numbers with sum less than ten 69
78 Unit 15 Adding numbers with sum less than 18 Objectives By the end of this unit, pupils should be able to: Add two or three whole numbers from 0 to 9 with sum not greater than 18. Suggested resources Small items to use as counters, such as beads, buttons, coins Frequently asked questions Q What prior knowledge do the Pupils need? A Pupils need to be able to add two or three whole numbers to give sums less than 10. They should be familiar with numbers from 0 to 18 and be able to count forward to at least 18. Common errors pupils make When counting forwards to solve addition problems pupils often start with the starting number instead of the number after the starting number: This results in the answer always being one out. Make sure you give plenty of opportunities for adding zero and one from a number. Evaluation guide Pupils to: 1. Add two or three whole numbers from 0 to 9 with sum not greater than 18. Lesson 1 Pupil s Book page 44 Small items to use as counters, such as beads, buttons, coins Give pupils this instruction: Put your hands behind your back. Now show me... (call out any number between 1 and 10). The pupils have to bring their hands out from behind their backs as quickly as they can, showing a number. Initially pupils will count their fingers but you want them to be able to make the number without counting. Encourage pupils to play the game with each other, with one pupil being the caller. Start by asking pupils to count forwards and backwards from 0 to 18. Explain that we are going to be working with numbers whose sum is less than 18. Remind pupils of the symbols used when adding (+ and =) and of how to write addition sums. Work through the example on page 44 in the PB. Now hand out counters and ask pupils to model the example using the counters. They should first form two separate piles of 3 and 8 counters, and then combine them to form 11 counters. Discuss the different strategies for finding the sum either counting all the counters in the new pile, or adding one pile to another and counting on, for example starting with 8 counters and counting on 3 to 70 Unit 15: Adding numbers with sum less than 18
79 reach 11. Ask pupils to start with 8 and count 3, and then to start with 3 and count 8 they will see that the answer is the same regardless of which number they start with. This is an important property of addition (the commutative property). Practice a few more examples, writing an addition sum to represent each example, and give pupils the opportunity to make up their own examples using the counters. Include examples where three numbers are added to give a sum less than 18. Complete Exercise 1 on page 44 in the PB. Ask pupils to write an addition sum to represent each question. Support activity Use a number line to provide a visual image of addition for pupils who need extra support. Show them how to use the number line to add two or three numbers, starting with the first number and adding on each time. Once pupils are proficient at using it they should be encouraged to use the image of the number line (that is, they should see the line in their heads) to solve addition problems. Answers Exercise = = = = 17 Observe and listen to the pupils during the lesson. Ask them questions about how they reached their answers and listen to the language they are using when explaining. Make sure they are using the + and = symbols correctly. Look at their answers to the exercises in the PB. Pupils should be able to add two or three whole numbers from 0 to 9 to give a sum less than 18. Homework activity Ask pupils to add the following for homework: = = = = = Unit 15: Adding numbers with sum less than 18 71
80 Lesson 2 Pupil s Book page 45 Small items to use as counters, such as beads, buttons, coins Addition bingo: Each pupil draws a 4 4 grid in their book. They choose which 16 numbers (18 or less) to write on their grid. Put two copies of each of the digits 0 9 into a bag, and draw out two cards and read the two numbers as an addition. For example, 3 and 4: call out Any pupil with the number 7 on their card will cross off the number 7. Return the cards to the bag, and repeat. The winner is whoever has a complete row, horizontal, vertical or diagonal if time permits or the winner could be the first completed grid. Give pupils more opportunity to practice adding two or three numbers using word stories, such as the ones in the exercise on page 45 in the PB. Write the word stories on the board and draw the objects, such as: I have 5 pencils, 3 pens and 7 erasers in my pencil case how many items do I have in total? I have 3 plums, 8 apples and 7 bananas in my fruit bowl how many fruit are there altogether? Help them to first write an addition sum from the word story and then to work out the answer. Read through exercise 2 on page 45 in the PB, once again giving pupils guidance as they write down an addition sum for each question. Allow them to work in pairs to complete the exercise. Extension activity Observe and listen to the pupils during the lesson. Look at their answers to the exercises in the PB. Pupils should be able to add two or three given whole numbers from 0 to 9 to give a sum less than 18. Extension activity Ask pupils to add four numbers to give a sum less than 18, for example: = = = = Support activity Spend time working through a few more word stories with pupils. Ask them to work in pairs and each make up two word stories, setting them out as in the questions to exercise 2 on page 45 in the PB. They can then exchange word stories and work out the sum for each other s word stories. Monitor their work closely, asking them questions as they work and making sure that they can explain their answers and the methods they are using. Use pupil-friendly language to assist them, but encourage them to use the correct mathematical language too. Answers Exercise = = = = Unit 15: Adding numbers with sum less than 18
81 Lesson 3 Pupil's Book page 44; Workbook pages 26, 27 Workbook Revise the work covered in Unit 15: Adding two or three whole numbers from 0 to 9 with sum not greater than 18. Complete worksheet 15 on pages 26 and 27 in the WB. Answers Worksheet a) 14 pebbles b) 17 leaves c) 9 sweets d) 12 boxes 2. a) 15 b) 13 c) a) 11 b) 15 c) 16 Observe and listen to the pupils during the lesson. Look at their answers to the exercises in the WB. Pupils should be able to add two or three whole numbers from 0 to 9 with sum not greater than 18. Unit 15: Adding numbers with sum less than 18 73
82 Unit 16 Adding 2-digit whole numbers without regrouping Objectives By the end of this unit, pupils should be able to: Add 2-digit whole numbers with sum not greater than 40 without exchanging or renaming. Suggested resources Small items to use as counters, such as beads, buttons, coins Frequently asked questions Q What prior knowledge do the Pupils need? A Pupils need to be able to add one-digit numbers with sums not exceeding 18. They should be familiar with numbers up to 40 and be able to count to 40. Pupils should understand that a two-digit number is made up of a tens component and a units component. Common errors pupils make Pupils may make computational mistakes when adding tens or units. Some pupils may confuse with and need extra support on the importance of ten, and the way numbers are written, supported with practical equipment to model the numbers. Evaluation guide Pupils to: 1. Add two-digit whole numbers with sum not greater than 40 and record their result. 2. Mention three everyday activities where accuracy is needed. Lesson 1 Pupil s Book page 46 Straws, matchsticks or other items which can be used to form bundles Small objects such as pebbles, beans, buttons Play Round the world. Half of the pupils sit in a circle while one pupil stands behind each one sitting. Call out an addition sum involving two one-digit numbers between 0 and 9, with sum not more than 18. Both the pupil sitting and the one standing behind him or her must call out the answer as quickly as possible. If the pupil standing calls correctly first, he or she moves on to stand behind the next pupil in the circle. If the pupil sitting calls correctly first he or she stands up and moves on to the next pupil and the other pupil sits in their place. Keep going around the circle for a full circuit. Show pupils collections of straws, some in bundles of ten and others as singles or units. Ask them which number is represented each time. For example two bundles of ten and 4 units represents 24. Repeat with a few two-digit numbers. Now ask them to find the sum of two such collections of straws, for example, a bundle of ten and two units, and a bundle of two tens and 5 units. The sum is 37. Make sure the sums do not exceed 40. Show 74 Unit 16: Adding 2-digit whole numbers without regrouping
83 pupils that they can first combine the bundles of ten and then combine the singles or units, as shown in the example on page 46 in the PB. Repeat with a number of examples, without the need for exchanging or renaming. Give pupils the opportunity to make up their own examples using the straws. Complete Exercise 1 on page 46 in the PB. Make sure pupils are adding the tens and the units separately, and then combining them to find the sum. They should write down each step of their working out. Extension activity Pupils can complete the challenge on page 46 in the PB. Support activity Use small objects such as pebbles, beans, buttons etc to help pupils who need extra support with addition of two-digit numbers. Group objects into piles containing two-digit numbers, with sums not exceeding 40, and ask pupils to combine the piles and work out the sum. Answers Exercise = = = = 29 Part 2 - teacher to check drawings Challenge Observe and listen to the pupils during the lesson. Ask them questions as they work on the exercise. Look at their answers to the exercises in the PB. Pupils should be able to add two-digit whole numbers with sum not exceeding 40 without exchanging or renaming. They should first add the tens and then the units, and then combine the two to get the sum. Unit 16: Adding 2-digit whole numbers without regrouping 75
84 Lesson 2 Pupil s Book page 47 Abacuses Discuss with pupils the ways we can use addition in everyday life. You can start the discussion by asking pupils leading questions, such as how do we know the amount of money we need to pay when we buy groceries? Ask them to think of as many examples as they can of addition in everyday life. Introduce the abacus. Either a real bead abacus if you have one, or a simple drawing on the board: a base line with three perpendicular lines representing ones column, tens column and hundreds column. The number of beads in each column represents the ones, tens or hundreds digit of a number. In this unit we only work with twodigit numbers. Remind pupils that the largest digit you can have in each column is a 9. Show them a few two-digit numbers on the abacus, such as 14, 21, 28 etc. and ask them to call out which number is represented. Explain that we can use abacuses to help us with addition. Show them how to use an abacus to add two-digit numbers, such as 13 and 16, which give a sum of 29. They should first add the beads in the tens columns ( = 20) and then the beads in the units columns (3 + 6 = 9). Repeat with a few more examples, asking pupils to write the addition sums each time using plus and equals signs. Answers Exercise The sum is 127. Observe and listen to the pupils during the lesson. Look at their answers to the exercises in the PB. Pupils should be able to add twodigit whole numbers with sum not exceeding 40 using an abacus. They should be able to explain their reasoning as they work and accurately use the plus and equals symbols. Extension activity Give pupils the opportunity to try and add two three-digit numbers without exchanging or renaming using an abacus, for example Support activity Give pupils who need extra practice the opportunity to work with an abacus to form their own two-digit numbers. Ask them to explain to you what each row of beads represents. If necessary allow them to use bundles of straws alongside the abacus to illustrate the same two-digit number, as in the previous lesson. Complete Exercise 2 on page 47 in the PB. Pupils can use actual abacuses to help them or they can draw abacuses in their books as they work. 76 Unit 16: Adding 2-digit whole numbers without regrouping
85 Lesson 3 Pupil's Book page 46; Workbook page 28 Workbook Revise the work covered in Unit 16: Adding two-digit whole numbers with sum not greater than 40 without exchanging or renaming. Complete worksheet 16 on page 28 in the WB. Answers Worksheet a) 14 b) 16 c) 28 d) 12 e) 30 f) 29 g) a) 23 b) 36 c) 39 d) 28 e) 28 Observe and listen to the pupils during the lesson. Look at their answers to the exercises in the WB. Pupils should be able to add twodigit whole numbers with sum not greater than 40 without exchanging or renaming. Unit 16: Adding 2-digit whole numbers without regrouping 77
86 Unit 17 Subtracting from whole numbers not greater than 9 Objectives By the end of this unit, pupils should be able to: Subtract from whole numbers not greater than 9. Suggested resources Small items to use as counters, such as beads, buttons, coins Frequently asked questions Q What prior knowledge do the Pupils need? A Pupils must be able to count a set of objects to at least 10. They should be able to count forwards and back in the range 1 to 10 and be able to say the number before and after a given number in the range 1 to 10. Q Does it matter with which number I start when subtracting numbers? A Yes it does, as subtraction is not commutative. Common errors pupils make When using a number line pupils may count the jumps instead of saying the numbers on the number line: Pupils will often start the count from the first number in the equation instead of the number before in the case of subtraction, so their answers are subsequently one too many. If you notice a pattern in pupils answers check their understanding of counting and the use of the number line. Evaluation guide Pupils to: 1. Subtract from given whole numbers not greater than 9. Lesson 1 Pupil s Book pages 48 and 49 Small items to use as counters, such as beads, buttons, coins Let the pupils stand in groups of 7 and give instructions to separate themselves into two groups, for example take 3 pupils away from the group; take 4 pupils away from the group etc. Use everyday language of the pupils to give instructions about taking a part of a group away. You could ask them to find out how in many different ways they could sort themselves. You can repeat this activity for other numbers less than 9. Pupils usually do not find taking away from a set a difficult concept to grasp, especially if it is in a familiar context, such as giving something away or eating something. Take away is represented by the subtraction sign which also represents the concept of difference, which is introduced at a later stage in a pupil s learning. At this stage, explain that when we subtract from a number that number becomes smaller. Work through the example on page 48 in the PB to illustrate this. Make up simple take-away stories, for example, 5 pupils were in the classroom and 2 pupils went home. How many are left in the classroom? Encourage the pupils to make up takeaway stories. 78 Unit 17: Subtracting from whole numbers not greater than 9
87 Complete Exercise 1 on page 48 in the PB. Answers Exercise = = = 4 Observe and listen to the pupils during the lesson. Look at their answers to the exercises in the PB. Pupils should be able to subtract from given whole numbers not greater than 9. Extension activity Pupils can complete the challenge on page 49 in the PB. Support activity Give pupils the opportunity to practice subtraction using objects to illustrate the concept. Place any number of objects below 9 in a bowl e.g. 8 bottle tops and then ask pupils to remove 3 bottle tops from the bowl. Ask pupils to count the number of remaining bottle tops. Practice with a few more examples, then ask pupils to make up their own examples. Lesson 2 Pupil s Book page 49 Small items to use as counters, such as beads, buttons, coins Ask pupils quick-fire subtraction questions using whole numbers less than 9. Make sure you give all pupils a chance to give an answer. Work through a few examples using counters to illustrate subtraction. For example start with 8 counters and take away 3, how many are left? Start with 7 counters and take away 1, how many are left? Start with 5 counters and take away 4, how many are left? Start with 6 counters and take away 6, how many are left? Ask pupils to make up their own examples using counters. Complete Exercise 2 on page 49 in the PB. Answers Exercise Observe and listen to the pupils during the lesson. Look at their answers to the exercises in the PB. Pupils should be able to subtract from given numbers not greater than 9. Unit 17: Subtracting from whole numbers not greater than 9 79
88 Extension activity Make a game: Create a set of cards with + 1, + 2, + 3, 1, 2, 3, 1 more, 2 more, 3 more, 1 less, 2 less, 3 less. Shuffle the cards. Draw a number line on the ground marked from 0 to 5 or up to 10 (this can be chalked or scratched into the earth.) Players place their counter (or themselves) on any number they choose on the line. They pick a card (without seeing it first) and follow what is on the card. The winner is the last person to fall off the number line at either end. Support activity Use a number line to illustrate subtraction to those pupils who need extra support. Start on a particular number (smaller than 9) for example, 7, and ask pupils questions like: if I take away 2 from 7 where on the number line will I be? (5) If I take away 4 from 7 where on the number line will I be? (3) etc. The number line helps them to visualise the process of subtraction. Lesson 3 Pupil's Book page 17; Workbook page 29 Workbook Revise the work covered in unit 17: Subtracting from whole numbers not greater than 9. Complete worksheet 17 on page 29 in the WB. Answers Worksheet a) 3 b) 3 c) 3 d) 5 2. a) 1 b) 5 c) 0 d) 2 Observe and listen to the pupils during the lesson. Look at their answers to the exercises in the WB. Pupils should be able to subtract from given whole numbers not greater than Unit 17: Subtracting from whole numbers not greater than 9
89 Unit 18 Subtracting whole numbers not greater than 18 Objectives By the end of this unit, pupils should be able to: Subtract from whole numbers not greater than 18. Suggested resources Small items to use as counters, such as beads, buttons, coins Key word definitions remain: what remains is what is left behind less: smaller than Frequently asked questions Q What prior knowledge do the Pupils need? A Pupils need to understand the concept of subtraction as taking away, and be able to subtract from whole numbers up to 9. They need to be able to count forward and backwards up to 18. Common errors pupils make Pupils may make errors when counting backwards to work out the answer to a subtraction by skipping a number or counting incorrectly. Give them plenty of opportunities to practice counting backwards if this is their chosen method of working out subtraction questions. Evaluation guide Pupils to: 1. Subtract from whole numbers not greater than Give examples of everyday activities where accuracy in subtraction is needed. Lesson 1 Pupil s Book page 50 Small items to use as counters, such as beads, buttons, coins Play subtraction bingo. Have pupils draw a three by three grid in their books and fill in any numbers smaller than 10. Call out subtraction questions (from whole numbers less than 10) and pupils can cross out the answer if it appears in their grid. For example, if you call out 7 3, pupils can cross out 4 if it appears in their grid. The first pupil to cross out a row or column can shout bingo and is the winner. If time permits, continue until the first pupil has crossed out all of their squares. If you have access to a flight of stairs, take pupils to the staircase and ask a pupil to stand on a certain step (for example, the 11th step). Have them walk down 5 steps, and ask them which step they are now on? (the 6th step). Explain that 11 5 = 6. Repeat with a number of examples, subtracting from whole numbers not exceeding 18. If you do not have access to a flight of stairs, draw a staircase or ladder on the board and ask the same questions using the picture. Unit 18: Subtracting whole numbers not greater than 18 81
90 Work through the examples on page 50 in the PB and complete Exercise 1. Answers Exercise Observe and listen to the pupils during the lesson. Look at their answers to the exercises in the PB. Pupils should be able to subtract from whole numbers not exceeding 18. Extension activity Have pupils make up subtraction word stories and exchange with a friend. Support activity Guide pupils to group sets of objects not exceeding 18. Ask pupils to take away a certain number of objects from a set and to tell you the remainder. For example, in a group of 17 beans if you take away 10 beans you will have 7 left. Repeat with a number of examples then ask pupils to make up their own examples. Lesson 2 Pupil s Book page 51 Small items to use as counters, such as beads, buttons, coins Have a discussion with pupils about the importance of subtraction and how it can be applied in everyday life, for example how to correctly calculate change when shopping. Lead pupils to think of other everyday examples and have them make up subtraction word stories using these examples. Remind pupils that subtracting is the same as taking away. Illustrate a few examples of subtraction using counters, for example starting with 15 counters and taking away 8, how many are left? 7 counters. Have pupils work in pairs and make up their own examples, some using counters and others without. Read through the questions in exercise 2 on page 51 in the PB and guide pupils to write down a subtraction equation for each question. They can complete the exercise working in pairs. Answers Exercise = = = sweets 5. 4 sweets 6. 0 oranges Challenge page 51 0, 1, 2, 4, 8, 10, 12, Unit 18: Subtracting whole numbers not greater than 18
91 Homework activity Observe and listen to the pupils during the lesson. Look at their answers to the exercises in the PB. Pupils should be able to subtract from whole numbers not greater than 18. Pupils should be able to give examples of everyday activities where accuracy in subtraction is needed. Extension activity Pupils can complete the challenge on page 51 in the PB. Homework activity 1. Moses had 15 apples. He ate 7 over a week, how many apples does he have left? 2. Mary borrowed 12 books from the library. She has read 8 of the books, how many does she still have to read? 3. Joseph grows 17 tomatoes in his garden. He gives 8 to his friend, how many tomatoes does he have left? Lesson 3 Pupil's Book page 18; Workbook page 30 Workbook Revise the work covered in Unit 18: Subtract from whole numbers not greater than 18. Make sure that pupils are familiar with the key word definitions for this unit: Remain: what remains is what is left behind Less: smaller than Complete worksheet 18 on page 30 in the WB. Answers Worksheet a) 3 b) 7 c) 6 2. a) 2 b) 8 c) 8 d) 6 e) 6 f) 1 g) 8 h) 8 i) 2 j) 0 Observe and listen to the pupils during the lesson. Look at their answers to the exercises in the WB. Pupils should be able to subtract from whole numbers not greater than 18. Unit 18: Subtracting whole numbers not greater than 18 83
92 Unit 19 Open sentences with addition Objectives By the end of this unit, pupils should be able to: Find missing numbers in an addition statement Cross-check the correctness of addition in everyday life. Suggested resources Small items to use as counters, such as beads, buttons, coins Key word definitions open sentences: a mathematical statement which can be either true or false depending on what numbers are used bonds: familiar addition sums which you know the answer to instantly Evaluation guide Pupils to: 1. Find missing numbers in a given statement. 2. Mention areas where accuracy of addition is required in daily life. Frequently asked questions Q What prior knowledge do the Pupils need? A Pupils need to be able to add whole numbers with sums not exceeding 18. They need to have good recall of number bonds with sums up to 10. Common errors pupils make When faced with having to fill in the missing number in an equation pupils will often add the two numbers given and put the total in the empty space: This is an indication that they do not fully understand an equation as a mathematical representation of a real situation. It is therefore very important to use pupils everyday language alongside mathematical language to make sure that they have complete understanding of the mathematical representation of an equation. 84 Unit 19: Open sentences with addition
93 Lesson 1 Pupil s Book pages 52 and 53 This is the first time that pupils meet a change unknown type equation. In this case they do not need to find the result of adding two numbers, but the number that needs to be added to a number to produce a given result. The mathematical representation must be clearly understood. Plenty of practice in using everyday language and modelling the equations is required. Give the pupils story problems such as I have 5 sweets in my hand and some more in my pockets. Altogether I have 7 sweets. How many are in my pocket? I have 3 oranges in my bag and I need 8 oranges for my family. How many oranges do I need to buy? Record the equations for the problems on the chalk board before answering them and then fill in the answer in the missing space. Write these open number sentences on the board: 5 + = = = = = = 5 Guide pupils to find a number which when added to 5 gives the number in the right side of each number sentence. These numbers found are called the missing numbers. Guide pupils to see that the numbers on the right side minus missing numbers equals 5, highlighting the relationship between addition and subtraction and showing them how to use subtraction to find the missing number in an open number sentence involving addition. Work through the example on page 52 in the PB, which uses concrete objects to illustrate the concept of an open number sentence. Complete Exercises 1 and 2 on page 52 and 53 in the PB Answers Exercise Exercise Homework activity Observe and listen to the pupils during the lesson. Listen to the language they are using when discussing their answers to determine whether they understand the equal to symbol and the notion of an open number sentence. Look at their answers to the exercises in the PB. Pupils should be able to find the missing number in a given open number sentence involving addition. Homework activity Ask pupils to complete these open number sentences: = = = = = 8 Suppot activity Practice number bonds with pupils who need extra support, making sure they are able to recall number bonds with sums up to at least 5. Show them how they can use number bonds to solve open number sentences. Unit 19: Open sentences with addition 85
94 Lesson 2 Pupil s Book page 53 Small items to use as counters, such as beads, buttons, coins Give partitioning of the number 5 special attention, as it is useful knowledge for building other addition and subtraction facts. Systematic recording should be provided by the teacher to make the resulting pattern explicit to the pupils: 5 and 0; 4 and 1; 3 and 2; 2 and 3; 1 and 4; 0 and 5. Discuss this one-up and one-down pattern with the pupils. Does it work for every number? To build pupils understanding of the conservation of number, pupils should be given the opportunity to repeat the activity with all numbers up to 10. Give pupils piles of small objects and guide them to group the objects into two sets of unequal numbers. Ask pupils to count the objects in the smaller group and then determine the number of objects to be added to obtain the number of the bigger group. Each time, write the appropriate open number sentence on the board and fill in the missing number once pupils have determined what it is. Now move on to word stories involving open number sentences, using the same approach as above. Tell pupils that you have 8 bananas and 3 of them are ripe. Write on the board: 3 + = 8. Ask them to work out how many bananas are not ripe in order to complete the open number sentence. Do a few more similar examples, writing an open number sentence for each one. Complete Exercise 3 on page 53 in the PB. Answers Exercise 3 2 short dresses (2 + 2 = 4) 4 red marbles (1 + 4 = 5) 2 short pencils (1 + 2 = 3) 7 sweets altogether ( = 7) Observe and listen to the pupils during the lesson. Look at their answers to the exercises in the PB. Pupils should be able to use equations to record addition stories and create addition stories from equations. Pupils should be able to recognise and use addition in a real-world situation. Pupils should be able to write and solve open number sentences from word stories. Extension activity Encourage pupils to make up missing-number stories themselves and to exchange with a friend and work out the missing number in each other s stories. Support activity Pupils may need extra assistance when working with word stories. Help them to translate the word story into a number sentence. Usually once they have managed that step they are able to solve the number sentence and find the missing number. Extra word story examples to use: 1. Michael buys 7 sweets. He gives 5 to his little brother and keeps the rest. (5 + 2 = 7) 2. Abeke brings 4 cakes to school. She keeps 1 and gives the rest away to her friends. (1 + 3 = 4) 3. Idowu has 6 t-shirts. 2 of them are blue and the rest are red. (2 + 4 = 6) 86 Unit 19: Open sentences with addition
95 Lesson 3 Pupil's Book page 52; Workbook page 31 Workbook Revise the work covered in Unit 19: Finding missing numbers in an addition statement Cross-checking the correctness of addition in everyday life. Make sure that pupils are familiar with the key word definitions for this unit: open sentences: a mathematical statement which can be either true or false depending on what numbers are used. bonds: familiar addition sums which you know the answer to instantly. Complete worksheet 19 on page 31 in the WB. Answers Worksheet Observe and listen to the pupils during the lesson. Look at their answers to the exercises in the WB. Pupils should be able to find missing numbers in a given statement; and mention areas where accuracy of addition is required in daily life. Unit 19: Open sentences with addition 87
96 Unit 20 Open sentences with subtraction Objectives By the end of this unit, pupils should be able to: Find missing numbers in a subtraction statement; Cross-check the correctness of subtraction in everyday life. Suggested resources Small items to use as counters, such as beads, buttons, coins Frequently asked questions Q What prior knowledge do the Pupils need? A Pupils need to be able to subtract from whole numbers up to 10. They should have some grasp of the concept of a mathematical equation or open number sentence. Common errors pupils make Pupils do not yet fully understand what the equals symbol represents, so while they may be able to complete the sums they have little understanding of the underlying concept. For this reason, using pictures as a method of recording is important. Evaluation guide Pupils to: 1. Find missing numbers in a given subtraction statement. 2. Give examples of the importance of accuracy in subtraction in everyday life. Lesson 1 Pupil s Book page 54 and 55 Small items to use as counters, such as pebbles, beads, buttons, coins Show the pupils a handful of pebbles, for example, 8 pebbles. Put some under a pot and show the pupils 2 left in your hand. Ask them: I had 8 pebbles altogether, I have 2 in my hand, so how many pebbles are under the pot? Let pupils play this as a game in pairs to practise number bonds. Hand out piles of small items and guide pupils to group them into two sets of unequal numbers, for example grouping 8 items into a group of 5 and a group of 3. Ask pupils to count the items in the larger group and then determine the number of objects to be subtracted to obtain the number of the smaller group. For example 2 needs to be subtracted from 5 to obtain 3. Write on the board: 5 = = 3 Repeat with a number of examples, writing an open number sentence each time and asking pupils to fill in the missing number. Explain that these examples all involve subtraction, and show pupils that in order to find the missing number we need to subtract the smaller number (on the right hand side) from the larger number. Also show them how 88 Unit 20: Open sentences with subtraction
97 to check their answers using addition, for example = 5. Complete Exercises 1 and 2 on pages 54 and 55 in the PB. Answers Exercise Exercise Support activity Give pupils extra practice with subtraction until they can recall the answers to subtractions from whole numbers up to at least 5. Now show them how useful it is to be able to recall these subtractions when solving open number sentences, rather than having to work out the answer each time. Observe how pupils are solving equations. Are they using their fingers to count, are they able to count in their heads, or do they simply know the answer? You may need to ask the pupils to explain how they worked out the answer if you are unable to observe their method. Look at their answers to the exercises in the PB. Pupils should be able to find the missing number in a given number sentence involving subtraction. Extension activity Encourage pupils to play number bond games at home with other family members. Number cards can be made out of any available paper or cardboard, or they can use a deck of playing cards. Games encourage instant recall rather than counting to work out an answer. Unit 20: Open sentences with subtraction 89
98 Lesson 2 Pupil s Book page 55 Complete quick-fire questions with subtraction equations in the number range from 5 to 10. Make sure you give all pupils a chance to give an answer. Pupils need to experience mathematics as part of their daily lives and be able to see where everyday events require mathematical knowledge. When pupils solve these problems, encourage them to make use of instant recall of facts. If they do need to use a method for solving, then they should be using a counting-on or counting-back strategy. Encourage pupils to count on or back in their heads rather than use their fingers. Counting on fingers can become a strategy that is used out of habit and requires no thinking. The wording of the story problems is kept as simple as possible for beginning readers. If assistance with reading the problem is required, this should be given. The ability to read a problem and to know what to do requires reading comprehension as well as what mathematics to apply. Observe and listen to the pupils during the lesson. Look at their answers to the exercises in the PB. Pupils should be able to use equations to record subtraction stories and create subtraction stories from equations. Pupils should be able to recognise and use subtraction in a real-world situation. Pupils should be able to solve word stories involving open number sentences using subtraction. Extension activity Have pupils make up three subtraction word stories. They can exchange with a friend and solve each other s word stories by drawing diagrams and writing open number sentences. Support activity Pupils who are struggling may require more time and practice but still need to be encouraged to use imaging in their minds. It may help them if you remind them of the image of the number line. Read carefully through the word stories in Exercise 3 on page 55 in the PB, helping pupils to interpret the questions where necessary. Allow them to work in pairs to complete the exercise. Answers Exercise books (5 3 = 2) 2. 2 sandwiches (3 2 = 1) 3. 4 flowers (4 4 = 0) 4. 5 cats (5 1 = 4) 90 Unit 20: Open sentences with subtraction
99 Lesson 3 Pupil s Book page 54; Workbook page 32 Workbook Revise the work covered in unit 20: Finding missing numbers in a subtraction statement; Cross-checking the correctness of subtraction in everyday life. Complete worksheet 20 on page 32 in the WB. Answers Worksheet Observe and listen to the pupils during the lesson. Look at their answers to the exercises in the WB. Pupils should be able to find missing numbers in a given subtraction statement; and give examples of the importance of accuracy in subtraction in everyday life. Unit 20: Open sentences with subtraction 91
100 Unit 21 Recognising money Objectives By the end of this unit, pupils should be able to: Recognise different denominations of Nigerian coins. Suggested resources Actual coins, model coins or paper coins Key word definitions denomination: the value of a particular coin highest: the biggest or largest value value: how much Frequently asked questions Q What prior knowledge do the Pupils need? A Pupils need to be able to add and subtract numbers easily. Pupils need to understand that money-coins are what they use to buy items. They also need to know values of numbers. Common errors pupils make Some pupils may be confused by the fact that 50k is smaller than 1, even though 50 is a bigger number. They need to know that even though 50 kobo has a number value of 50, it is less that 1 or 2 which have the values of 100k and 200k respectively. Evaluation guide Assess whether pupils can: Identify specified coins from a collection of coins. Lesson 1 Pupils book page 56 Real or model Nigerian Coins Brown paper and Cardboard Pupils Book Place pupils in small groups and give each group a pile of coins of different denominations, including 1/2k, 1k, 5k, 10k, 25k. Ask them to sort the coins into smaller piles according to denomination. Check whether they are able to name each denomination. Show the pupils different denominations of Nigerian coins. Let the pupils see and touch the real coins. Let them differentiate the coins by the pictures/symbols on them, the sizes, as well as the colour of each. Show the pupils both the front and the back of the coins. Pupils should use white or brown paper to trace the coins then write the value of each on the tracings. Ask them how many 1k are in 2k, 5k, 10k etc. Assist the pupils to count the number of ½ k in 1k, 5k and 10k, paying particular attention to the fact that two ½ k coins are worth the same as one 1k coin. Pupils can complete Exercise 1 on page 56 in the PB. 92 Unit 21: Recognising money
101 Answers Exercise Bronze 3. Silver Observe and listen to the pupils during the lesson. Look at their answers to the exercises in the PB. Pupils should be able to identify the Nigerian coins and differentiate them according to size, colour and value. Extension activity Pupils should draw the three Nigerian coins 50k, 1, 2. They should also cut out brown paper or cardboard to the size of each coin and then draw the correct symbols of each of the coins on the corresponding cardboard cut-outs. Support activity Show pupils a collection of Nigerian coins of different denominations. Have them sort them into piles, grouping them according to denomination. Now ask them questions to help them familiarise themselves with the value of each denomination: How many 1k in a 5k coin? How many ½ k in a 1k coin? How many 5k in a 10k coin? etc Lesson 2 Pupils book page 57 Real or model Nigerian Coins Pupils Book Show the pupils the coins spent in Nigeria. Ask them to pick out specific coins from a pile of mixed coins. Group coins into three piles, each containing a different number of coins of different denominations. You could either stick the coins on the board so that pupils can all see them, or you can draw them on the board or use pictures of coins. For example, the first pile could contain four ½ k, two 1k and one 5k; the second pile could contain four 1k and two 2k; and the third pile could contain one 10k. Ask pupils to work out the value of each pile, and to say which pile has the highest value and which pile has the lowest value (in the example above, the first pile contains 9k, the second 8k and the third 10k). Repeat with a number of different examples, making sure that pupils can work out the value of a group of coins of different denominations. Pupils can complete Exercise 2 on page 57 in the PB. Answers Exercise 2 1. B 2. B 3. A 4. A Unit 21: Recognising money 93
102 Observe and listen to the pupils during the lesson. Look at their answers to the exercises in the PB. Pupils should be able to work out the value of a group of coins of different denominations. Extension activity Pupils can work in pairs and each form three of their own piles containing coins of different denominations. Their partner should work out which pile has the highest value. Support activity Practice working out the value of a pile of coins with pupils who need extra support. Help them to count each coin s value and to combine the values to find the value of the pile. Quiz them to make sure they know how many ½ k in 1k, how many 1k in 5k etc. Lesson 3 Pupil s Book page 56; Workbook page 33 Workbook Pupils Book Revise the work covered in Unit 21: Recognising different denominations of Nigerian coins. Make sure that pupils are familiar with the key word definitions for this unit: Denomination the value of a particular coin. Highest the biggest or largest value. Value how much something is worth. Complete worksheet 21 on page 33 in the WB. Answers Worksheet a) 16k b) 16k 2. 1k 3. a) 5k b) 10k 4. a) fruit b) towers c) palm tree 5. a) 1k b) 25k c) 10k 6. a) grey b) silver c) brown d) bronze e) gold d) 5k e) ½ k Observe and listen to the pupils during the lesson. Look at their answers to the exercises in the WB. Pupils should be able to identify specified coins from a collection of coins. 94 Unit 21: Recognising money
103 Unit 22 Adding and subtracting money Objectives By the end of this unit, pupils should be able to: Add coins to obtain sums not exceeding 25k Calculate change obtainable from 10k or less. Suggested resources Small items to use as counters, such as beads, buttons, coins Pupils Book Key word definitions calculate: to work out the answer calculating: working out the answer Frequently asked questions Q What prior knowledge do the Pupils need? A Pupils need to be able to identify all coins used. Pupils need to be confident adding numbers to 25 and subtracting numbers from 10. Common errors pupils make Pupils may struggle when subtracting ½ k to find change. Remind them that two ½ k coins make 1k. Evaluation guide Assess whether pupils can: Do simple exercises on the addition of money not exceeding 25k; Calculate change from 10k or less when buying or selling something. Lesson 1 Pupils book page 58 Items to sell in pretend shops Pretend, real or paper coins Brown paper Pupils Book Ask a variety of quick-fire addition questions with sums not exceeding 25, such as: what is double 12? 9 plus 13? 17 add 7? 6 and 8? etc. Draw a collection of coins on the board and ask pupils to find the total. Such as: 5k, 5k, 10k and 2k, or 5k, 25k, 5k and 1k. Set up several stalls with a variety of objects priced from ½ k to 25k. Ask two pupils to stand by each stall as the sellers. Give the pupils pretend money to pay with and ask them to go to a stall and buy three items. Stall sellers must give the total price of the three items. Customers must have the exact money. Provide a piece of paper and a pencil to help them add the total. Swap round some customers and sellers to allow everyone to have a turn. Wander round to each stall and listen to pupils. If some pupils find adding three items too challenging ask them to choose just two. Work through the examples on page 58 in the PB. Ask pupils to complete Exercise 1 on page 58 In the PB. Unit 22: Adding and subtracting money 95
104 Answers Exercise ½ k 2. 3k 3. 11k 4. 20k 5. 16k 6. 25k Observe and listen to the pupils during the lesson. Look at their answers to the exercises in the PB. Pupils should be able to add money with sums not exceeding 25k. Extension activity Pupils should make ten units of each type of coins with brown paper. They can then form groups with different combinations of coins and say the value of the sum of each group of coins. The teacher should supervise and assist where necessary. Support activity Give your pupils extra practice adding amounts of money. Encourage pupils who are struggling to group coins of the same denomination together and add those first, and then to combine different denominations. Lesson 2 Pupils book page 59; Workbook page 35 Items to sell in pretend shops Pretend, paper or real coins Pupils Book Ask quick-fire subtraction questions with numbers to 10, such as: What is 7 minus 3? 5 take away 2? 2 subtract 1? 5 take away 4? 9 minus 4? etc. Explain to pupils that we don t always have the exact money to pay for items. Sometimes we need to get change. For example: If I buy a sweet that costs 2k and I give the seller a 5k coin, how much change would I need? We can work out the change needed by putting it into a simple subtraction calculation. 5 2 = 3. So I need 3k change. How can I make 3k? Maybe 2k and 1k coins. Set up the stalls again with objects priced from 1 to 10. Ask two pupils to stand on each stall as the sellers and ask the rest of the class to be the customers. Customers may choose one or two items to buy. This time the customers do not need to give the exact amount as the seller can work out the change to give them. Again provide paper and pencil to help their calculations if necessary. Work through the example on page 59 in the PB and then ask pupils to complete Exercise 2 on page 59 in the PB. Answers Exercise 2 1. You will get 3k change. 2. 3k 3. 1k 96 Unit 22: Adding and subtracting money
105 Observe and listen to the pupils during the lesson. Look at their answers to the exercises in the PB. Pupils should be able to calculate change when they buy or sell something for not more than 10k. Support activity Give pupils extra practice with subtraction from whole numbers not exceeding 10. Have a quiz to test their subtraction and have them write down the questions they get wrong and redo them. Lesson 3 Pupil s Book page 58; Workbook page 34 Workbook Pupils Book Revise the work covered in Unit 22: Adding coins to obtain sums not exceeding 25k; Calculating change obtainable from 10k or less. Make sure that pupils are familiar with the key word definitions for this unit: Calculate to work out the answer Calculating working out the answer. Complete worksheet 22 on page 34 in the WB. Answers Worksheet a) 3k b) 20k c) 16k 2. a) 15k b) 11k c) 7k 3. 15k 4. 8k 5. B 6. a) 15k b) 2k c) 1 ½ k d) 17k e) 30k f) 25k d) 10k e) 4k Observe and listen to the pupils during the lesson. Look at their answers to the exercises in the Workbook. Pupils should be able to do simple exercises on the addition of money not exceeding 25k; calculate change from 10k or less when buying or selling something. Unit 22: Adding and subtracting money 97
106 Term 2 Project: Tracing coins Objectives Pupils should be able to: Distinguish between the denominations of Nigerian coins Create accurate rubbings of coins. Pupil s Book page 60 Real Nigerian Coins Tracing paper Pencils Pupils Book Show pupils a selection of coins and ask them to name and describe each coin. They should be familiar with the coins used and able to identify them and distinguish between them. As pupils trace their coins, listen to the language they use to describe them. Are they familiar with the different coin denominations? This project is meant as an independent task to give the opportunity to observe and question pupils as they work. Pupils should be able to trace coins. Pupils should be able to identify the coins used in Nigeria. Read through the instructions on page 60 in the PB and guide pupils as they trace their coins. They should trace the front and back of each coin, and each pupil should trace at least one of each type of coin. The traced coins could be used for display within the classroom or they can be pasted into PBs. 98 Term 2: Project: Tracing coins
107 Term 2 Objectives This assessment is a summative assessment of work covered in Units 13 to 22. It is designed to assess pupils mathematical understanding and not their reading ability. It is important that it is completed by individuals and without support from other pupils, as this would cover up any difficulties a pupil may be having with particular concepts. It is therefore best carried out with small groups of pupils under the guidance of the teacher. Teachers should read each question carefully to the pupils and give them enough time to complete it before moving on to the next question. A more able group within the class may be able to complete the assessment without the teacher needing to read the questions. However, observe pupils while they complete the questions, as this provides further information about them. Guidelines Pupil s Book page 62 On completion of the assessment teachers should look for correct answers and mistakes individual pupils make. They should also check to see if there is a pattern that indicates that any particular question is causing a significant number of pupils difficulties. An analysis of the results of an assessment enables teachers to identify any weaknesses, so that they can provide the necessary support, and strengths, so that they can provide more challenging activities. Teachers are also able to identify any weaknesses in their teaching programme and make adjustments as necessary. 2. a) 4 eggs b) 5 eggs c) 3 eggs d) 3 eggs 3. a) half b) quarter Pupils should be able to complete the three questions without assistance. Take note of where pupils struggle or ask for help, and revise those topics as needed. Answers 1. a) eighteen b) twelve c) twenty seven d) thirty five e) forty four Term 2: 99
108 Unit 23 Introducing length Objectives By the end of this unit, pupils should be able to: Develop the idea of length Compare the length of two or three objects Order similar objects according to lengths. Suggested resources Workbook Pencils varied in length Sticks varied in length Rulers Books Key word definitions length: how long something is taller: a person or thing that is higher than other people or things tallest: a person or thing that is the highest longer: a further distance from one end to the other longest: the furthest distance from one end to the other shorter: a smaller distance from one point to the other shortest: the smallest distance from one point to the other observe: to look at something carefully in order for the pupils to practice the concept of length as well as to practice and internalize the vocabulary that is needed. Evaluation guide Pupils to: 1. Give examples of lengths. 2. Compare lengths of given objects using longer than and shorter than. 3. Order given bundles of sticks of various lengths. Frequently asked questions Q Is it important to do practical activities when teaching the topic of length? A It is essential that you have plenty of practical activities. Pupils need to experience length in a concrete way if they are going to successfully be able to measure objects. This enables perceptual development as well as conceptual development. Common errors pupils make Pupils may confuse words, for example shorter than and the shortest or longer than and the longest. It is best to engage in plenty of practical activity 100 Unit 23: Introducing length
109 Lesson 1 Pupil s Book page 64 Pencils varied in length Sticks varied in length Ask pupils to look at the sticks that you have brought into the class. Talk about the word long. Ask the pupils which stick do they think is long and which stick they think is short. Practice this with various other sticks. It is important to start this unit with as much practical work as possible using concrete teaching materials. During the primary one year it is very important to emphasise perceptual development together with conceptual development. Perceptual development is aided by use of concrete teaching materials. Hold up two sticks and ask the pupils which stick is the longer stick. Point out to the pupils that the other stick is the shorter stick. Repeat with two different sticks. Then pack out three sticks and ask the pupils which stick they would say is the longest stick? The pupils should point out the correct stick. Hold up another three sticks and ask pupils to arrange the sticks from the longest to the shortest. Once they are able to complete the task ask them to arrange the sticks from the shortest to the longest. Repeat this activity until pupils know how to identify the longest stick and the shortest stick. Answers Exercise 1 a) Green b) Green c) Purple d) Pink e) Orange Pupils should be able to arrange sticks or pencils from shortest to longest and from longest to shortest. Support activity Get pupils to repeat the activity using two or more pencils. Ask pupils to point out which pencil is the longest one. Homework activity Ask pupils to draw two sticks. One stick should be longer than the other. Once pupils have practiced the concept of long and short, allow the pupils to complete Exercise 1 on page 64 in the PB. Work through the exercise with the pupils and guide them to write the answers correctly. Ensure that they know that tallest is used in the context to mean longest. Explain to the pupils that in the context of the sentence the correct word to use is tallest. Unit 23: Introducing length 101
110 Lesson 2 Pupil s Book page 65 Pencils varied in length Sticks varied in length Ask pupils to compare two sticks. They should be able to use full sentences to say: This stick is shorter than this one; this stick is longer than that one and so on. Pupils should be able to identify longer than and shorter than when comparing lengths of different objects. Homework activity Pupils must draw three objects of different lengths. They must draw the longest one first and the shortest one last. The pupils should be given opportunity to integrate and consolidate the concept of longer than; shorter than, longest and shortest. Show the pupils three sticks of varying lengths and ask them if they can identify the longest stick of the three. Then ask them to identify the shortest stick. Repeat this a few times until the pupils know the meaning of longest and shortest. Hold up two pencils of differing lengths and ask them which pencil is the shorter of the two. Repeat this a few times until the pupils can answer easily. Allow the pupils to work in pairs. Give each pair three or four sticks. They then order the sticks from shortest to longest and from longest to shortest. Give pupils an opportunity to show the rest of the class how they ordered the sticks. Pupils now can complete Exercise 2 on page 65 in the PB. Guide the pupils through the exercises and assist them to write the answers correctly. Answers Exercise 2 a) Blue b) Yellow c) Pupils draw two items that are longer than their pencils 102 Unit 23: Introducing length
111 Lesson 3 Pupil s Book page 65 Pencils varied in length Sticks varied in length Ask pupils to compare five sticks this time. They should be able to use full sentences to say: This stick is shorter than this one; this stick is longer than that one and so on. Pupils should be able to identify longer than and shorter than when comparing lengths of different objects. Extension activity Ask pupils to compare the lengths of their feet against two other pupils feet. Ask them to arrange themselves from tallest to shortest (left to right). This lesson is an extension of Lesson 2, where pupils are given the opportunity to integrate and consolidate the concept of longer than; shorter than, longest and shortest. Show the pupils four or five sticks of varying lengths and ask them if they can identify the longest stick of them. Then ask them to identify the shortest stick. Repeat this a few times until the pupils fully comprehend the meaning of longest and shortest. Hold up three pencils of differing lengths and ask them which pencil is the shorter of the three. Repeat this a few times until the pupils can answer easily. Allow the pupils to work in pairs and give each pair five or six sticks. They then order the sticks from shortest to longest and from longest to shortest. Pupils now can complete Exercise 3 on page 65 of the PB. Guide the pupils through the exercises and assist them to write the answers correctly. Answers Exercise 3 1. Purple 2. Yellow 3. Guide the pupils to share the correct answers with their partner. The green bottle is the taller bottle and the man is holding the longer piece of wood / card. Unit 23: Introducing length 103
112 Lesson 4 Pupil's Book page 64; Workbook page 36 Workbook Pupils revise the concepts covered in this unit by working through worksheet 23 on page 36 in the WB. Check pupils progress and monitor carefully how they cope with integrating the content covered in this unit. Prepare rhymes and games to play with pupils which consolidate the concepts covered in this lesson. Answers Worksheet Check that each pupil has used the correct colour for long and for short. 2. Check that the longer objects have been coloured in. Observe and listen to the pupils during the lesson. Take in the pupils WBs and informally assess the pupils worksheets and level of understanding. They should be able to develop the idea of length, compare the length of two or three objects and order similar objects according to length. 104 Unit 23: Introducing length
113 Unit 24 Measuring length using natural units Objectives By the end of this unit, pupils should be able to: Measure length and distance in their natural units. Suggested resources Workbook Objects for measuring such as string, rope, sticks Key word definitions measuring: a way of finding out the size or amount of something natural units: parts of the body which can be used to measure the length or size of something, such as the hand or foot hand span: the width of the hand from one side to the other Evaluation guide Pupils to: 1. Measure different given lengths using different natural units. 2. Measure the wide of their classroom with their foot and arm s length. Frequently asked questions Q What prior knowledge do pupils need to complete this unit? A It is important that the pupils understand the introductory work done in Unit 23 very well. They should understand the words and language of the unit. They should be able to compare two objects and say which is the longest and which is the shortest. Common errors pupils make Pupils may find it difficult to understand how to measure an item using their hands or arms. It is important that you demonstrate carefully allowing them to copy your actions. They should understand that if they are using their hands they should place their hands closely together and there should be no gaps in between them. Unit 24: Measuring length using natural units 105
114 Lesson 1 Pupil s Book page 66 Objects for measuring such as sticks or string Read through the unit in the PB in order to know what is expected of the pupils. Ensure that you have identified items for them to measure using their hands and arms. Try the activities yourself in order to know what questions could arise and what challenges the work will present given your particular context. Explain to the pupils that we can use our hands to measure length. Ask the pupils how they think they would measure the length of their tables using their hands. Ask them to share their ideas with the class. At this point you do not want to point out right or wrong answers. You should aim at encouraging them to share as many ideas with the class as possible. List the different suggestions and ask the pupils which method they think would work best. Try the method out and measure the length of a table. Discuss the advantages and disadvantages of the method with the pupils. Demonstrate to the pupils how to measure using hand spans. Ask the pupils to use their hands to measure the tables. Assist the pupils to measure their tables. You could now ask pupils to tell you what the length of the tables are in hand spans. Repeat the exercise asking the pupils to measure other objects for example, the length of a stick in hand spans. Allow them plenty of practice at this. If pupils do not understand how to measure using their hand spans it is important that you guide them by showing them using your own hands and then assisting them to measure an object using their own hands. Demonstrate to the pupils how to measure the length of the wall using an arm length. Ask pupils to come forward and to measure a wall in the classroom using the length of their arm. Repeat this with different pupils measuring. Ensure that they are able to measure the length of a wall using the length of their arm. Discuss how they measured with them. Observe and listen to pupils during the lesson. Ensure that they are able to measure the length of different objects using hand spans and the length of their arm. Extension activity Ask pupils to measure the length of their table using their hand spans. Now measure the table using your own hand span. Compare the measurement that they recorded and the measurement that you recorded. Your measurement should be less than theirs as their hands are smaller than yours. Discuss the difference with the pupils. Homework activity Ask pupils to measure different household items using their hand spans. They could measure the length of a table, the length of a bed, etc. They should report their findings back to you the following day. Once they have mastered the skill of measuring the length of an object using their hand spans ask them to describe to you what they did to measure the length of the object. This enables them to develop the language of mathematics and mensuration. It also affords them the opportunity of consolidating the concepts through language. 106 Unit 24: Measuring length using natural units
115 Lesson 2 Pupil s Book page 66 Objects to measure such as string, rope or sticks Using items that are suitable for measuring, explain to the pupils that we can use our feet to measure length. Ask them how they think they would measure the length of the passage using feet. Encourage pupils to share as many ideas with the class as possible. List the different suggestions and ask the pupils which method they think would work best. Try the method out and measure the length of a passage. Discuss the advantages and disadvantages of the method with the pupils. Demonstrate to the pupils how to measure using feet. Ask the pupils to use their feet to measure the length of a piece of rope which is placed on the floor in the classroom. You could now ask pupils to tell you what the length of the piece of rope is in feet. Repeat the exercise asking the pupils to measure other objects, for example, the length of a line drawn with chalk on the floor. Allow them plenty of practice at this. Once they have mastered the skill of measuring the length of object using their feet ask them to describe to you what they did to measure the length of the object. This enables them to develop the language of mathematics and mensuration. It also affords them the opportunity of consolidating the concepts through language. Demonstrate to the pupils how to measure the length of the passage using steps. Ask pupils to come forward and to measure the length of a passage using steps. Repeat this with different pupils measuring. Ensure that they are able to measure the length of the passage using steps and discuss how they measured the length of the passage. If pupils do not understand how to measure using their feet it is important that you guide them by showing them using your own feet and then assisting them to measure an object using their own feet. Once pupils are comfortable with the skill of using hand spans, feet, arms and steps to measure different things then they are ready to attempt Exercise 1 on page 66 in the PB. Guide them carefully through each of the questions. Answers Exercise 1 1. Pupils measure feet to measure the length of the classroom. 2. Pupils use their arms to measure the width of the classroom. Ensure that pupils are able to measure length using feet and steps. Extension activity Ask pupils to measure the length of the classroom using steps. Now measure the length of the classroom using your steps. Compare the measurement that they recorded and the measurement that you recorded. Your measurement should be less than theirs as their steps are smaller than yours. Discuss the difference with the pupils. Homework activity Ask pupils to measure different lengths at home using their feet. They could measure the length of a room, the length of a garden, etc. They should report their findings back to you the following day. Unit 24: Measuring length using natural units 107
116 Lesson 3 Pupil s Book page 67 Objects for measuring such as string or rope Prepare a revision activity for measuring with arms, hand spans, feet and steps. Ask pupils to tell you how they have learnt to measure. You can use this activity to assess if they have developed the necessary perceptual skill, concepts and language to enable them to understand the basic principles of measurement. Lay a piece of rope on the ground and ask the pupils to measure the rope using their feet. Pupils are able to measure length using hand spans, arms, feet, steps and identify longer and shorter items. Homework activity Pupils to complete Exercise 2 on page 67 of the PB if they have not done so in class. Ask pupils to measure the following: The length of their desk using their hand spans The length of the passage using steps The width of the classroom using their arms Allow pupils to explain how they measure as well as tell the class what the result is of their measuring. Draw 5 pairs of objects on the chalkboard, placing a longer and shorter one next to each other. Ask pupils to copy the pictures into their note books and circle the larger of the two objects. Once the pupils are confident about measuring you may ask them to complete Exercise 2 on page 67 of the PB. Guide the pupils through the exercise. Answers Exercise 2 1. Pupils measure their building 2. 8 blocks long 108 Unit 24: Measuring length using natural units
117 Lesson 4 Pupil s Book page 67 Objects for measuring such as rope, string Have pupils form pairs and compare their hand spans, steps and arms (and any other natural units they are familiar with). Repeat a few times with different partners. Guide pupils to see that natural units are not standard, and that each pupil can have a different size. Ask them if they think this might cause inaccuracy of measurements. Observe and listen to the pupils during the lesson. They should be able to measure length using hand spans, arms, feet and steps. Homework activity Pupil s to complete Exercise 3 on page 67 of the PB if they have not done so in class. This lesson is an extension of Lesson 4. The focus of this lesson is to consolidate what they have learnt about measuring using hand spans, steps and arms. Once the pupils are confident about measuring, they can complete Exercise 3 on page 67 of the PB. Guide them through the exercise. Assist all pupils to attempt the puzzle. Guide them to find the answer. It may help to draw the strides and help them count in fives. Answers Exercise 3 1. Hand spans 2. Feet [any other reasonable answer could be considered] Puzzle 14 x 5 = 70 feet or the pupils can count in 5s to get to the answer. Unit 24: Measuring length using natural units 109
118 Lesson 5 Pupil's Book page 66; Workbook pages 37 and 38 Workbook Revise the concepts covered in this unit by working through Worksheet 24 on pages 37 and 38 in the WB. Check pupils progress while they do this and assess how well they have understood the lessons. Answers Worksheet Answers will vary according the individuals and the classroom. 2. Answers will vary according the individuals and the classroom. 3. Check that the pupils give reasonable answers. 4. a. Pupils estimate 1-3 match sticks. Pupils measure at 3 match sticks. b. Pupils estimate 2-5 match sticks. Pupils measure at 2 match sticks. c. Pupils estimate 2-4 match sticks. Pupils measure at 1 1 match sticks. 2 Observe and listen to pupils during the lesson. Look at the answers in their WBs to assess their level of understanding. They should be able to measure length and distance using different natural units and order given objects by length. 110 Unit 24: Measuring length using natural units
119 Unit 25 Comparing and ordering lengths Objectives By the end of this unit, pupils should be able to: Compare lengths of two or three objects Apply length and ordering of lengths in our environment. Suggested resources Pencils of varied lengths Sticks of varied lengths String Wool Objects that have different lengths, widths and height, for example, different sized cups or mugs, bowls, tins, boxes Key word definitions compare: to look at two people or things together so that you can tell the difference between them long: something that is far from one end to the other, for example: she has long hair longer: something that is further from one end to the other longest: something that is the furthest from one end to the other short: a small distance from one end to the other, for example: we walk a short distance to school. shorter: a smaller distance from one end to the other shortest: the smallest distance from one end to the other order: when everything is in the right place ordering: placing or organizing things in a certain way smallest: of a size that is less than usual, opposite of largest largest: the greatest size or amount of something, biggest arrange: to place things in a particular order width: how wide something is from one side to the other measure: a way of showing the size or amount of something Frequently asked questions Q What prior knowledge do pupils need? A Pupils need to have an understanding of length. They need to know that when they consider the length of something then they are considering how long the object is. Common errors pupils make Pupils may struggle to compare different lengths. Their understanding of long, longer and longest may not have developed fully. Also their understanding of short, shorter and shortest may not have developed. It is important to include as much practical activity as possible and to develop their language skills and vocabulary (See Key word definitions above). Evaluation guide Pupils to: 1. Measure and order given objects by length. Unit 25: Comparing and ordering lengths 111
120 Lesson 1 Pupil s Book page 68 Pencils Objects for measuring such as sticks, string or wool Call two pupils to the front of the class. They should differ in length. Ask the pupils to put them in order of length: from the shortest to the tallest. Now call three pupils and repeat. Repeat a couple of times. Ask the pupils how they decided who should stand first in the row and who should stand next and so on. They should refer to the fact that they compared the two and the one who is smallest has to stand first, then the taller pupil and so on. Read through the example on page 68 of the PB with the pupils and encourage them to look at the pictures and corresponding words. Demonstrate by holding up three sticks and asking the pupils to say which is long, longer and longest. Ask the pupils to match the sticks to the words: which stick can be described as long, which stick can be described as longer and which stick can be described as the longest stick. Repeat with a different set of objects, for example, pieces of string. Ask the pupils which piece of string can be described as short, which piece of string can be described as shorter and which piece of string can be described as the shortest piece of string. Assess if the pupils have understood the language and the concepts of length. If not repeat the activities using other objects such as pencils, wool, leaves and so on. Extension activity Ask pupils to measure the length and width of the classroom using their arm. Ask them to measure the length of the classroom with their arm. Ask them to describe which is longest: the width or the length. Support activity Some pupils may still struggle to use the words correctly to compare length. If this is the case, repeat the exercises from the main lesson but using only two objects at a time initially. Once pupils have mastered this skill then progress to comparing the length of three objects. Homework activity Ask the pupils to collect three objects at home and draw them. They should draw a circle around the object which is the longest. Observe and listen to the pupils during the lesson. Pupils should be able to compare the length of objects correctly. They should also be able to use the words long, longer and longest and short, shorter and shortest correctly. 112 Unit 25: Comparing and ordering lengths
121 Lesson 2 Pupil s Book pages 69 and 70 Objects for measuring such as pencils, sticks, wool, string Prepare the same objects used in the previous lesson. Read through pages 68 to 70 in order to know what is required from the pupils in this lesson. Revise one of the activities from the previous lesson. You could take three sticks and ask the pupils to arrange the sticks in order of length from shortest to longest and then another set of objects such as pencils that they should arrange from short to shortest. Repeat this as many times as necessary using different objects. The lesson continues the concept of comparing length. You could use this lesson to encourage the pupils to work in a semi- abstract way, if they are ready for this step. You could show them the illustrations on page 68 and read the information to them. They could point to the water pipes and indicate which one is long, which one is longer and which one is longest. They could then look at the pictures of the bottles and then point to which one is short, which one is shorter and which one is shortest. Assist pupils to complete Exercises 1 and 2 on pages 69 and 70 in the PB. Pupils may find it easy to point out the answers but may be a little confused with writing the number to represent the picture. Explain to them carefully how to use the numbers to indicate the correct answers. If the pupils are not able to do the work in the PB, go back to covering the work practically with concrete objects in the class. Answers Exercise 1 1. a) 1;2;3 b) 1,2,3 c) 2,1,3 2. a) 3,1,2 b) 2, 3, 2 c) 3,2,1 Exercise 2 Each picture to the right of the first picture represents the shorter object. Observe and listen to pupils during the lesson. They should be able to compare length using these words: Long, longer and longest Short, shorter and shortest Extension activity The pupils must collect three sticks of different lengths. Pupils must then arrange the sticks in this order: long, longer, longest. They must then draw their sticks in the correct order. They must write these words under each stick: long, longer and longest. Homework activity Pupils to complete Exercises 1 and 2 on pages 69 and 70 in the PB if they have not done so in class. Unit 25: Comparing and ordering lengths 113
122 Lesson 3 Pupil s Book page 70 Objects for measuring such as pencils, sticks, string, wool Draw or stick up pictures of suitable objects up on the board showing different lengths and ask pupils to point out the long, longer and longest and short, shorter and shortest. Write the words under the correct objects. This is an extension to the previous lesson. Exercise continues to strengthen the pupils concept of comparing length. With your help and guidance they are then able to complete Exercise 3 on page 70 in the PB. If the pupils are not able to do the exercise in the PB go back to covering the work practically with concrete objects in the class. Answers Exercise 3 a) Longer b) Shorter c) Shorter Observe and listen to the pupils during the lesson. Look at their answers to the exercises in the PB. They should be able to compare length using these words: Long, longer and longest Short, shorter and shortest Homework activity Ask pupils to do a drawing of the members of their family and to circle the person who is the shortest. Lesson 4 Pupil s Book page 71 Pencils of varied lengths Sticks of varied lengths Objects that have different lengths, widths and height such as different sized cups or mugs, bowls, tins, boxes Pupil's Book Ask pupils to arrange themselves from tallest to shortest. Help them form a row from shortest to tallest. Ask them to tell you how they solved the problem. Now ask them to re-arrange themselves from tallest to shortest. A pupil may point out that if you look at the row from the other point (where the tallest pupil is) then they are already in order. However give them another point in the classroom to start their ordering. Explain to the pupils that when comparing objects it is important to compare the same dimension: height or width or length. Use the objects that you brought to class to demonstrate, for example, put two different sized boxes next to each other. Ask the pupils which one is the largest one. Ask them which one which is the smaller box. Now place 3 boxes next to each other and ask them to order them from smallest to largest. Encourage pupils to explain how they knew which was the smallest box, and which one was the largest box. Ask pupils to indicate the height of the box, the length of the box and the width of the box. This is an introductory activity and pupils do not have to memorise or be able to describe each of these properties in year one. Revise the concept of long and short. Pupils should now complete Exercise 4 on page 71 in the PB. Guide and assist the pupils to write the answers. 114 Unit 25: Comparing and ordering lengths
123 Answers Exercise 4 1. a) high heel shoes then the school shoes b) spoon, fork and then the knife Observe and listen to the pupils during the lesson. Pupils should be able to compare length of objects and order them from longest to shortest. Extension activity Make a height chart by sticking a piece of paper onto the wall about 1.5m high. Ask pupils to stand with their backs straight against the paper and mark their height with a pencil, writing each pupil s name next to their mark. Look at the chart with the pupils and discuss who is the tallest, shortest and so on. Lesson 5 Pupil's Book page 68; Workbook page 39 Workbook Pupils revise the concepts covered in this unit by completing Worksheet 25 on page 39 in the WB. Check pupils progress and monitor carefully how they cope with integrating the content covered in this unit. Answers Worksheet Check that pupils colour only one object, and that it is the longest object in the set. 2. Check that pupils colour only one object, and that it is the shortest object in the set. 3. Pupils circle the giraffe. 4. Pupils circle the wall in the middle of the set. 5. Pupils colour only one pair of shoes, the pair on the far right. Observe and listen to the pupils during the lesson. Look at their answers in the WB to assess their understanding. They should be able to compare lengths of two or three objects and apply length and ordering of lengths in our environment. Unit 25: Comparing and ordering lengths 115
124 Unit 26 Time Objectives By the end of this unit, pupils should be able to: Demonstrate knowledge of the idea of time Read a clock to the hour and half hour Name days of the week and arrange them in order Mention when certain things are done at home and school. Suggested resources Charts indicating activities particular to different periods of the day Chart with four quadrants Morning Afternoon Evening Night Pictures of activities that may fit in each of the quadrants Cardboard, scissors, glue or tape, pins, pencils (for the clock) Key word definitions morning: the time of day from when the sun rises until midday afternoon: the time of day from midday until evening evening: the time of day from the end of the afternoon until you go to bed night: the time of day when it s dark and most people sleep It may be best to describe evening time as that time that the family is home after the activity of the day and the time that they should be getting ready to go to bed. The time just before the sun goes down, etc. Evaluation guide Pupils to: 1. State the time when certain things are done at home or at school, such as going to sleep, coming to school etc. 2. Show that they understand the idea of time. Frequently asked questions Q What prior knowledge should pupils have? A Pupils should have some awareness of morning, afternoon, evening and night time. Common errors pupils make Pupils should not have too much difficulty with this unit of work. However, some pupils may find the distinction between evening and night time a little confusing. 116 Unit 26: Time
125 Lesson 1 Pupil s Book page 72 Charts indicating activities peculiar to different periods of the day Chart with four quadrants Pictures of activities that may fit in each of the quadrants Use the chart that you prepared and stick it on to the board. Hold up each of the pictures that you have selected and ask the pupils where they would paste the pictures. Assist them to stick the pictures into the correct quadrants. Observe and listen to the pupils during the lesson. They should be able to match appropriate activities to times of the day. Homework activity Ask pupils to draw a picture of their favourite time of day. They must bring the picture to class the next day and explain why they like this time of day the most. Discuss with pupils when they do certain activities. Ask them when do they wake up? When do they walk or travel to school? When do they go home? When do they have their last meal of the day? When do they go to bed? Ensure that pupils understand the terms: morning, afternoon, evening and night. Emphasise that the sun rises in the morning and that the sun sets in the evening. Once the pupils are able to grasp the periods of time and appropriate activities linked to the times then they are ready to attempt Exercise 1 on page 72 of the PB. Guide and assist them to answer the questions correctly. Answers Exercise 1 1. Pupils discuss the activities of each of the pictures: a) The girl is doing her school work. b) The girl is playing in the garden. c) The girl is having supper. d) The girl is sleeping. 2. a) The girl is doing her school work during the morning. b) The girl is playing in the afternoon. c) The girl is having supper in the evening. d) The girls is sleeping at night. Unit 26: Time 117
126 Lesson 2 Pupil s Book page 73 Charts indicating activities peculiar to different periods of the day Get pupils to show you their pictures they had to complete for homework. Give each pupil a chance to explain why he or she likes a specific time of day. You could get pupils to talk about their favourite time of the year as well. Set some time aside to map the pupils day with them and explain what time of day it is when they perform certain activities. For example, they list all their activities: I get up, I go to school, I work at school, I leave school, I play with my friends at home, I do my homework, I have supper, I wash and then go to bed. Now discuss with them when each of these activities take place. They could then draw what they do in the morning, etc. Please be sensitive to pupils living in difficult conditions e.g. there may not be a regular dinner time in some homes, there may not be a regular bath time in some homes}. Observe and listen to the pupils during the lesson. Look at their answers in the PB to assess their understanding of the concepts. Pupils should be able to match appropriate activities to times of the day. Homework activity Pupils can find out from their parents what they do during the day at work. They can find out what tasks they do at specific times of the day. This is an extension of the previous lesson. Talk about the different things pupils do in their holidays or over weekends, and the times at which they do them. This will help consolidate their understanding of the terms: morning, afternoon, evening and night. Pupils to complete Exercise 2 on page 73 of the PB. Guide and assist pupils to answer the questions correctly. Answers Exercise 2 1. a) I go do school in the morning. b) I go to bed at night. c) I do my homework in the afternoon. d) I take my bath in the evening. e) I leave the school in the afternoon. f) I eat my dinner in the evening. {some of the responses may differ depending on the pupils context and circumstances. 118 Unit 26: Time
127 Lesson 3 Pupil s Book pages 73 and 74 Cardboard, scissors, glue or tape, pins, pencils (for the clock) Songs and rhymes about time Start the lesson with a song or rhyme about time. Show the pupils the model clock that you have made and ask them what they notice about the clock. They should notice the numbers that are displayed on the clock face. Encourage them to count from the 1 to the 12 while pointing at the numbers. Explain to them that school starts at a certain time and show them the time on the clock. They do not have to be able to read time but pupils will benefit from becoming aware of time shown on a clock face. Observe and listen to pupils during the lesson. Pupils should be able to match activities to periods of the day. Extension activity Give pupils a circular piece of paper to stick into their note books with the numbers 12, 3, 6 and 9 in the correct places. Ask them to fill in the missing numbers and draw the hands showing the time that school starts in the morning. Homework activity Ask pupils to find out the current time of sunrise and sunset and whether this changes during the different seasons. Show other times that may be appropriate, for example, at what time do you get up in the morning? If they say 6 o clock then show them this time, explain to them that this time is 6 o clock in the morning. Explain to the pupils that if the sun is rising at 6 o clock then it is morning time. Explain to the pupils that time enables us to know when to do certain tasks and it also helps us know when to get up in the morning and when to go to bed in the evening. Read through the information on page 73 with the pupils. Read the example to them, as well. Pupils can complete Exercise 3 on page 74 of the PB. Guide them to write the correct answers. Answers Exercise 3 1. Morning 2. Morning 3. Morning 4. Afternoon Unit 26: Time 119
128 Lesson 4 Pupil s Book page 75 The clock (from Lesson 3) Songs and rhymes involving time Start the lesson by singing songs or reciting rhymes that you introduced in the previous lesson. Using the clock from Lesson 3, get pupils to count the numbers from 1 to 12 on the clock again, identifying each number on the clock. When school starts, get pupils to look at the clock and ask them to read the number on which the short hand falls. At break time, get pupils to look at the clock and ask them to read the number on which the short hand falls. Extension activity Ask pupils to stand in one place early in the morning. They should look at their shadow and describe it. Ask them to stand in the same place at about 11h30 am. They should again look at their shadow and describe it. Ask them if they notice a difference. Homework activity Pupils to complete Exercise 4 on page 75 of the PB if they have not done so in class. Revise the work covered in the previous lesson by repeating the times of the day and how we use these times to do specific things. Pupils can complete Exercise 4 on page 75 of the PB. Guide them to write the correct answers. Answers Exercise 4 1. Morning 2. Evening 3. Night 4. Evening 5. Afternoon 6. afternoon Observe and listen to the pupils during the lesson. Pupils should be able to match activities to periods of the day. 120 Unit 26: Time
129 Lesson 5 Pupil's Book page 72; Workbook pages Workbook Sing songs or recite rhymes that the pupils are now familiar with from the previous lesson. Revise the concepts covered in this unit by working through Worksheet 26 on pages 40 to 42 in the WB. Guide pupils where necessary and check their answers to assess how they are progressing. Answers Worksheet Morning 2. Evening 3. Afternoon 4. Morning 5. Night 6. Pupils give their own answers 7. Check that pupils draw reasonable activities for each time of day. Take in the pupils Workbooks (WB) and informally assess the pupils worksheets and level of understanding. They should be able to demonstrate knowledge of the idea of time and mention when certain things are done at home and at school. Unit 26: Time 121
130 Unit 27 Weight Objectives By the end of this unit, pupils should be able to: Compare the weights of some common objects using the terms light and heavy and order objects according to their weights. Suggested resources Weight balance See-saw Various objects that pupils can compare (coconuts, oranges, etc.) Bags to hold objects Bathroom scale or kitchen scale Balance beam or weight balance Key word definitions weight: how heavy a person or object is heavy: a person or object that weighs a lot and may be difficult to lift heavier: a person or object that weighs more when compared to another person or object light: a person or object that weighs a little lighter: a person or object that weighs less than another person or object estimate: to say what you think something will cost or weigh before you know all the facts estimating: saying what you think something will cost or weigh compare : to look at two people or things together so that you can tell the difference between them comparing: the act of looking at two things together so that you can tell the difference between them weighing: the action of finding out the weight of a person or object balance: to put something in a position where it does not fall. a beam balance is used to compare the weight of objects pulley: a piece of equipment which has a wheel and a rope and is used for lifting things Frequently asked questions Q What prior knowledge do pupils need? A Pupils will need to be able to count to at least 10. Learners will need to be able to compare numbers to 10 and know which is more and which is less. Q Are weight and mass the same thing? A Weight and mass are not the same thing. Mass is the quantity of matter in an object. It is quite often called weight, but the two are not the same. The weight of an object changes according to gravity. Mass is measured in kilograms (kg) and weight is correctly measured in newtons (N). A one-kilogram mass weighs 9.8 N on Earth, but on the Moon, owing to much weaker gravity, it would weigh only 1.6 N. Common errors pupils make Pupils need to realise that mass has nothing to do with what an object looks like: It is a property that can only be judged by feeling it, or measuring it by using something like a beam balance. They also need to understand that mass, like other measures, is relative: A heavy item can feel lighter in comparison with an even heavier object. Evaluation guide Pupils to: Show two different objects and select which one is heavier than the other. 122 Unit 27: Weight
131 Lesson 1 Pupil's Book page 76 Weight balance See-saw Various objects that pupils can compare (coconuts, oranges, etc.) Bags to hold objects Have different objects in the class for pupils to compare in terms of weight and how heavy or light they feel. Ask three pupils to stand at the front of the class. Give the first pupil a coconut in one hand and an orange in the other. Which feels heavier the coconut or the orange? Give the second pupil a book in one hand and a stone in the other. Which feels lighter the book or the stone? Give the third pupil a spoon in one hand and a pencil in the other. Which feels heavier the spoon or the pencil? Ask another three pupils to the front and pass the objects to them. Do they agree with the first group of pupils answers? Before the lesson begins gather some bags which can be closed place a couple of large stones, in one bag place a few hardback books, in one bag a bunch of bananas, in another bag place some clothes and in another bag place some feathers or straw. Bring the bags to the front of the class. Ask one pupil to come to the front and choose two bags. Which bag feels heavier? Place the heavier bag on one side and the lighter bag on the other. Place the corresponding labels (lighter/heavier) in front of them. Ask another pupil to come to the front and choose another bag. Ask the pupil to pick up the bag found to be lighter by the previous pupil and compare the two bags. Which bag is heavier? If the new bag is lighter, then place it on the side with the label lighter. If the new bag is heavier then compare it with the bag labelled heavier. Which bag is heavier now? If the new bag is lighter place it between the first two bags. If the new bag is heavier, place it on the heavier side and move the label heavier in front of the new bag. Repeat with different bags and the remaining bags and compare them all with each other. When all the bags have been compared and been placed in some kind of order from heavier to lighter, ask another pupil to come up and open each bag to see what is inside. What was the heaviest bag filled with? What was the lightest bag filled with? If pupils are struggling to distinguish between heavier and lighter objects, ask them to hold two different objects, such as a stone in one hand and a feather in the other. Ask them to tell you which object is lighter and which is heavier. Observe and listen to the pupils during the lesson. They should be able to identify the words heavier and lighter and compare objects that feel heavier and lighter. Extension activity Pupils to make a collection of items they think are heavy, or collect pictures of heavy objects. They should make another collection of items they think are light, or collect pictures of objects which would be light. Homework activity Pupils collect some items at home and try and compare them. They put them in order from heaviest to lightest. Unit 27: Weight 123
132 Lesson 2 Pupil s Book page 77 Weight balance or beam balance Various objects that pupils can compare (coconuts, oranges, etc.) Revise the work from lesson one. Pupils hold two objects and try and say which one is heavier and which one is lighter. It may be a good idea to demonstrate the relativity of the concept. You could ask the pupils to compare a leaf and a small stone. Then they can compare the same small stone and a larger stone and so on. Observe and listen to the pupils during the lesson. Are pupils able to compare objects and determine which object is heavier and which object is lighter? Support activity Have a class discussion on which object the learners have seen that they think is the heaviest/ lightest object. Compare these objects to each other. Refer to previous day s homework activity and ask pupils to arrange the objects they brought from home from lightest to heaviest on their desks and say which is heaviest and which lightest. Show the pupils two objects, for example, a banana and a pencil. Ask them to guess or estimate which object will be heavier. Tell them that you will show them using the beam balance. Place the banana on one end of the balance and the pencil on the other. The banana should be heavier than the pencil. Repeat using similar objects to the objects used in exercise 1 on page 77 of the PB. Once the pupils understand the concept of using the balance to show heavier and lighter, they can complete Exercise 1 on page 77 of the PB. Guide them and assist the pupils to reach the correct answers. Answers Exercise 1 a. banana b. rock c. pineapple d. apple e. board duster 124 Unit 27: Weight
133 Lesson 3 Pupil s Book page 78 Bathroom scale or kitchen scale Various objects that pupils can compare (coconuts, oranges, etc.) Read through pages 77 to 79 of the unit in the pupil book (PB) to ensure that you know the work that needs to be covered in the lesson. Discuss with the pupils where they have seen merchants and traders weighing foodstuffs in order to sell them by weight. Ask them if they have seen other people weighing items, objects or people. Some pupils may have baby brothers or sister who has been weighed at the local clinic. Ask them to talk about their experiences. Revise the work of the previous two lessons and ask pupils to hold two different objects and to tell the class which one is heavier and which one is the lighter object. Explain to the pupils that we do not always use a beam balance to determine if an object is heavier than another and that sometimes we may use a pulley to compare weights of objects. The pupils can complete Exercise 2 on page 78 in the PB. Answers Exercise 2 a. the book may be lighter than the 3 bananas b. the orange may be lighter than the coconut c. the pencil will be lighter than the bottle d. the computer screen may be heavier than the bag Observe and listen to the pupils during the lesson. Pupils should be able to compare objects and say which one is heavier and which one is lighter. Lesson 4 Pupil s Book page 79 Bathroom scale or kitchen scale or beam balance Various objects that pupils can compare (coconuts, oranges, etc.) Ask pupils to find out from their mother or father, or any other relative, how much they weighed at birth. Pupils must then work in pairs and tell each other about their weights. They must work out who was the lightest/heaviest of them. Give assistance where necessary. Revise the work of the previous three lessons. Practice giving pupils different objects to work out which is the heaviest, or lightest, alternating each time. Remind pupils that we do not always use a beam balance to determine if an object is heavier than another and that sometimes we may use a pulley to compare weights of objects. Show the pupils that when objects have more or less the same weight the beam balance will balance. So for instance, place a book on one end of the beam balance and a few smaller objects on the other side until the beam balance is balanced. Ask them to count how many of the smaller items it took to balance the beam balance. The pupils can complete Exercise 3 on page 79 in the Pupil s Book (PB). Use a beam balance to demonstrate the answers if possible. Answers Exercise 3 a. 3 b. 8 c. 6 Unit 27: Weight 125
134 Pupils are able to compare objects and say which one is heavier and which one is lighter and order them from heaviest to lightest. Homework activity Pupils draw objects which are lighter than others. Lesson 5 Pupil's Book page 76; Workbook pages 43 and 44 Workbook Pupils revise the concepts covered in this unit by working through the worksheet 27 on pages 43 and 44 in the WB. Check pupils progress and monitor carefully how they cope with integrating the content covered in this unit. Answers Worksheet Pupils colour the eraser and the hammer. 2. a) Heavier b) Lighter c) Lighter 3. a) 2 b) 8 c) 1 4 d) 1 2 e) Pupils colour the brick and the book. Observe and listen to pupils during the lesson. Take in the pupils WBs and informally assess the pupils worksheets and level of understanding. They should be able to compare the weights of some common objects using the terms light and heavy. Support activity Identify if pupils are struggling to complete any of the answers in the worksheet and assist them individually if necessary or pair them with another pupil who can work with them. 126 Unit 27: Weight
135 Unit 28 Three-dimensional shapes Objectives By the end of this unit, pupils should be able to: Identify, sort and name cuboids, cubes, cylinders and spheres Distinguish between cuboids and cubes Identify and count the flat faces, corners and edges of a cube and cuboid Identify the curved surfaces of a cylinder Mention solid shapes in homes and the environment that are cuboids, cubes, cylinders and spheres. Suggested resources Ludo dice Empty match boxes Packets of sugar Empty Milo tins, milk containers, Balls of different sizes Charts showing pictures of cuboids, cubes, cylinders, spheres Two sets of cards with three-dimensional shapes drawn on them Cube and cuboid objects Charts that show objects that have spherical, cylindrical, cube and cuboid shapes around the house and in nature Key word definitions three-dimensional (3-d) shapes: solid shapes which have length, width and height solid shapes: hard shapes with no empty space inside tallest: the highest person or thing longest: an object having the furthest distance from one end to the other width: how wide something is from one side to the other depth: how deep something is height: how far it is from the bottom to the top of a person or object cuboid: a solid shape with six rectangular sides cube: a solid shape with six square sides all the same size cylinder: a solid shape which is long and round, like a tin of beans sphere: a solid, round object, such as a ball distinguish: to tell the difference between two things environment: the area outside our homes and buildings Frequently asked questions Q What prior knowledge do the pupils need? A Pupils will need to be able to count up to 10. They need to know the colours red, blue, green and yellow. They will also need to be able to identify 2-D shapes, namely squares, rectangles, triangles and circles. Pupils will need to understand what is meant by the concepts straight and curved. Q Can cuboids have square faces? A Cuboids are rectangular prisms. Four of the faces will be rectangles and the two end faces can be either two more rectangles or two squares. A shape with all six square faces is a cube. Q Does a sphere have one edge? A No, an edge is where two surfaces join. As a sphere is perfectly round with only one surface it has no edges and no faces. Q Why should pupils spend time playing with threedimensional shapes and building models? A Pupils sort, match, fit, combine and compare these shapes in the same way as they compare sets of objects that lead to number operations. The advantage of using three-dimensional material is that it leads pupils towards considering more than one feature at a time. Not only do they need to take into account length, but also height and breadth; not one face, but several faces must look right. Unit 28: Three-dimensional shapes 127
136 Common errors pupils make Pupils may confuse a curved surface for a face: For example, they may say that a cylinder has three faces, while it has two faces and a curved surface. Remind them that a face must be flat. They may have problems counting faces on a solid object: Pupils sometimes count faces more than once. Let pupils ask a partner to check their answers. Pupils may also have difficulty in counting faces, corners and edges of a three-dimensional shape in a picture, that is, when it is represented in two dimensions: Ensure that pupils have the actual objects at hand to check their answers. Evaluation guide Pupils to: 1. Identify, sort and name different solids (shapes). 2. Distinguish between given cuboids and cubes. 3. Give examples of solid shapes in their homes and environment. 4. Count the faces, corners and edges of given cubes and cuboids. 5. Complete a chart to indicate the number of flat faces, corners, edges and curved surfaces of a cube, a cuboid, a cylinder and a sphere. Lesson 1 Pupil s Book pages 80 and 81 Three-dimensional shapes to bring to the lesson (select from the list above) Charts showing pictures of cuboids, cubes, cylinders, spheres Ludo dice Empty match boxes Packets of sugar Empty Milo tins, milk containers Balls of different sizes Show the three-dimensional objects to the pupils and ask them to describe each of them. Guide them in the discussion. Make a list of important words that they may use such as round, square and so on. At this stage the pupils are not expected to have all the necessary vocabulary however, this activity will allow you to assess the extent of their knowledge and vocabulary. This unit demands that they build a rich vocabulary related to the shapes they will be learning about. Explain to the pupils that the shapes are called three-dimensional shapes or we can say 3-d shapes. Show the pupils that the 3-D shapes have length, width and depth or height. Show the pupils a number of different 3-D shapes and ask them to sort them into groups. Pupils should sort the shapes into cylinders, spheres, cuboids and cubes. They may not sort them correctly at first but discuss the way they sorted the objects with them. Point out differences and similarities and guide them until they have refined their sorting of the shapes. Show the pupils a number of cubes such as. the Ludo dice. Explain to them that these are called cubes. Repeat this with all the other shapes. Once the pupils are able to sort the shapes and once they know the names of the shapes they will be in a position to complete Exercise 1 on pages 80 to 81 in the PB. Guide the pupils to identify and name the different 3-D shapes. 128 Unit 28: Three-dimensional shapes
137 Answers Exercise 1 1. Cuboids: loaf of bread, carton of milk, match box Cube: box Sphere: tomato 2. a) sphere b) cylinder c) cuboid Observe and listen to the pupils during the session. They should be able to identify a variety of 3-D shapes: cylinder, sphere, cube and a cuboid. Homework activity Pupils to complete Exercise 1 on pages 80 to 81 in the PB if they have not done so in class. Lesson 2 Pupil s Book page 82 Three-dimensional shapes to bring to the lesson (select from the list above) Charts showing pictures of cuboids, cubes, cylinders, spheres Ludo dice Empty match boxes Packets of sugar Empty Milo tins, milk containers Balls of different sizes Two sets of cards with three-dimensional shapes drawn on them (8 cards in total) Draw each three-dimensional shape on two different pieces of card (you will have 8 pieces of card, 2 for each type of shape). Mix them up. Get pupils to come up in pairs and have the cards laid out face-up on your desk. Pupils must find each three-dimensional shape and put them together with their matching shape. This activity will assist pupils in identifying the shapes according to their properties. This is an extension of the previous lesson. Once the pupils are able to sort the shapes and once they know the names of the shapes they will be in a position to complete Exercise 2 on page 82 of the PB. Guide the pupils to identify and name the different 3-D shapes. Answers Exercise 2 a. cylinders b. cuboid c. cubes d. spheres Unit 28: Three-dimensional shapes 129
138 Observe and listen to pupils during the lesson. Look at their answers to the exercise in the PB. Pupils should be able to identify and sort a variety of 3-D shapes: cylinder, sphere, cube and a cuboid. Homework activity Ask pupils to collect some cylinders and spheres from home. They can draw their objects in their note books. Lesson 3 Pupil s Book page 83 Cube and cuboid objects Charts that show objects that have spherical, cylindrical, cube and cuboid shapes around the house and in nature Revise the work from the previous lesson by asking pupils to identify a number of 3-D shapes that you show them. Show the pupils a cube and a cuboid. Ask them to tell you what is the same about the shapes. Ask them to tell you what the differences are when they compare the two objects. Ensure that they know that a cube has equal sides and that a cuboid has different lengths for its length, height and width. Mix objects that are of cube and cuboid shapes. Ask pupils to sort the objects and group them according to shape. Show the pupils the charts which you have prepared. Start with the shapes in and around the home. Ask them to identify the shapes, for example, a fridge would be cuboid, a stove could also be cuboid or a primus stove could be cylindrical. Once they are able to identify shapes of 3-D objects around the house you could ask them to point to objects in the class and say what shape they are, for example, a book is cuboid, a ball is a sphere and so on. The pupils can then work through Exercise 3 on page 83 of the PB. Guide and assist them to find the shapes in the illustrations. 130 Unit 28: Three-dimensional shapes
139 Answers Exercise 3 1. the ball and the sun 2. the washing machine, the fridge, the door, the box 3. the tree trunk 4. the crate and the book 5. crates Observe and listen to the pupils during the lesson. Look at their answers to the question in the PB. They should be able to identify a cube and a cuboid. They should be able to identify 3-D shapes in nature and at home. Extension activity Gather a collection of junk materials such as empty packages and ask learners to use them to make their own constructions, either in groups or in pairs. Learners should then describe the shapes they have used and why they have chosen those particular shapes in their constructions. For example, cubes and cuboid shaped boxes make good walls and cylinder tubes make good rollers or wheels. Learners can also make class collections of objects that are in the shape of a cube, sphere, cuboid and cylinder. Label four boxes to collect them in. Learners may want to bring objects from home. Homework activity Ask learners to find cuboids, cubes, spheres and cylinders around their home. They record their findings either in their books or on a sheet of paper. Lesson 4 Pupil's Book page 80; Workbook pages 45 and 46 Workbook Pupils revise the concepts covered in this unit by working through Worksheet 28 on pages 45 and 46 in the WB. Check pupils progress and monitor carefully how they cope with integrating the content covered in this unit. Answers Worksheet Pupil s circle (from top to bottom): cuboid, sphere, cylinder, sphere, cube, cuboid, cylinder, cuboid Cylinder 5. Cone or semi-circle 6. Check that pupils draw the cube and cuboid correctly, and that they are distinct from each other. 7. Pupil s answers will vary. Observe and listen to pupils during the lesson and review their answers to the questions in the worksheet. They should be able to sort, identify and name cubes, cuboids, cylinders and spheres. Pupils should be able to distinguish between cuboids and cubes. They should be able to mention solid shapes in their homes and the environment. Homework activity Pupils to complete Worksheet 28 on pages 45 and 46 in the WB if they have not completed it in class. Unit 28: Three-dimensional shapes 131
140 Unit 29 Two-dimensional shapes Objectives By the end of this unit, pupils should be able to: Identify a square, a rectangle, and a circle Match a square, a rectangle, and a circle with their corresponding names Distinguish between squares and rectangles Mention square, rectangular, and circular shapes in their homes and environment. Suggested resources Shapes, drawings and cut outs of squares, rectangles and circles Chart of 2-D shapes Empty tins of Bournvita, milk, etc. Empty packets of sugar, chalk, etc. Small bag or cloth Ruler, coin, envelop, etc. Key word definitions two-dimensional (2-D) shapes: shapes that are flat flat shapes: a shape that is smooth and has no areas higher than the rest plane shapes: 2-D shapes that are completely flat and level curved: a line or edge that is bent, not straight edges: the part around the side or end of something Frequently asked questions Q What prior knowledge do the pupils need? A Pupils will need to be able to count, order and write the numerals from 1 to 10. Q Is it sufficient to learn only the names of the shapes? A The names in isolation have little meaning. It is important that pupils explore the shapes and become familiar with them. By handling them they will gradually appreciate the properties of particular shapes. They should be encouraged to use the correct mathematical vocabulary as often as possible when describing the shapes. Q Can you find 2-D properties on solid 3-D objects? A Many solid objects have 2-D shaped faces. These are the flat surfaces on a solid shape. For example, a box usually has rectangular faces and sometimes square faces too. A tin can has two circular faces. These were explored in more detail in unit 28 (3-D shapes). You can also find 2-D shapes in the patterns on some solid shapes. Common errors pupils make Pupils often say that a ball shape or sphere is a circle because it is round. Remind pupils that circles are flat shapes, whereas balls aren t. Shapes need to be presented to pupils in a variety of ways and a variety of sizes. Pupils should encounter shapes in a variety of orientations even at this early stage of learning. Evaluation guide Pupils to: Match a given flat face with the name: square, rectangle, and circle. Distinguish between given square and rectangle. Name four square, rectangular, and circular shapes in their homes. 132 Unit 29: Two-dimensional shapes
141 Lesson 1 Pupil s Book page 84 and 85 Chart of 2-D shapes Hold up the chart of 2-D shapes. Go through each shape and ask the pupils to call out what each shape s name is. Ask them to look at their shapes and explain why they are different. Pupils need to be able to distinguish the differences between the circle, square and rectangle. Homework activity Ask pupils to bring simple objects from home that have these 2-D shapes. This lesson focuses on getting the pupils familiar with these three main 2-D shapes. Ask the children to look around in the classroom and see if they can find these shapes in their environment. At this stage, pupils need to be familiar with the physical structure or contour of the shapes. In the next lesson they will learn about the number and types of sides. Point to the shapes on the chart and ask the pupils to name each of the shapes. Ask the pupils to draw a square, a rectangle and a circle. This exercise has been broken up into two parts. Get pupils to complete Question 1 of Exercise 1 on pages 84 and 85 in the PB. Answers Exercise 1 1. a) 4 (two on the cart and the two wheels of the cart) b) 5 (five on the cart) c) 6 (four on the cart and one side of the cart and the top of the cart) d) 3 (four signs on the cart and one on the front of the cart) Unit 29: Two-dimensional shapes 133
142 Lesson 2 Pupil s Book page 85 Shapes, drawings and cut outs of squares, rectangles and circles Chart of 2-D shapes Small bag or cloth Ruler, coin, envelope, etc. Use shapes cut out from card or paper and introduce these to the class one at a time. Start with the square. Hold it up and point to a corner. How many corners does a square have? Now point to one of the sides and explain that squares have straight sides. How many sides does a square have? A square has 4 sides. Repeat with the rectangle. A rectangle also has 4 sides. Now introduce the circle. How many corners does a circle have? A circle does not have any corners. How many straight sides does a circle have? A circle does not have any straight sides. Tell learners that a circle has only one curved side. Put one of the card shapes into a small cloth bag or sack. Ask a learner to feel the shape inside the bag without being able to see it. Describe the shape you are feeling in the bag. Which shape do you think it is? Repeat with the different card shapes and then use real objects such as a ruler, coin, envelope (ensure that objects are very thin to avoid any confusion with 3-D shapes). Although the curriculum does not require you to introduce a triangle you may introduce it if the pupils are able to recognize the shape. two shorter sides and a square has sides that are the same length. Pupils do not have to memorise these facts but the facts may help them recognize the rectangle and the square. Discuss the fact that the circle has only one side and that it has no corners. Pupils to complete the rest of Exercise 1 and Exercise 2 on pages 84 and 85 in the PB. Guide and assist the pupils to answer the questions correctly. Answers Exercise 2 1. Square, dark yellow square, 4 sides 2. Triangle, light yellow triangle, 3 sides 3. Rectangle, red rectangle, 4 sides 4. Circle, blue circle, 1 side Observe and listen to the pupils during the lesson. They should be able to identify, match and name a rectangle, square and circle. Pupils should be able to identify the shape and number of sides each shape has. Homework activity Pupils to complete Exercise 2 on page 85 in the PB if they have not already done so. Ask pupils to draw two circular objects that they can find at home. Put the chart up on the board for the pupils to see. Talk about the square. Ask the pupils how many corners does the square have. Count the corners with the pupils. Ask the pupils how many sides the square has. Count the sides with the pupils. Now ask the pupils to look at the rectangle. Ask the pupils to count the corners and the sides. Discuss with the pupils how a rectangle is different to a square. The discussion should lead to the pupils knowing that a rectangle has to longer sides and 134 Unit 29: Two-dimensional shapes
143 Lesson 3 Pupil's Book page 85 Shapes, drawings and cut outs of squares, rectangles and circles Chart of 2-D shapes Small bag or cloth Ruler, coin, envelope, etc. Extension activity Go on a shape hunt outside. How many of the shapes can be found around the school? Ask pupils to draw the shapes they find. Homework activity Pupils find an object at home that has a rectangle shape. They draw the shape and colour it in. Place the cut-out shapes in your little bag or piece of cloth. As you pull them out, get pupils to call out the shape name, how many sides it has, how many corners it has, and what types of sides they have, i.e. straight or curved? This is an extension of the previous lessons. Pupils consolidate their knowledge on distinguishing between each 2-D shape, by pointing at them and naming them, as well as drawing each shape. Pupils to complete Exercise 3 on page 85 in the Pupil's Book (PB). Answers Exercise 3 1. a) rectangle b) circle c) square d) triangle 2. Pupils draw each of the shapes Observe and listen to the pupils during the lesson. Pupils should be able to identify and draw a rectangle, square and circle. Unit 29: Two-dimensional shapes 135
144 Lesson 4 Pupil's Book page 84 Paper squares and rectangles Hold up a square piece of card and a rectangular piece of card. Ask pupils to identify the difference between them (in terms of shape). Ask Pupils to think of other examples of rectangles and squares in their homes or environments. This lesson focuses on ensuring that pupils can clearly distinguish between the shapes of a square and a rectangle. Ask pupils to look at the paper squares that you have provided. Ask the pupils to compare the sides of the square. Ask them what they notice. They should be encouraged to fold the squares so that they can compare the sides. They should notice that the sides are the same length. Ask them to do the same with the rectangle. They should notice that two opposite sides are the same length and that two sides are longer than the other two sides. Ask the pupils to discuss what is the same when you compare a rectangle and a square: they both have four sides and they both have 4 corners. Ask them to tell you what is different when you compare a square to a rectangle. They should say that a square has all 4 sides the same length and a rectangle has two sides the same length and the other two opposite sides the same length or they may say that the rectangle does not have all four sides the same length. Pupils should be able to distinguish between the shapes of the rectangle and square. Lesson 5 Pupil s Book page 87 Paper squares and rectangles Revise the starter activity from Lesson 2. Ask pupils to draw shapes out the bag. As they draw the shape out of the bag they should name the shape. Assist them to name the properties of each shape, for example, a circle has no side and no straight sides, a square has 4 corners and four straight sides and so on. Ask pupils to look at the picture on page 87 in the PB and to name the two-dimensional shapes they can see in the sitting room in a home. Ask them to tell you about shapes they have at their homes. They may now complete Exercise 4 on page 87 in the Pupil's Book (PB). Assist and guide them to answer correctly. Assist the pupils to complete the puzzle on page 87 in the PB. Answers Exercise 4 a) on the pillows, patterns on the mat b) pillows on the couch and smaller shapes on the table c) clock against the wall and bowl on the table d) table and the shape against the wall Observe and listen to the pupils during the lesson. Pupils should be able to distinguish between a square and a rectangle and identify square and rectangular shapes in their homes. 136 Unit 29: Two-dimensional shapes
145 Support activity If pupils find it difficult to distinguish between a square and a rectangle it is important that the pupils be given opportunity to engage in more practical work with actual shapes. Draw a rectangle and a square on separate pieces of paper. Ask the pupils to cut the two shapes out. The pupils place the square and the rectangle next to each other and they describe what they see. Allow them to trace the shape of the square and the rectangle with their fingers. They should then attempt to describe to you the difference between the two shapes. If they struggle point out to them that the rectangle has two opposite sides the same and the square has all four sides the same. They should then try and draw a square and a rectangle. Homework activity Pupils draw shapes that they see at home. Lesson 6 Pupil's Book page 84; Workbook page 47 Workbook Pupils revise the concepts covered in this unit by working through Worksheet 29 on page 47 in the WB. Check pupils progress and monitor carefully how they cope with integrating the content covered in this unit. Answers Worksheet Check that the pupils colour each shape in the correct colour. 2. a) Circle, 1 b) Triangle, 3 c) Rectangle, 4 d) Square, 4 3. Check that pupils draw each shape carefully and neatly. Observe and listen to the pupils during the lesson. Take in the pupils WBs and informally assess the pupils worksheets and level of understanding. They should be able to: Identify a square, a rectangle and a circle Match and name a square, a rectangle and a circle Distinguish between squares and rectangles Mention square, rectangular and circular shapes in their homes. Unit 29: Two-dimensional shapes 137
146 Unit 30 Collecting data Objectives By the end of this unit, pupils should be able to: Collect data on their ages at home and school Collect data on their heights. Suggested resources Cards with ages written on them Wall rule, etc. Small bag with coloured beads or shapes inside Metre stick or measuring tape Key word definitions data: a collection of facts or information tally: the total amount or number of something tally marks: marks made in groups of five that are made to record counting tally chart: a chart which shows the record of things or people counted Frequently asked questions Q What prior knowledge do the pupils need? A Pupils will need to be able to add totals, count in fives and count on in ones from a given number. They will also need to be able to order numbers to 50 and understand most and least. Common errors pupils make Some pupils may have difficulty counting the tallies. Review counting in 5s and also counting on in 1s from 5. Remind pupils that four tally lines crossed through with another line give a total of 5. Have them look at their fingers. They know they have 5 fingers. The four fingers represent the four lines and fold their thumb across their palm is the fifth line. Evaluation guide Pupils to: Group themselves according to their ages and their heights. Mention their ages and their heights. Lesson 1 Pupil's Book page 88 small bag with coloured beads or shapes inside Count in 5s from as a class. Start again but tell pupils that this time, if you raise your hand pupils are to count on in 1s from where they stopped (for example, 5, 10 [raise hand], 11, 12, 13, 14, 15). Stand at the front of the class with the small bag of coloured beads (shapes could also be used). Ask a pupil to take a bead out of the bag and say which colour it is and then return the bead to the bag. Write the colour on the board and make a tally mark next to it. Ask another pupil to take a bead from the bag and say what colour it is. If it is a different colour then write it underneath the first one and make a tally mark next to it, if it is the same colour as the first make a second tally mark. Repeat, asking each pupil to take a bead from the bag. Either add another colour to the list with a tally mark or add a tally to an existing colour. Explain to the pupils that you are making a tally to record how many times each colour appears. When you get to making a fifth tally on a colour, stop to explain that a fifth line is crossed through the four lines to clearly show it is five and then start another group of lines. Keep going until each member of the class has had a turn at taking out a bead. 138 Unit 30: Collecting data
147 Look at the tally list you have made and choose a colour for the pupils to find the total. Explain that to find a total we can count the tallies in 5s and then count any extra by counting on in 1s. As a class, find the totals for each colour and write them in figures at the end of each tally line. You can ask the pupils which colour appeared most and which colour appeared least. Observe and listen to the pupils during the lesson. They should be able to understand that for every piece of data that a tally mark can be made to represent that piece of data. Pupils should be able to understand how tally marks are written. Support activity If pupils are not sure how to correlate tally marks with the beads drawn from the bag it would be a good idea to repeat the activity. Ask the pupils to draw the tally marks and assist them to draw the fifth tally mark across the first four tally marks. Extension activity Ask pupils to look at how you wrote the tally marks on the board now ask them to write tallies for these totals: 5, 8, 10, 14, 26. Lesson 2 Pupil s Book pages 88 and 89 Stand pupils in a large circle and count around the circle, as they say their number every fifth pupil must sit down. If the number of pupils is a multiple of five the teacher must join in on the second time round the circle so the sitting pupil is no longer the fifth and will have to stand and the new fifth with have to sit. Revise how to write different numbers using tally marks with the pupils. Read through the information on page 88 on representing numbers 1 10 using tally marks. Ask the pupils if they know what the ages are of the children in the class. Explain to them that they will investigate the question in order to find out what the ages of the children are. Show them the example on page 88 of the Pupil Book (PB) and explain to them that you will assist them to draw up a similar table. Draw the following table on the board: Age Tally Number of children 6 years 7 years 8 years total Now ask all the pupils who are 6 years old to stand one at a time. As each pupil stands make a corresponding tally mark in the middle column of the table which you have drawn on the board. Ask the pupils in the class to assist you to count the tally marks. Ask the pupils if they know what number the tally marks represent. Assist them if they seem a little unsure. Pupils can now complete Exercise 1 on page 89 in the PB. Unit 30: Collecting data 139
148 Answers Exercise 1 1. Pupils write down the ages of themselves and their classmates. 2. Pupils make a tally chart to represent these ages. Observe and listen to the pupils during the lesson. Look at their answers to the exercise in the PB. They should be able to make tally marks. Pupils should be able to count up tally marks that represent the ages of children in their class and give a number for each of the ages. Support activity If pupils struggle to complete the exercise of finding out the ages of the whole class allow them to repeat the same exercise but allow them to work in smaller groups of pupils. The smaller numbers may make the exercise a little easier for them. Guide and assist them to make the tally marks for each age of the pupils and then assist them to count the tally marks. Extension activity Ask pupils to write their own question for a survey. What is your favourite? Ideas could include: food, game, song, animal, etc. They should then ask their classmates to answer their question and they should record the responses using tally marks. They should then count the tally marks for each. They should be encouraged to think of ways in which they could show their data to the class. Lesson 3 Pupil s Book page 89 Workbook Recap counting totals of tallies with a quick survey of What is your favourite shape? Write shapes circle, square, star, triangle, rectangle in a list and quickly go round the class and tally their favourite shape. Ask the class to total each group of tallies. Work together in this lesson to complete Exercise 2 on page 89 of the Pupil's Book. Explain to the pupils that you are going to measure them in order to find out how tall the pupils in the class are. Draw the following table on the board: Height Tally Number of children Up to 120 cm Up to 125 cm Up to 130 cm Up to 135 cm Measure each of the children. As you measure them make a corresponding tally mark in the correct row and column. Once you have measured each of the children they then look at the data. Count the tallies and write the correct number in the last column.. You can ask them to identify which measurement has most of the children and which measurement represents the least children. If you think that the pupils would be able to measure themselves correctly encourage them to do the measuring themselves. Not all the pupils may have the necessary skill yet to do this. They could copy the table into their books. 140 Unit 30: Collecting data
149 Observe and listen to the pupils during the lesson. Pupils should be able to collect data on their heights. Extension activity Use the challenge on page 89 in the PB as an extension activity for those pupils who finish their work quickly. Lesson 4 Pupil's Book page 88; Workbook page 48 Workbook Pupils revise the concepts covered in this unit by working through Worksheet 30 on page 48 in the WB. Check pupils progress and monitor carefully how they cope with integrating the content covered in this unit. Answers Worksheet Pupil s answers will vary. Help them to measure accurately and check their tallies pineapples, 8 apples, 7 oranges a) 21 b) Apple c) Pineapple Observe and listen to the pupils during the lesson. Look at their answers to the questions in the Pupil s Book and WB to assess their level of understanding. Pupils should be able to collect data on their ages and their heights and group themselves according to their ages and heights. They should be able to mention their ages and heights. Unit 30: Collecting data 141
150 Term 3 Project Collecting data Objectives Pupils should be able to: Construct a balancing scale Compare weights using their balancing scale Demonstrate safe use of materials, such as scissors Accurately record data and present it neatly. Guidelines Pupil s Book page 90 For the first section on making a balancing scale, each pupil will need the resources noted in the PB. Work through each step of the instructions as a class and only move to the next step when all pupils are ready to do so. Supervise pupils as they use the scissors and firmly discourage playing with the scissors and any other dangerous behaviour. The second section of the project requires the pupils to stand at a roadside. It is important to find out where they could stand in order to be safe from passing vehicles and also safe in terms of other factors. Does the pupils scale balance work? Are pupils able to use tally marks correctly to record sets of data? Are pupils able to count tally marks correctly? Are pupils able to organize their work in order to record data correctly? Have pen and paper for each pupil. If possible supply the pupils with small clip boards or otherwise pieces of card cut from boxes to which they could pin or stick their paper. This will make the recording easier. Guide the pupils through the information that they should collect. Read through the chart that they need to complete and ensure that pupils know what type of vehicles they should be looking for. Once the pupils understand what is required they need to proceed safely to the place near a road where they can collect the data. It is recommended that you request a few parents to attend this lesson as they could assist you with ensuring that the pupils remain safe. The parents could also assist the pupils with recording the data correctly. 142 Term 3: Project Collecting data
151 Term 3 Objectives This assessment is a summative assessment of work covered in Units 23 to 30. It is designed to assess the pupils mathematical understanding and not their reading ability. It is also important that it is completed by individuals and not with the support of other pupils as this would not uncover any difficulties a pupil may be having with particular concepts. Guidelines Pupil s Book page 94 This assessment is carried out over two lessons to give adequate time for pupils to complete the problems. On completion of the assessment, teachers should look for correct answers and mistakes made by individuals. They should also be checking to see if there is a pattern in terms of any particular question causing a significant number of pupils difficulties. By analysing the results of an assessment, teachers can identify weaknesses in individuals and provide the necessary support, and also strengths of individuals and provide them with more challenging activities. They are also able to identify any weaknesses in their teaching programme and make adjustments as necessary. Lesson 1 Pupil s Book page 94 Collect objects that pupils can compare lengths. Have objects which pupils can compare in terms of heavier or lighter. Revise the concept of long, longer and longest by showing pupils sticks of different lengths. Ask the pupils to put the sticks in order of length: long, longer and longest. Repeat with pieces of string. If you assess that pupils have a good recollection of the concept then revise the concept of heavier and lighter. Show the pupils two objects, for example, an apple and a pineapple. They should say which one is lighter and which one is heavier. In this lesson pupils should complete Questions 1 to 4 on page 94 of the PB. They should be able to complete Question 1 as you would have revised the concept in the starter activity. For question 2 it may be necessary to demonstrate to the pupils how to measure using hand span. Assist the pupils to complete the question. Once they have completed Question 2 ask them to complete Question 3. Read the instructions to them and ask them to say which time of day each of the pictures represent. Pupils should be able to answer Question 4 as you revised the topic in the starter activity. Term 3: 143
152 Answers exercise 1. a) blue pencil b) top piece of string 2. Pupils measure the table using their hand spans 3. c = daytime; a = sunset or evening; b = night time 4. a) pineapple b) shoe Pupils should be able to complete the 4 questions easily as this work has been covered during Term 3. If they struggle with any aspects of the questions you may need to revise some of the concepts. Lesson 2 Pupil s Book page 95 Have three-dimensional shapes to revise the names of each of the shapes Have examples of two-dimensional shapes in order to revise 2-D shapes Ask pupils to identify the 3-D shapes. Call out the name and ask the pupils to point to the correct shape. Place the 2-D shapes in a bag and ask pupils to draw a shape out of the bag. Ask the pupils to name the shape that has been pulled from the bag. The lesson gives the pupils an opportunity to complete the assessment activity. Pupils should complete Questions 5 to 7 on page 95 of the Pupil Book. Assist and guide them appropriately in order to complete the questions. Answers exercise 5. cylinder; sphere, cuboid, cube 6. a) square, circles, rectangle and a triangle b) square, triangle c) triangles, rectangles, 7. Pupils complete the table using tallies and then counting the tallies. 144 Term 3:
153 Resources This section contains resources for you to print out and use with your class. You may print each page as many times as you need. Each page can be printed on and cut out of white paper printer paper. The resources provided are: Two function machines. Write a number in the blocks on the left, then write an operation in the middle block(s). The pupils must then work out the answers and write them in the blocks on the right. Counting grid, figures. Numbers 1 to 100 are given in figures with a space below each number. Pupils must write the number in words below the correct figure. Counting grid, words. Numbers 1 to 100 are given in words with a space below each number. Pupils must write the number in figures below the correct number. Number line chart from 0 to 20. Print and cut out this number line along the dotted lines. Stick the number line on the wall of the classroom, or use it during lessons to demonstrate addition and subtraction. Flash cards, figures 0 to 9. Print and cut out the flash cards for use in class, or as single digit overlay cards. Flash cards, figures 10 to 90. Print and cut out the flash cards for use in class, or as double digit overlay cards. Flash cards, words one to ten. Print and cut out the flash cards for use in class. Writing frame, figures one to ten. Print and give to pupils to complete. Resources 145
154 146 Resources
155 Teacher s Notes Resources 147
156 Resources
157 Teacher s Notes Resources 149
158 One Two Three Four Five Six Seven Eight Nine Ten Eleven Twelve Thirteen Fourteen Fifteen Sixteen Seventeen Eighteen Nineteen Twenty Twenty- one Twenty- two Twenty- three Twenty- four Twenty- five Twenty- six Twenty- seven Twenty- eight Twenty- nine Thirty Thirty- one Thirty- two Thirty- three Thirty- four Thirty- five Thirty- six Thirty- seven Thirty- eight Thirty- nine Forty Forty- one Forty- two Forty- three Forty- four Forty- five Forty- six Forty- seven Forty- eight Forty- nine Fifty Fifty- one Fifty- two Fifty- three Fifty- four Fifty- five Fifty- six Fifty- seven Fifty- eight Fifty- nine Sixty Sixty- one Sixty- two Sixty- three Sixty- four Sixty- five Sixty- six Sixty- seven Sixty- eight Sixty- nine Seventy Seventy- one Seventy- two Seventy- three Seventy- four Seventy- five Seventy- six Seventy- seven Seventy- eight Seventy- nine Eighty Eighty- one Eighty- two Eighty- three Eighty- four Eighty- five Eighty- six Eighty- seven Eighty- eight Eighty- nine Ninety Ninety- one Ninety- two Ninety- three Ninety- four Ninety- five Ninety- six Ninety- seven Ninety- eight Ninety- nine Hundred 150 Resources
159 Teacher s Notes Resources 151
160 Resources
161 Teacher s Notes Resources 153
162 Resources
163 Teacher s Notes Resources 155
164 Resources
165 Teacher s Notes Resources 157
166 Resources
167 Teacher s Notes Resources 159
168 Resources
169 Teacher s Notes Resources 161

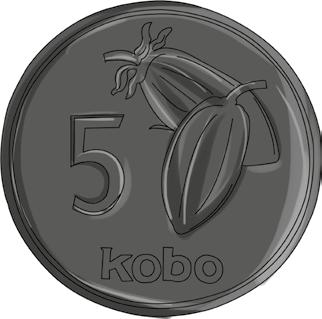

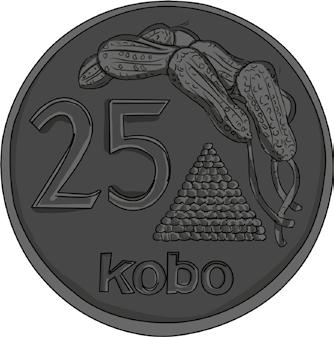

170 162 Resources
Contents. Foreword... 5
 Contents Foreword... 5 Chapter 1: Addition Within 0-10 Introduction... 6 Two Groups and a Total... 10 Learn Symbols + and =... 13 Addition Practice... 15 Which is More?... 17 Missing Items... 19 Sums with
Answer Key For The California Mathematics Standards Grade 1
 Introduction: Summary of Goals GRADE ONE By the end of grade one, students learn to understand and use the concept of ones and tens in the place value number system. Students add and subtract small numbers
First Grade Standards
 These are the standards for what is taught throughout the year in First Grade. It is the expectation that these skills will be reinforced after they have been taught. Mathematical Practice Standards Taught
End-of-Module Assessment Task
 Student Name Date 1 Date 2 Date 3 Topic E: Decompositions of 9 and 10 into Number Pairs Topic E Rubric Score: Time Elapsed: Topic F Topic G Topic H Materials: (S) Personal white board, number bond mat,
Dublin City Schools Mathematics Graded Course of Study GRADE 4
 I. Content Standard: Number, Number Sense and Operations Standard Students demonstrate number sense, including an understanding of number systems and reasonable estimates using paper and pencil, technology-supported
Mathematics Success Grade 7
 T894 Mathematics Success Grade 7 [OBJECTIVE] The student will find probabilities of compound events using organized lists, tables, tree diagrams, and simulations. [PREREQUISITE SKILLS] Simple probability,
Standard 1: Number and Computation
 Standard 1: Number and Computation Standard 1: Number and Computation The student uses numerical and computational concepts and procedures in a variety of situations. Benchmark 1: Number Sense The student
KS1 Transport Objectives
 KS1 Transport Y1: Number and Place Value Count to and across 100, forwards and backwards, beginning with 0 or 1, or from any given number Count, read and write numbers to 100 in numerals; count in multiples
Math Grade 3 Assessment Anchors and Eligible Content
 Math Grade 3 Assessment Anchors and Eligible Content www.pde.state.pa.us 2007 M3.A Numbers and Operations M3.A.1 Demonstrate an understanding of numbers, ways of representing numbers, relationships among
Arizona s College and Career Ready Standards Mathematics
 Arizona s College and Career Ready Mathematics Mathematical Practices Explanations and Examples First Grade ARIZONA DEPARTMENT OF EDUCATION HIGH ACADEMIC STANDARDS FOR STUDENTS State Board Approved June
EDEXCEL FUNCTIONAL SKILLS PILOT. Maths Level 2. Chapter 7. Working with probability
 Working with probability 7 EDEXCEL FUNCTIONAL SKILLS PILOT Maths Level 2 Chapter 7 Working with probability SECTION K 1 Measuring probability 109 2 Experimental probability 111 3 Using tables to find the
MODULE FRAMEWORK AND ASSESSMENT SHEET
 MODULE FRAMEWORK AND ASSESSMENT SHEET LEARNING OUTCOMES (LOS) ASSESSMENT STANDARDS (ASS) FORMATIVE ASSESSMENT ASs Pages and (mark out of ) LOs (ave. out of ) SUMMATIVE ASSESSMENT Tasks or tests Ave for
Using Proportions to Solve Percentage Problems I
 RP7-1 Using Proportions to Solve Percentage Problems I Pages 46 48 Standards: 7.RP.A. Goals: Students will write equivalent statements for proportions by keeping track of the part and the whole, and by
Build on students informal understanding of sharing and proportionality to develop initial fraction concepts.
 Recommendation 1 Build on students informal understanding of sharing and proportionality to develop initial fraction concepts. Students come to kindergarten with a rudimentary understanding of basic fraction
About this unit. Lesson one
 Unit 30 Abuja Carnival About this unit This unit revises language and phonics done throughout the year. The theme of the unit is Abuja carnival. Pupils describe a happy carnival picture and read a story
End-of-Module Assessment Task K 2
 Student Name Topic A: Two-Dimensional Flat Shapes Date 1 Date 2 Date 3 Rubric Score: Time Elapsed: Topic A Topic B Materials: (S) Paper cutouts of typical triangles, squares, Topic C rectangles, hexagons,
Mathematics Success Level E
 T403 [OBJECTIVE] The student will generate two patterns given two rules and identify the relationship between corresponding terms, generate ordered pairs, and graph the ordered pairs on a coordinate plane.
EDEXCEL FUNCTIONAL SKILLS PILOT TEACHER S NOTES. Maths Level 2. Chapter 4. Working with measures
 EDEXCEL FUNCTIONAL SKILLS PILOT TEACHER S NOTES Maths Level 2 Chapter 4 Working with measures SECTION G 1 Time 2 Temperature 3 Length 4 Weight 5 Capacity 6 Conversion between metric units 7 Conversion
Mathematics process categories
 Mathematics process categories All of the UK curricula define multiple categories of mathematical proficiency that require students to be able to use and apply mathematics, beyond simple recall of facts
Numeracy Medium term plan: Summer Term Level 2C/2B Year 2 Level 2A/3C
 Numeracy Medium term plan: Summer Term Level 2C/2B Year 2 Level 2A/3C Using and applying mathematics objectives (Problem solving, Communicating and Reasoning) Select the maths to use in some classroom
Missouri Mathematics Grade-Level Expectations
 A Correlation of to the Grades K - 6 G/M-223 Introduction This document demonstrates the high degree of success students will achieve when using Scott Foresman Addison Wesley Mathematics in meeting the
The following shows how place value and money are related. ones tenths hundredths thousandths
 2-1 The following shows how place value and money are related. ones tenths hundredths thousandths (dollars) (dimes) (pennies) (tenths of a penny) Write each fraction as a decimal and then say it. 1. 349
TEACHING Simple Tools Set II
 TEACHING GUIDE TEACHING Simple Tools Set II Kindergarten Reading Level ISBN-10: 0-8225-6880-2 Green ISBN-13: 978-0-8225-6880-3 2 TEACHING SIMPLE TOOLS SET II Standards Science Mathematics Language Arts
Curriculum Design Project with Virtual Manipulatives. Gwenanne Salkind. George Mason University EDCI 856. Dr. Patricia Moyer-Packenham
 Curriculum Design Project with Virtual Manipulatives Gwenanne Salkind George Mason University EDCI 856 Dr. Patricia Moyer-Packenham Spring 2006 Curriculum Design Project with Virtual Manipulatives Table
Grade 6: Correlated to AGS Basic Math Skills
 Grade 6: Correlated to AGS Basic Math Skills Grade 6: Standard 1 Number Sense Students compare and order positive and negative integers, decimals, fractions, and mixed numbers. They find multiples and
RI.2.4 Determine the meaning of words and phrases in a text relevant to a grade 2 topic or subject area.
 Reading Mini-Lesson Plans Week: March 11-15 Standards: RL.2.10 By the end of the year, read and comprehend literature, including stories and poetry, in the grades 2-3 text complexity band proficiently,
PRIMARY ASSESSMENT GRIDS FOR STAFFORDSHIRE MATHEMATICS GRIDS. Inspiring Futures
 PRIMARY ASSESSMENT GRIDS FOR STAFFORDSHIRE MATHEMATICS GRIDS Inspiring Futures ASSESSMENT WITHOUT LEVELS The Entrust Mathematics Assessment Without Levels documentation has been developed by a group of
Grade 2: Using a Number Line to Order and Compare Numbers Place Value Horizontal Content Strand
 Grade 2: Using a Number Line to Order and Compare Numbers Place Value Horizontal Content Strand Texas Essential Knowledge and Skills (TEKS): (2.1) Number, operation, and quantitative reasoning. The student
What the National Curriculum requires in reading at Y5 and Y6
 What the National Curriculum requires in reading at Y5 and Y6 Word reading apply their growing knowledge of root words, prefixes and suffixes (morphology and etymology), as listed in Appendix 1 of the
RIGHTSTART MATHEMATICS
 Activities for Learning, Inc. RIGHTSTART MATHEMATICS by Joan A. Cotter, Ph.D. LEVEL B LESSONS FOR HOME EDUCATORS FIRST EDITION Copyright 2001 Special thanks to Sharalyn Colvin, who converted RightStart
Ohio s Learning Standards-Clear Learning Targets
 Ohio s Learning Standards-Clear Learning Targets Math Grade 1 Use addition and subtraction within 20 to solve word problems involving situations of 1.OA.1 adding to, taking from, putting together, taking
Starting primary school
 Starting primary school When children start in reception they will all be at different stages of their learning and skill development depending on their pre-school opportunities and their birthdate. The
AGS THE GREAT REVIEW GAME FOR PRE-ALGEBRA (CD) CORRELATED TO CALIFORNIA CONTENT STANDARDS
 CORRELATED TO CALIFORNIA CONTENT STANDARDS") AGS THE GREAT REVIEW GAME FOR PRE-ALGEBRA (CD) CORRELATED TO CALIFORNIA CONTENT STANDARDS 1 CALIFORNIA CONTENT STANDARDS: Chapter 1 ALGEBRA AND WHOLE NUMBERS Algebra and Functions 1.4 Students use algebraic
AGS THE GREAT REVIEW GAME FOR PRE-ALGEBRA (CD) CORRELATED TO CALIFORNIA CONTENT STANDARDS 1 CALIFORNIA CONTENT STANDARDS: Chapter 1 ALGEBRA AND WHOLE NUMBERS Algebra and Functions 1.4 Students use algebraic
Story Problems with. Missing Parts. s e s s i o n 1. 8 A. Story Problems with. More Story Problems with. Missing Parts
 s e s s i o n 1. 8 A Math Focus Points Developing strategies for solving problems with unknown change/start Developing strategies for recording solutions to story problems Using numbers and standard notation
Multiplication of 2 and 3 digit numbers Multiply and SHOW WORK. EXAMPLE. Now try these on your own! Remember to show all work neatly!
 Multiplication of 2 and digit numbers Multiply and SHOW WORK. EXAMPLE 205 12 10 2050 2,60 Now try these on your own! Remember to show all work neatly! 1. 6 2 2. 28 8. 95 7. 82 26 5. 905 15 6. 260 59 7.
Math-U-See Correlation with the Common Core State Standards for Mathematical Content for Third Grade
 Math-U-See Correlation with the Common Core State Standards for Mathematical Content for Third Grade The third grade standards primarily address multiplication and division, which are covered in Math-U-See
Alignment of Australian Curriculum Year Levels to the Scope and Sequence of Math-U-See Program
 Alignment of s to the Scope and Sequence of Math-U-See Program This table provides guidance to educators when aligning levels/resources to the Australian Curriculum (AC). The Math-U-See levels do not address
Unit 2. A whole-school approach to numeracy across the curriculum
 Unit 2 A whole-school approach to numeracy across the curriculum 50 Numeracy across the curriculum Unit 2 Crown copyright 2001 Unit 2 A whole-school approach to numeracy across the curriculum Objectives
Primary National Curriculum Alignment for Wales
 Mathletics and the Welsh Curriculum This alignment document lists all Mathletics curriculum activities associated with each Wales course, and demonstrates how these fit within the National Curriculum Programme
(I couldn t find a Smartie Book) NEW Grade 5/6 Mathematics: (Number, Statistics and Probability) Title Smartie Mathematics
 NEW Grade 5/6 Mathematics: (Number, Statistics and Probability) Title Smartie Mathematics") (I couldn t find a Smartie Book) NEW Grade 5/6 Mathematics: (Number, Statistics and Probability) Title Smartie Mathematics Lesson/ Unit Description Questions: How many Smarties are in a box? Is it the
(I couldn t find a Smartie Book) NEW Grade 5/6 Mathematics: (Number, Statistics and Probability) Title Smartie Mathematics Lesson/ Unit Description Questions: How many Smarties are in a box? Is it the
What's My Value? Using "Manipulatives" and Writing to Explain Place Value. by Amanda Donovan, 2016 CTI Fellow David Cox Road Elementary School
 What's My Value? Using "Manipulatives" and Writing to Explain Place Value by Amanda Donovan, 2016 CTI Fellow David Cox Road Elementary School This curriculum unit is recommended for: Second and Third Grade
Operations and Algebraic Thinking Number and Operations in Base Ten
 Operations and Algebraic Thinking Number and Operations in Base Ten Teaching Tips: First Grade Using Best Instructional Practices with Educational Media to Enhance Learning pbskids.org/lab Boston University
Grades. From Your Friends at The MAILBOX
 From Your Friends at The MAILBOX Grades 5 6 TEC916 High-Interest Math Problems to Reinforce Your Curriculum Supports NCTM standards Strengthens problem-solving and basic math skills Reinforces key problem-solving
PART C: ENERGIZERS & TEAM-BUILDING ACTIVITIES TO SUPPORT YOUTH-ADULT PARTNERSHIPS
 PART C: ENERGIZERS & TEAM-BUILDING ACTIVITIES TO SUPPORT YOUTH-ADULT PARTNERSHIPS The following energizers and team-building activities can help strengthen the core team and help the participants get to
THE HEAD START CHILD OUTCOMES FRAMEWORK
 THE HEAD START CHILD OUTCOMES FRAMEWORK Released in 2000, the Head Start Child Outcomes Framework is intended to guide Head Start programs in their curriculum planning and ongoing assessment of the progress
Hardhatting in a Geo-World
 Hardhatting in a Geo-World TM Developed and Published by AIMS Education Foundation This book contains materials developed by the AIMS Education Foundation. AIMS (Activities Integrating Mathematics and
Characteristics of the Text Genre Informational Text Text Structure
 LESSON 4 TEACHER S GUIDE by Taiyo Kobayashi Fountas-Pinnell Level C Informational Text Selection Summary The narrator presents key locations in his town and why each is important to the community: a store,
Grade 5 + DIGITAL. EL Strategies. DOK 1-4 RTI Tiers 1-3. Flexible Supplemental K-8 ELA & Math Online & Print
 Standards PLUS Flexible Supplemental K-8 ELA & Math Online & Print Grade 5 SAMPLER Mathematics EL Strategies DOK 1-4 RTI Tiers 1-3 15-20 Minute Lessons Assessments Consistent with CA Testing Technology
Characteristics of the Text Genre Realistic fi ction Text Structure
 LESSON 14 TEACHER S GUIDE by Oscar Hagen Fountas-Pinnell Level A Realistic Fiction Selection Summary A boy and his mom visit a pond and see and count a bird, fish, turtles, and frogs. Number of Words:
Loughton School s curriculum evening. 28 th February 2017
 Loughton School s curriculum evening 28 th February 2017 Aims of this session Share our approach to teaching writing, reading, SPaG and maths. Share resources, ideas and strategies to support children's
Stacks Teacher notes. Activity description. Suitability. Time. AMP resources. Equipment. Key mathematical language. Key processes
 Stacks Teacher notes Activity description (Interactive not shown on this sheet.) Pupils start by exploring the patterns generated by moving counters between two stacks according to a fixed rule, doubling
Page 1 of 11. Curriculum Map: Grade 4 Math Course: Math 4 Sub-topic: General. Grade(s): None specified
: None specified") Curriculum Map: Grade 4 Math Course: Math 4 Sub-topic: General Grade(s): None specified Unit: Creating a Community of Mathematical Thinkers Timeline: Week 1 The purpose of the Establishing a Community
Curriculum Map: Grade 4 Math Course: Math 4 Sub-topic: General Grade(s): None specified Unit: Creating a Community of Mathematical Thinkers Timeline: Week 1 The purpose of the Establishing a Community
Paper Reference. Edexcel GCSE Mathematics (Linear) 1380 Paper 1 (Non-Calculator) Foundation Tier. Monday 6 June 2011 Afternoon Time: 1 hour 30 minutes
 1380 Paper 1 (Non-Calculator) Foundation Tier. Monday 6 June 2011 Afternoon Time: 1 hour 30 minutes") Centre No. Candidate No. Paper Reference 1 3 8 0 1 F Paper Reference(s) 1380/1F Edexcel GCSE Mathematics (Linear) 1380 Paper 1 (Non-Calculator) Foundation Tier Monday 6 June 2011 Afternoon Time: 1 hour
Centre No. Candidate No. Paper Reference 1 3 8 0 1 F Paper Reference(s) 1380/1F Edexcel GCSE Mathematics (Linear) 1380 Paper 1 (Non-Calculator) Foundation Tier Monday 6 June 2011 Afternoon Time: 1 hour
TOPICS LEARNING OUTCOMES ACTIVITES ASSESSMENT Numbers and the number system
 Curriculum Overview Mathematics 1 st term 5º grade - 2010 TOPICS LEARNING OUTCOMES ACTIVITES ASSESSMENT Numbers and the number system Multiplies and divides decimals by 10 or 100. Multiplies and divide
Mathematics subject curriculum
 Mathematics subject curriculum Dette er ei omsetjing av den fastsette læreplanteksten. Læreplanen er fastsett på Nynorsk Established as a Regulation by the Ministry of Education and Research on 24 June
1 st Quarter (September, October, November) August/September Strand Topic Standard Notes Reading for Literature
 August/September Strand Topic Standard Notes Reading for Literature") 1 st Grade Curriculum Map Common Core Standards Language Arts 2013 2014 1 st Quarter (September, October, November) August/September Strand Topic Standard Notes Reading for Literature Key Ideas and Details
1 st Grade Curriculum Map Common Core Standards Language Arts 2013 2014 1 st Quarter (September, October, November) August/September Strand Topic Standard Notes Reading for Literature Key Ideas and Details
How to Use Text Features Poster
 How to Use Text Features Poster Congratulations on your purchase of this Really Good Stuff How to Use Text Features Poster, an excellent visual aide for students learning to identify and use informational
2 nd Grade Math Curriculum Map
 .A.,.M.6,.M.8,.N.5,.N.7 Organizing Data in a Table Working with multiples of 5, 0, and 5 Using Patterns in data tables to make predictions and solve problems. Solving problems involving money. Using a
Lancaster Lane CP School. The Importance of Motor Skills
 Lancaster Lane CP School The Importance of Motor Skills What Are Gross Motor Skills? Good gross motor skills are required in order for muscles in the body to perform a range of large, everyday movements
Extending Place Value with Whole Numbers to 1,000,000
 Grade 4 Mathematics, Quarter 1, Unit 1.1 Extending Place Value with Whole Numbers to 1,000,000 Overview Number of Instructional Days: 10 (1 day = 45 minutes) Content to Be Learned Recognize that a digit
LLD MATH. Student Eligibility: Grades 6-8. Credit Value: Date Approved: 8/24/15
 PUBLIC SCHOOLS OF EDISON TOWNSHIP DIVISION OF CURRICULUM AND INSTRUCTION LLD MATH Length of Course: Elective/Required: School: Full Year Required Middle Schools Student Eligibility: Grades 6-8 Credit Value:
The Singapore Copyright Act applies to the use of this document.
 Title Mathematical problem solving in Singapore schools Author(s) Berinderjeet Kaur Source Teaching and Learning, 19(1), 67-78 Published by Institute of Education (Singapore) This document may be used
Genevieve L. Hartman, Ph.D.
 Curriculum Development and the Teaching-Learning Process: The Development of Mathematical Thinking for all children Genevieve L. Hartman, Ph.D. Topics for today Part 1: Background and rationale Current
Paper 2. Mathematics test. Calculator allowed. First name. Last name. School KEY STAGE TIER
 259574_P2 5-7_KS3_Ma.qxd 1/4/04 4:14 PM Page 1 Ma KEY STAGE 3 TIER 5 7 2004 Mathematics test Paper 2 Calculator allowed Please read this page, but do not open your booklet until your teacher tells you
Objective: Model division as the unknown factor in multiplication using arrays and tape diagrams. (8 minutes) (3 minutes)
 (3 minutes)") Lesson 11 3 1 Lesson 11 Objective: Model division as the unknown factor in multiplication using arrays Suggested Lesson Structure Fluency Practice Application Problem Concept Development Student Debrief
Lesson 11 3 1 Lesson 11 Objective: Model division as the unknown factor in multiplication using arrays Suggested Lesson Structure Fluency Practice Application Problem Concept Development Student Debrief
Remainder Rules. 3. Ask students: How many carnations can you order and what size bunches do you make to take five carnations home?
 Math Concepts whole numbers multiplication division subtraction addition Materials TI-10, TI-15 Explorer recording sheets cubes, sticks, etc. pencils Overview Students will use calculators, whole-number
The Ontario Curriculum
 The Ontario Curriculum GRADE 1 checklist format compiled by: The Canadian Homeschooler using the current Ontario Curriculum Content Introduction... Page 3 Mathematics... Page 4 Language Arts... Page 9
Backwards Numbers: A Study of Place Value. Catherine Perez
 Backwards Numbers: A Study of Place Value Catherine Perez Introduction I was reaching for my daily math sheet that my school has elected to use and in big bold letters in a box it said: TO ADD NUMBERS
Reteach Book. Grade 2 PROVIDES. Tier 1 Intervention for Every Lesson
 Book PROVIDES Tier 1 Intervention for Every Lesson Copyright by Houghton Mifflin Harcourt Publishing Company All rights reserved. No part of the material protected by this copyright may be reproduced or
WHAT ARE VIRTUAL MANIPULATIVES?
 by SCOTT PIERSON AA, Community College of the Air Force, 1992 BS, Eastern Connecticut State University, 2010 A VIRTUAL MANIPULATIVES PROJECT SUBMITTED IN PARTIAL FULFILLMENT OF THE REQUIREMENTS FOR TECHNOLOGY
Talk About It. More Ideas. Formative Assessment. Have students try the following problem.
 5.NF. 5.NF.2 Objective Common Core State Standards Add Fractions with Unlike Denominators Students build on their knowledge of fractions as they use models to add fractions with unlike denominators. They
This scope and sequence assumes 160 days for instruction, divided among 15 units.
 In previous grades, students learned strategies for multiplication and division, developed understanding of structure of the place value system, and applied understanding of fractions to addition and subtraction
Unit Lesson Plan: Native Americans 4th grade (SS and ELA)
") Unit Lesson Plan: Native Americans 4th grade (SS and ELA) Angie- comments in red Emily's comments in purple Sue's in orange Kasi Frenton-Comments in green-kas_122@hotmail.com 10/6/09 9:03 PM Unit Lesson
Unit Lesson Plan: Native Americans 4th grade (SS and ELA) Angie- comments in red Emily's comments in purple Sue's in orange Kasi Frenton-Comments in green-kas_122@hotmail.com 10/6/09 9:03 PM Unit Lesson
FEEDBACK & MARKING POLICY. Little Digmoor Primary School
 FEEDBACK & MARKING POLICY Little Digmoor Primary School This policy complements the Teaching and Learning policy at Little Digmoor Primary School. It is a vital component in maximising the full learning
Montana Content Standards for Mathematics Grade 3. Montana Content Standards for Mathematical Practices and Mathematics Content Adopted November 2011
 Montana Content Standards for Mathematics Grade 3 Montana Content Standards for Mathematical Practices and Mathematics Content Adopted November 2011 Contents Standards for Mathematical Practice: Grade
Are You Ready? Simplify Fractions
 SKILL 10 Simplify Fractions Teaching Skill 10 Objective Write a fraction in simplest form. Review the definition of simplest form with students. Ask: Is 3 written in simplest form? Why 7 or why not? (Yes,
THE UNITED REPUBLIC OF TANZANIA MINISTRY OF EDUCATION, SCIENCE, TECHNOLOGY AND VOCATIONAL TRAINING CURRICULUM FOR BASIC EDUCATION STANDARD I AND II
 THE UNITED REPUBLIC OF TANZANIA MINISTRY OF EDUCATION, SCIENCE, TECHNOLOGY AND VOCATIONAL TRAINING CURRICULUM FOR BASIC EDUCATION STANDARD I AND II 2016 Ministry of Education, Science,Technology and Vocational
Sensory evaluation. Teachers guide (primary)
") Sensory evaluation Teachers guide (primary) Welcome What is sensory evaluation? Sensory evaluation is a scientific discipline that analyses and measures human responses to the composition of food and drink,
Sensory evaluation Teachers guide (primary) Welcome What is sensory evaluation? Sensory evaluation is a scientific discipline that analyses and measures human responses to the composition of food and drink,
Focus of the Unit: Much of this unit focuses on extending previous skills of multiplication and division to multi-digit whole numbers.
 Approximate Time Frame: 3-4 weeks Connections to Previous Learning: In fourth grade, students fluently multiply (4-digit by 1-digit, 2-digit by 2-digit) and divide (4-digit by 1-digit) using strategies
Characteristics of Functions
 Characteristics of Functions Unit: 01 Lesson: 01 Suggested Duration: 10 days Lesson Synopsis Students will collect and organize data using various representations. They will identify the characteristics
Chapter 4 - Fractions
 . Fractions Chapter - Fractions 0 Michelle Manes, University of Hawaii Department of Mathematics These materials are intended for use with the University of Hawaii Department of Mathematics Math course
Sleeping Coconuts Cluster Projects
 Sleeping Coconuts Cluster Projects Grades K 1 Description: A story, an indoor relay race for pre-readers and new readers to demonstrate the benefits of doing Bible translation in cluster projects, and
Learning to Think Mathematically With the Rekenrek
 Learning to Think Mathematically With the Rekenrek A Resource for Teachers A Tool for Young Children Adapted from the work of Jeff Frykholm Overview Rekenrek, a simple, but powerful, manipulative to help
DMA CLUSTER CALCULATIONS POLICY
 DMA CLUSTER CALCULATIONS POLICY Watlington C P School Shouldham Windows User HEWLETT-PACKARD [Company address] Riverside Federation CONTENTS Titles Page Schools involved 2 Rationale 3 Aims and principles
If we want to measure the amount of cereal inside the box, what tool would we use: string, square tiles, or cubes?
 String, Tiles and Cubes: A Hands-On Approach to Understanding Perimeter, Area, and Volume Teaching Notes Teacher-led discussion: 1. Pre-Assessment: Show students the equipment that you have to measure
Table of Contents. Development of K-12 Louisiana Connectors in Mathematics and ELA
 Table of Contents Introduction Rationale and Purpose Development of K-12 Louisiana Connectors in Mathematics and ELA Implementation Reading the Louisiana Connectors Louisiana Connectors for Mathematics
ASSESSMENT TASK OVERVIEW & PURPOSE:
 Performance Based Learning and Assessment Task A Place at the Table I. ASSESSMENT TASK OVERVIEW & PURPOSE: Students will create a blueprint for a decorative, non rectangular picnic table (top only), and
Curriculum Scope and Sequence
 Curriculum Scope and Sequence First Baptist Academy Mathematics: Number and Counting Concepts Understand that numbers are used to denote quantity: two birds Count to 10 by rote Count to 10 in Spanish Begin
South Carolina College- and Career-Ready Standards for Mathematics. Standards Unpacking Documents Grade 5
 South Carolina College- and Career-Ready Standards for Mathematics Standards Unpacking Documents Grade 5 South Carolina College- and Career-Ready Standards for Mathematics Standards Unpacking Documents
Supporting children with gaps in their mathematical understanding
 Primary National Strategy Supporting children with gaps in their mathematical understanding Wave 3 mathematics Using the pack Acknowledgements Many people have contributed to this pack. We want to acknowledge
Learning Lesson Study Course
 Learning Lesson Study Course Developed originally in Japan and adapted by Developmental Studies Center for use in schools across the United States, lesson study is a model of professional development in
SESSION 2: HELPING HAND
 SESSION 2: HELPING HAND Ready for the next challenge? Build a device with a long handle that can grab something hanging high! This week you ll also check out your Partner Club s Paper Structure designs.
The Indices Investigations Teacher s Notes
 The Indices Investigations Teacher s Notes These activities are for students to use independently of the teacher to practise and develop number and algebra properties.. Number Framework domain and stage:
The Curriculum in Primary Schools
 The Curriculum in Primary Schools Seminar on findings from Curriculum Implementation Evaluation, DES Inspectorate Primary Curriculum Review, Phase 1, NCCA May 11 th 2005 Planning the curriculum whole school
Helping at Home ~ Supporting your child s learning!
 Helping at Home ~ Supporting your child s learning! Halcombe School 2014 HELPING AT HOME At Halcombe School, we think teaching your child at school is like coaching your child in a sports team. When your
UNIT IX. Don t Tell. Are there some things that grown-ups don t let you do? Read about what this child feels.
 UNIT IX Are there some things that grown-ups don t let you do? Read about what this child feels. There are lots of things They won t let me do- I'm not big enough yet, They say. So I patiently wait Till
Interactive Whiteboard
 50 Graphic Organizers for the Interactive Whiteboard Whiteboard-ready graphic organizers for reading, writing, math, and more to make learning engaging and interactive by Jennifer Jacobson & Dottie Raymer
Heart to Start Red Kit
 U Hea S Depa lth & rtm Hum ent of an S ervi ces Inno Prev vation enti on A in war d Educator Lesson Plans Heart to Start Red Kit fiber-ific FASHIONS! orange yellow fiber-ific Fruits and Veggies strawberry
P a g e 1. Grade 5. Grant funded by:
 P a g e 1 Grade 5 Grant funded by: P a g e 2 Focus Standard: 5.NF.1, 5.NF.2 Lesson 6: Adding and Subtracting Unlike Fractions Standards for Mathematical Practice: SMP.1, SMP.2, SMP.6, SMP.7, SMP.8 Estimated
Conteúdos de inglês para o primeiro bimestre. Turma 21. Turma 31. Turma 41
 Conteúdos de inglês para o primeiro bimestre Turma 21 Greetings Vocabulário: hello, hi, good morning, good afternoon, good night, good evening, goodbye, bye Estrutura: Hello! What is your name? My name